<?xml version="1.0" encoding="utf-8"?>
<feed xmlns="http://www.w3.org/2005/Atom">
  <title>Amaurot Ch.</title>
  
  
  <link href="https://redbowtie.github.io/atom.xml" rel="self"/>
  
  <link href="https://redbowtie.github.io/"/>
  <updated>2024-03-01T05:12:03.344Z</updated>
  <id>https://redbowtie.github.io/</id>
  
  <author>
    <name>Estus</name>
    
  </author>
  
  <generator uri="https://hexo.io/">Hexo</generator>
  
  <entry>
    <title>Create Tailscale Relay</title>
    <link href="https://redbowtie.github.io/2024/02/03/TailDerp/"/>
    <id>https://redbowtie.github.io/2024/02/03/TailDerp/</id>
    <published>2024-02-03T15:10:00.000Z</published>
    <updated>2024-03-01T05:12:03.344Z</updated>
    
    <content type="html"><![CDATA[<!--excerpt--></p><p>So it’s almost time for vacation, but I had little mood for that. I don’t want carry all my laptops, it’s inconvenient. So i finally decided to use a server with public IP to act as a relay.</p><p>The article mainly followed this <a href="https://blog.csdn.net/qq_29064203/article/details/135379460">dude</a> and <a href="https://tailscale.com/kb/1232/derp-servers?q=derp">official doc</a></p><blockquote><p>[upd] Mar. 1: I again deployed Derp on another server, so I revised this a bit</p></blockquote><h2 id="I-Environments"><a href="#I-Environments" class="headerlink" title="I. Environments"></a>I. Environments</h2><ul><li>A server with public IP, i used Ubuntu 22 LTS</li><li>Other PCs with Tailscale installed.</li><li>A ssh app that you’d like to use, I used Terminus.</li></ul><hr><h2 id="II-Preparation"><a href="#II-Preparation" class="headerlink" title="II. Preparation"></a>II. Preparation</h2><p>Log in the server, and run software updates. （Concerning the methods of logging in, it’s better to disable password login)</p><figure class="highlight shell"><table><tr><td class="gutter"><pre><span class="line">1</span><br></pre></td><td class="code"><pre><span class="line">sudo apt update &amp;&amp; sudo apt upgrade</span><br></pre></td></tr></table></figure><p>Install Go dependencies<br><figure class="highlight shell"><table><tr><td class="gutter"><pre><span class="line">1</span><br><span class="line">2</span><br><span class="line">3</span><br><span class="line">4</span><br></pre></td><td class="code"><pre><span class="line">sudo apt install -y wget git openssl curl</span><br><span class="line">wget https://go.dev/dl/go1.21.6.linux-amd64.tar.gz  #consider using the latest version?</span><br><span class="line">sudo tar -C /usr/local -xzf go1.21.5.linux-amd64.tar.gz</span><br><span class="line">export PATH=$PATH:/usr/local/go/bin</span><br></pre></td></tr></table></figure></p><p>Check installation with<br><figure class="highlight shell"><table><tr><td class="gutter"><pre><span class="line">1</span><br></pre></td><td class="code"><pre><span class="line">go version</span><br></pre></td></tr></table></figure></p><p>Add path into environment variable, here I encountered some permission issue, and found out that <code>sudo</code> <strong>will not help with redirection</strong> <code&gt;&gt;></code>, so I just used <code>root</code>, remember to <code>logout</code><br><figure class="highlight shell"><table><tr><td class="gutter"><pre><span class="line">1</span><br><span class="line">2</span><br><span class="line">3</span><br><span class="line">4</span><br></pre></td><td class="code"><pre><span class="line">sudo -i</span><br><span class="line">echo &quot;export PATH=$PATH:/usr/local/go/bin&quot; &gt;&gt; /etc/profile</span><br><span class="line">source /etc/profile</span><br><span class="line">logout</span><br></pre></td></tr></table></figure></p><p>Configure domestic proxy for acceleration<br><figure class="highlight shell"><table><tr><td class="gutter"><pre><span class="line">1</span><br><span class="line">2</span><br></pre></td><td class="code"><pre><span class="line">go env -w GO111MODULE=on</span><br><span class="line">go env -w GOPROXY=https://goproxy.cn,direct</span><br></pre></td></tr></table></figure></p><hr><h2 id="III-Install-and-configure-Derp"><a href="#III-Install-and-configure-Derp" class="headerlink" title="III. Install and configure Derp"></a>III. Install and configure Derp</h2><figure class="highlight shell"><table><tr><td class="gutter"><pre><span class="line">1</span><br></pre></td><td class="code"><pre><span class="line">go install tailscale.com/cmd/derper@main</span><br></pre></td></tr></table></figure><p>Modify certification, goto <code>~/go/pkg/mod/tailscale@xxx/cmd/derper</code>, comment out some lines (at nearly the last section of the file)</p><figure class="highlight shell"><table><tr><td class="gutter"><pre><span class="line">1</span><br></pre></td><td class="code"><pre><span class="line">nano cert.go</span><br></pre></td></tr></table></figure><p><img src="tailderp_1.png" alt=""></p><p>Build derper.<br><figure class="highlight shell"><table><tr><td class="gutter"><pre><span class="line">1</span><br></pre></td><td class="code"><pre><span class="line">sudo go build -o /etc/derp/derper</span><br></pre></td></tr></table></figure><br>Here I also ran into some permission issues, and using <code>sudo</code> suggest there is no <code>go</code> command. It <a href="https://stackoverflow.com/questions/71899341/go-command-not-found-error-when-using-sudo">turns out</a> that root has its own <code>secure_path</code>, add <code>:/usr/local/go/bin</code> should do the job. It could be slow, be patient. Add <code>-x</code> if debug info is needed.</p><p>Sign keys.<br><figure class="highlight shell"><table><tr><td class="gutter"><pre><span class="line">1</span><br></pre></td><td class="code"><pre><span class="line">sudo openssl req -x509 -newkey rsa:4096 -sha256 -days 3650 -nodes -keyout /etc/derp/derp.myself.com.key -out /etc/derp/derp.myself.com.crt -subj &quot;/CN=derp.myself.com&quot; -addext &quot;subjectAltName=DNS:derp.myself.com&quot;</span><br></pre></td></tr></table></figure></p><p>Configure ports<br><figure class="highlight shell"><table><tr><td class="gutter"><pre><span class="line">1</span><br><span class="line">2</span><br><span class="line">3</span><br><span class="line">4</span><br><span class="line">5</span><br><span class="line">6</span><br><span class="line">7</span><br><span class="line">8</span><br><span class="line">9</span><br><span class="line">10</span><br><span class="line">11</span><br><span class="line">12</span><br><span class="line">13</span><br><span class="line">14</span><br></pre></td><td class="code"><pre><span class="line">sudo cat &gt; /etc/systemd/system/derp.service &lt;&lt;EOF</span><br><span class="line">[Unit]</span><br><span class="line">Description=TS Derper</span><br><span class="line">After=network.target</span><br><span class="line">Wants=network.target</span><br><span class="line">[Service]</span><br><span class="line">User=root</span><br><span class="line">Restart=always</span><br><span class="line">ExecStart=/etc/derp/derper -hostname derp.myself.com -a :33445 -http-port 33446 -certmode manual -certdir /etc/derp</span><br><span class="line">RestartPreventExitStatus=1</span><br><span class="line">[Install]</span><br><span class="line">WantedBy=multi-user.target</span><br><span class="line">EOF</span><br><span class="line"><span class="meta prompt_"># </span><span class="language-bash">Consider change the port number</span></span><br></pre></td></tr></table></figure></p><p>And in server settings open ports for TCP and 3478 for <strong>UDP</strong> for access, restart daemon</p><figure class="highlight shell"><table><tr><td class="gutter"><pre><span class="line">1</span><br><span class="line">2</span><br><span class="line">3</span><br><span class="line">4</span><br></pre></td><td class="code"><pre><span class="line">sudo systemctl daemon-reload</span><br><span class="line">sudo systemctl enable derp</span><br><span class="line">sudo systemctl restart derp</span><br><span class="line">sudo reboot</span><br></pre></td></tr></table></figure><p>If the service is not started, consider manually enable it.</p><hr><h2 id="Tailscale-web-Configuration"><a href="#Tailscale-web-Configuration" class="headerlink" title="Tailscale web Configuration"></a>Tailscale web Configuration</h2><p>Into <code>Access Control</code> section,<br><figure class="highlight shell"><table><tr><td class="gutter"><pre><span class="line">1</span><br><span class="line">2</span><br><span class="line">3</span><br><span class="line">4</span><br><span class="line">5</span><br><span class="line">6</span><br><span class="line">7</span><br><span class="line">8</span><br><span class="line">9</span><br><span class="line">10</span><br><span class="line">11</span><br><span class="line">12</span><br><span class="line">13</span><br><span class="line">14</span><br><span class="line">15</span><br><span class="line">16</span><br><span class="line">17</span><br><span class="line">18</span><br><span class="line">19</span><br></pre></td><td class="code"><pre><span class="line">&quot;derpMap&quot;: &#123;</span><br><span class="line">&quot;OmitDefaultRegions&quot;: true,</span><br><span class="line">&quot;Regions&quot;: &#123;</span><br><span class="line">&quot;901&quot;: &#123;</span><br><span class="line">&quot;RegionID&quot;:   901,</span><br><span class="line">&quot;RegionCode&quot;: &quot;code&quot;,</span><br><span class="line">&quot;RegionName&quot;: &quot;name&quot;,</span><br><span class="line">&quot;Nodes&quot;: [</span><br><span class="line">&#123;</span><br><span class="line">&quot;Name&quot;:            &quot;node name&quot;,</span><br><span class="line">&quot;RegionID&quot;:         901,</span><br><span class="line">&quot;DERPPort&quot;:         33445,</span><br><span class="line">&quot;IPv4&quot;:            &quot;Server IP&quot;,</span><br><span class="line">&quot;InsecureForTests&quot;: true,</span><br><span class="line">&#125;,</span><br><span class="line">],</span><br><span class="line">&#125;,</span><br><span class="line">&#125;,</span><br><span class="line">&#125;,</span><br></pre></td></tr></table></figure></p><p>Save, on pc with tailscale installed, run <code>tailscale netcheck</code><br><img src="tailderp2.png" alt=""><br>New derp server should be detected.</p><p>Till then everything should work fine.</p><hr><h2 id="IV-Security-measures"><a href="#IV-Security-measures" class="headerlink" title="IV. Security measures"></a>IV. Security measures</h2><p>Once IP and ports are leaked, it is highly dangerous, install tailscale to enable device verification.</p><figure class="highlight shell"><table><tr><td class="gutter"><pre><span class="line">1</span><br></pre></td><td class="code"><pre><span class="line">curl -fsSL https://tailscale.com/install.sh | sh</span><br></pre></td></tr></table></figure><p>Run as instructed, and login use provided address, approve.</p><p>Then, modify derp settings:<br><figure class="highlight shell"><table><tr><td class="gutter"><pre><span class="line">1</span><br></pre></td><td class="code"><pre><span class="line">sudo nano /etc/systemd/system/derp.service</span><br></pre></td></tr></table></figure><br>after <code>-certdir /etc/derp</code> add <code> —verify-clients</code></p><p>Then reload service with restart.<br><figure class="highlight shell"><table><tr><td class="gutter"><pre><span class="line">1</span><br><span class="line">2</span><br><span class="line">3</span><br></pre></td><td class="code"><pre><span class="line">sudo systemctl daemon-reload</span><br><span class="line">sudo systemctl restart derp</span><br><span class="line">sudo reboot</span><br></pre></td></tr></table></figure></p><hr><p>Finally, it’s done, and easier than I thought, however when I use ping for remote connection, the latency seems to be around 100ms, which may be caused by the weak signal strength of my hotspot when inside a room.</p><p>Another thing is that I can clearly see that when connection initiates, about 15Mbps data get in the server, but at the same time, only 0.5Mbps went out of the server. Meanwhile, the CPU and RAM usage looks fine, not sure what’s going on here. Maybe find some time to figure this out in the future.</p>]]></content>
    
    
    <summary type="html">&lt;p&gt;Learned something new.</summary>


    <category term="Tweak" scheme="https://redbowtie.github.io/categories/Tweak/"/>
    
    
    <category term="Networks" scheme="https://redbowtie.github.io/tags/Networks/"/>
    
    <category term="Linux" scheme="https://redbowtie.github.io/tags/Linux/"/>
    
  </entry>
  
  <entry>
    <title>Implementations of Tracking Problems</title>
    <link href="https://redbowtie.github.io/2024/01/31/Tracking/"/>
    <id>https://redbowtie.github.io/2024/01/31/Tracking/</id>
    <published>2024-01-31T14:53:00.000Z</published>
    <updated>2024-02-02T01:43:14.246Z</updated>
    
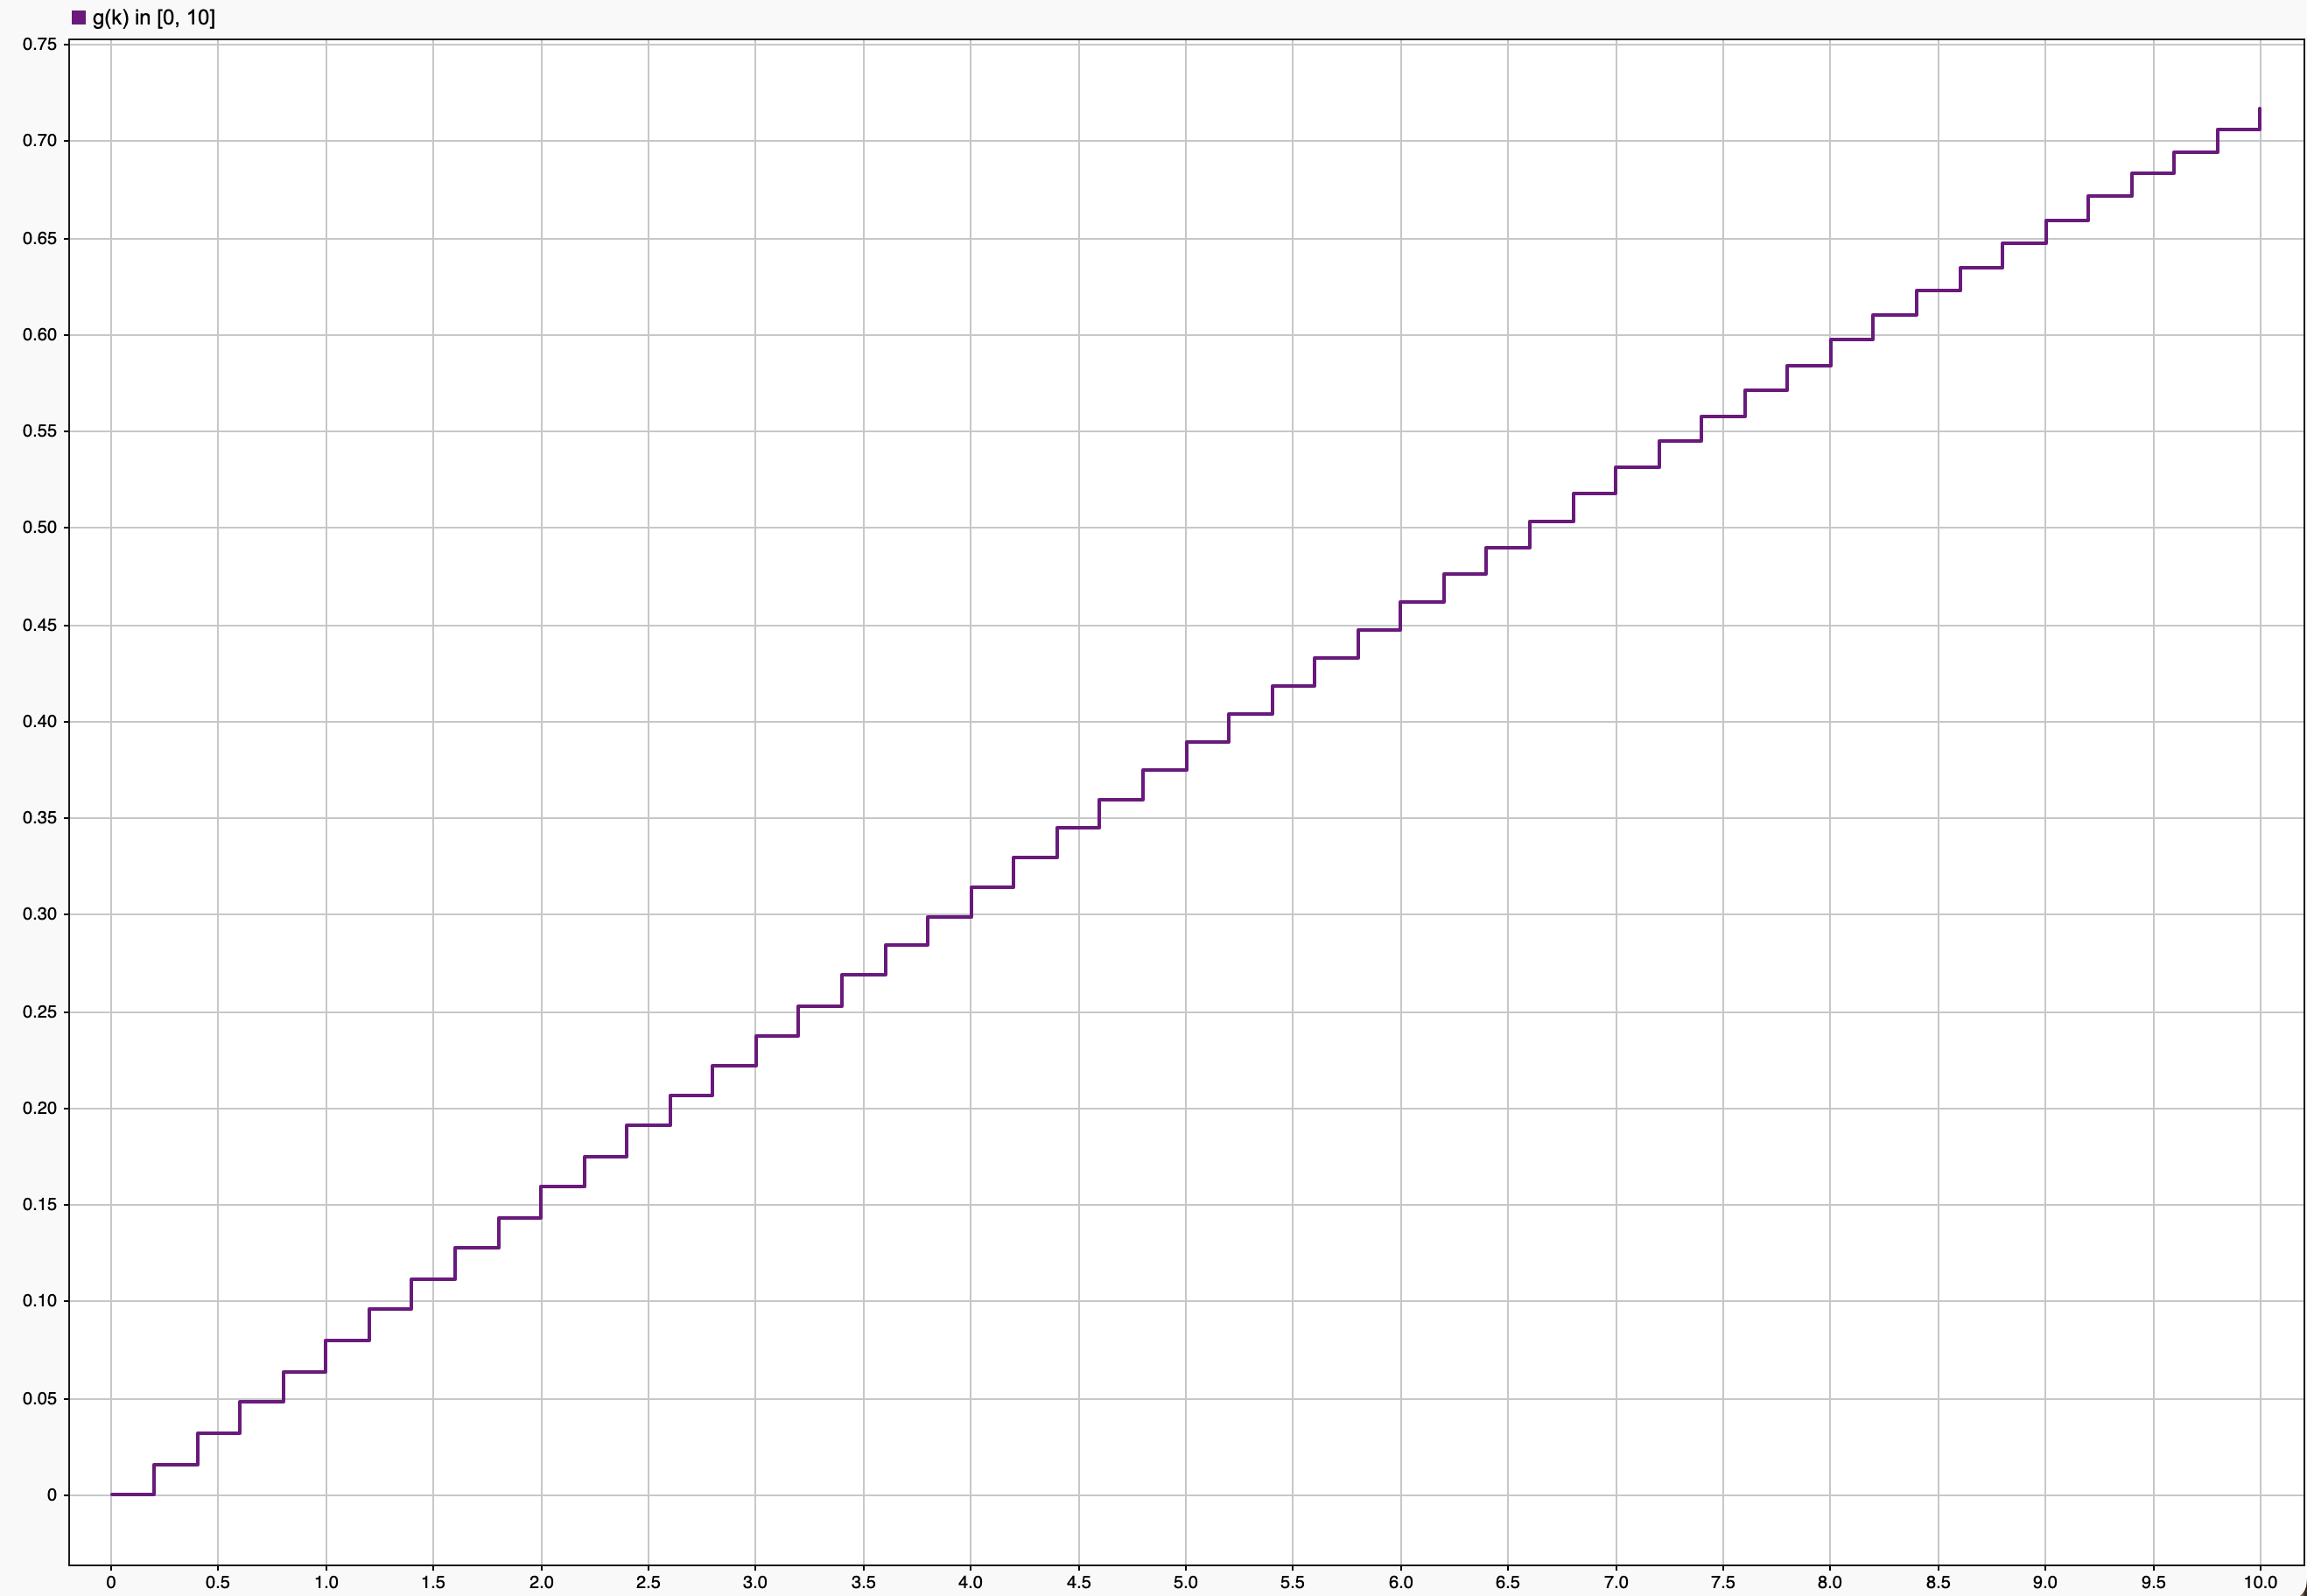
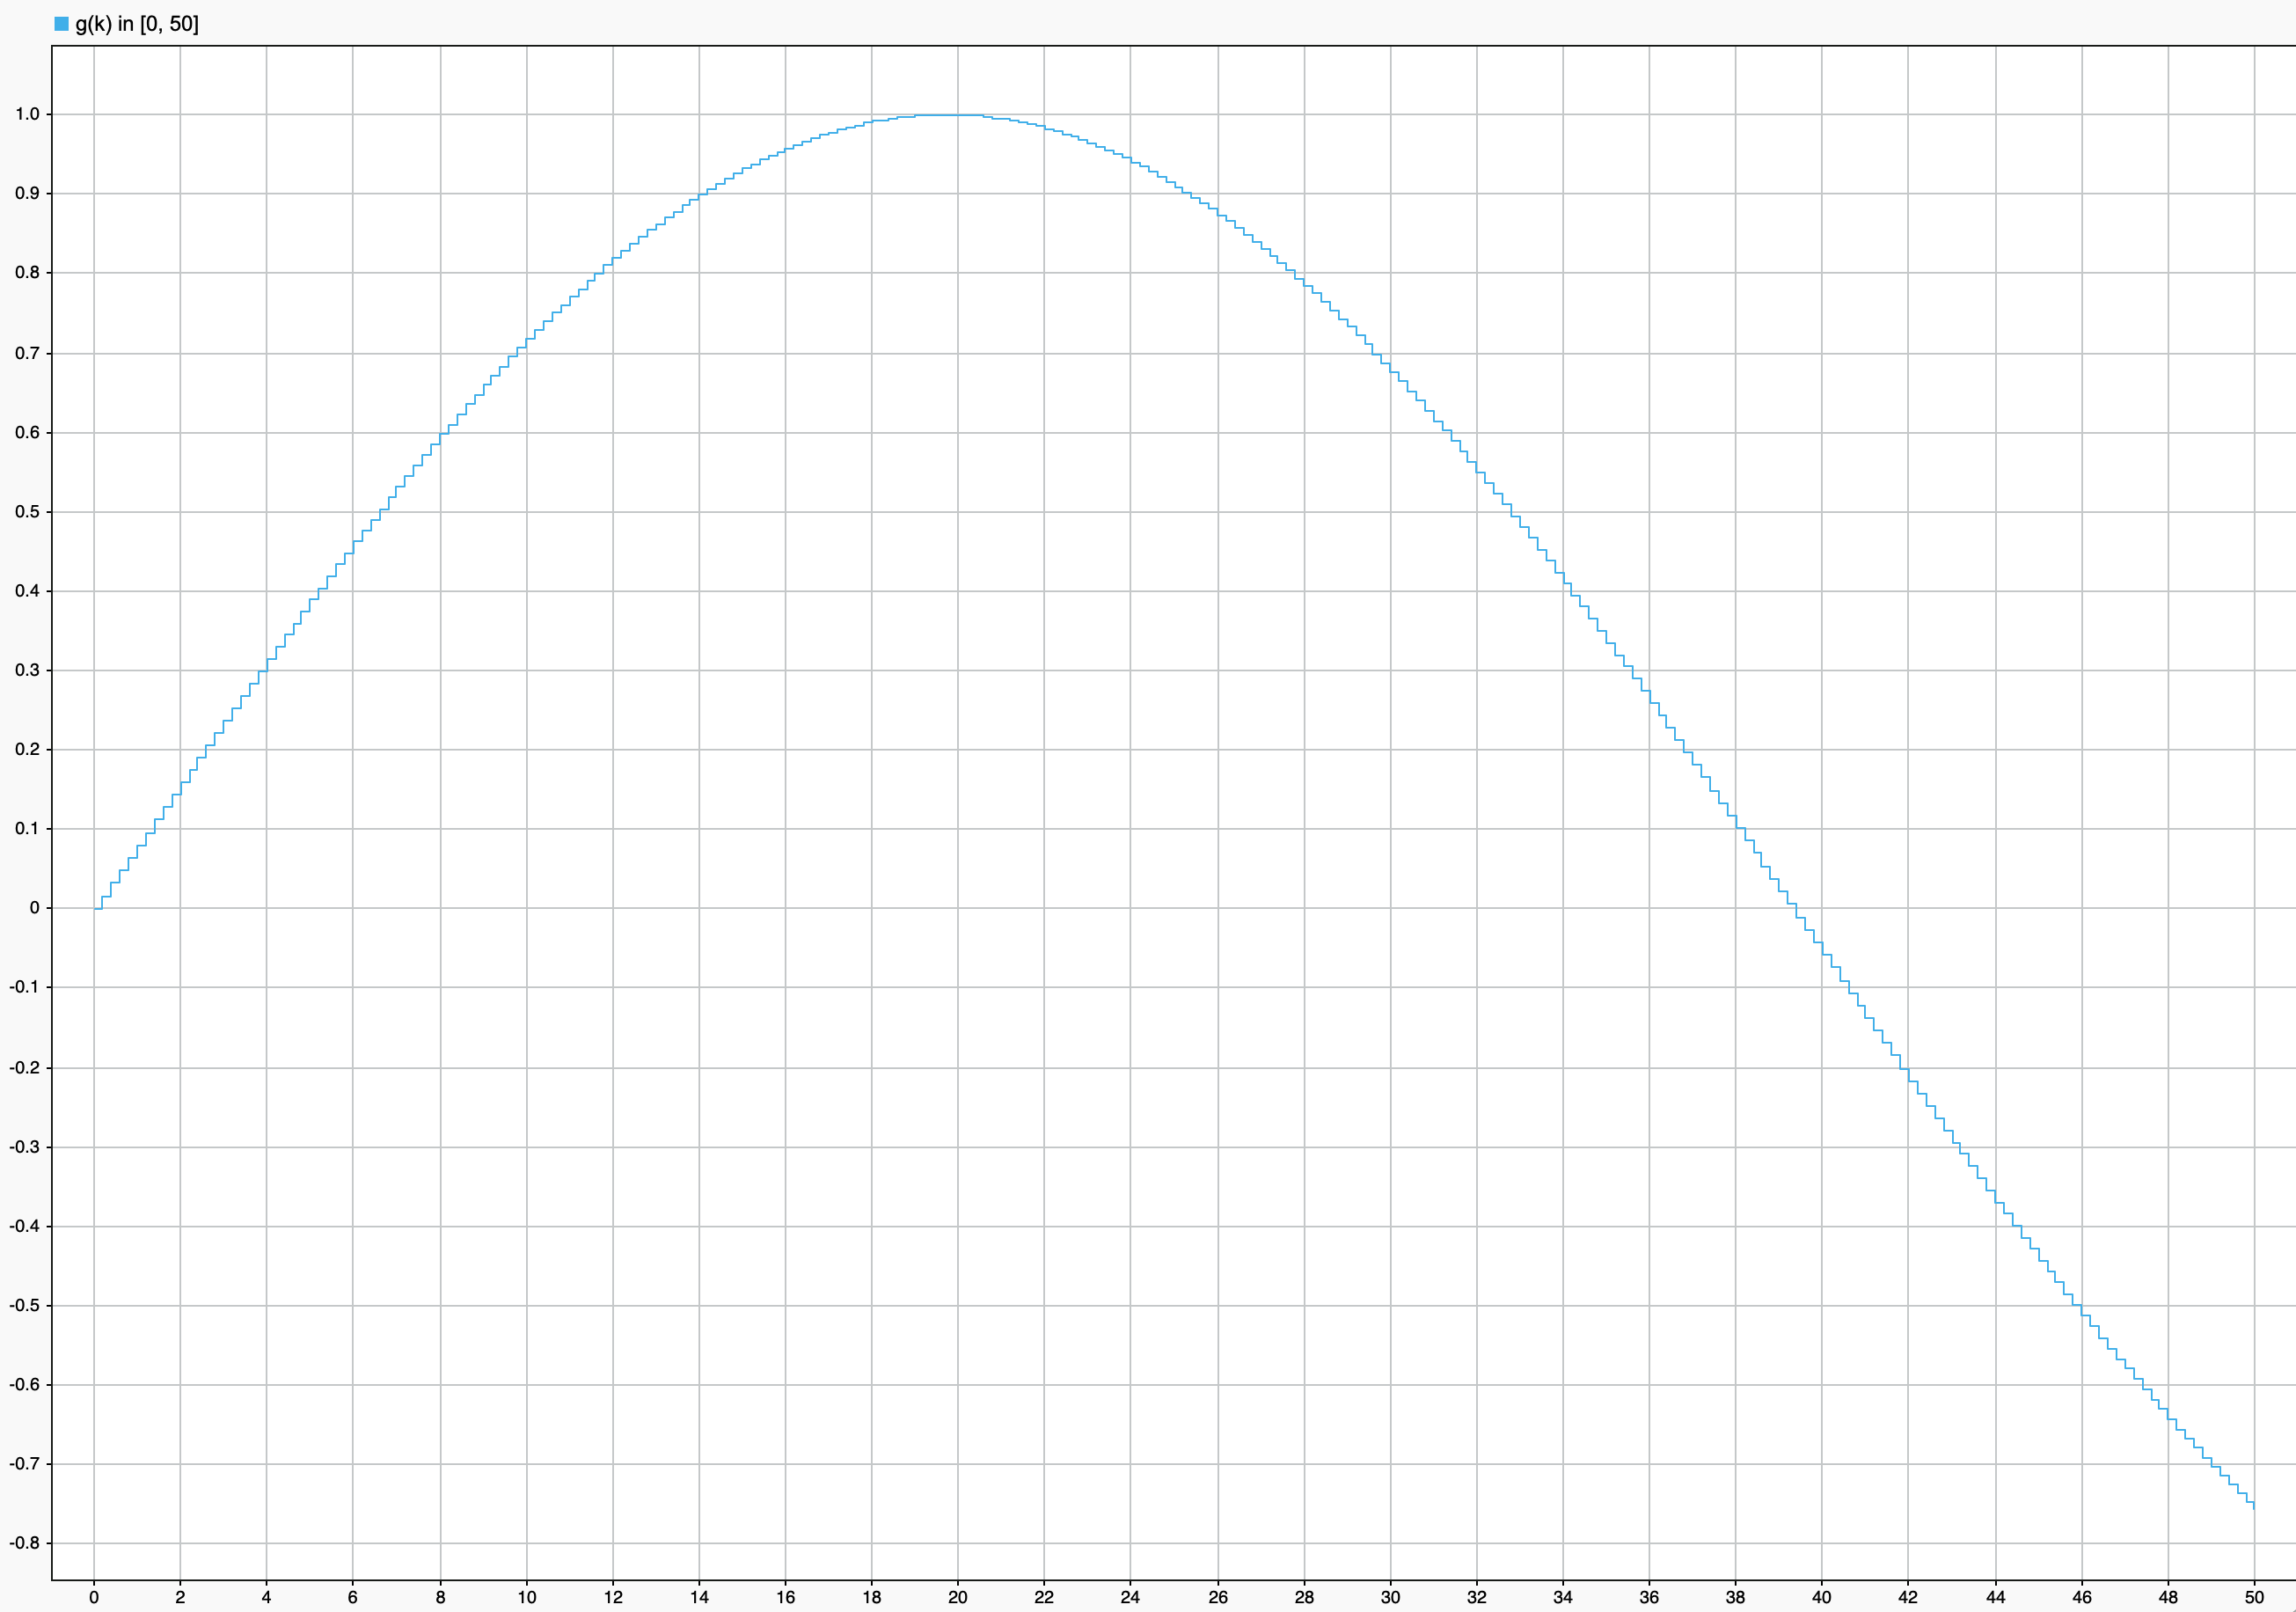
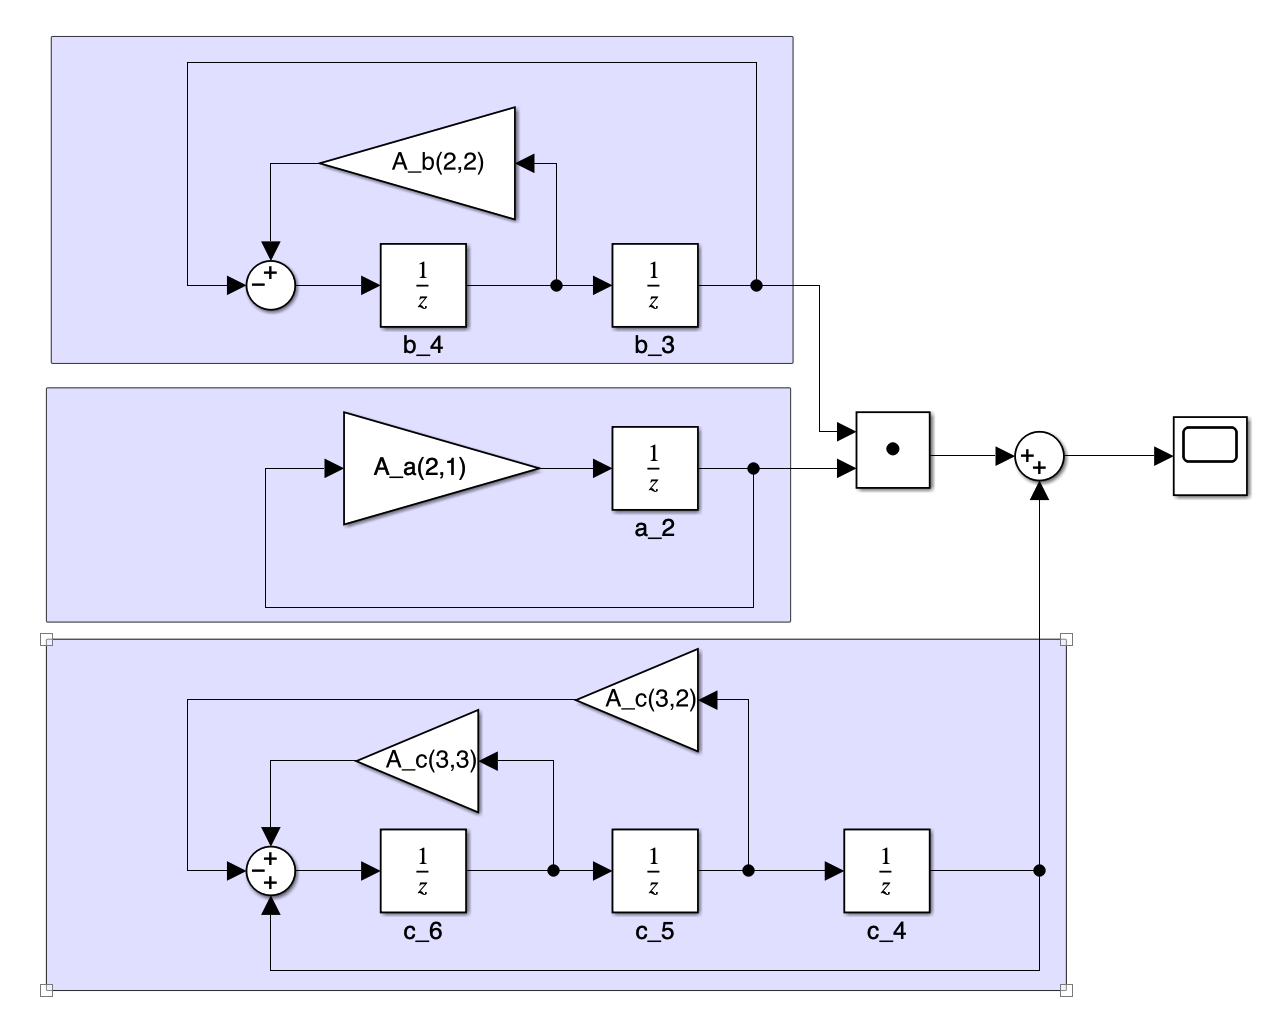
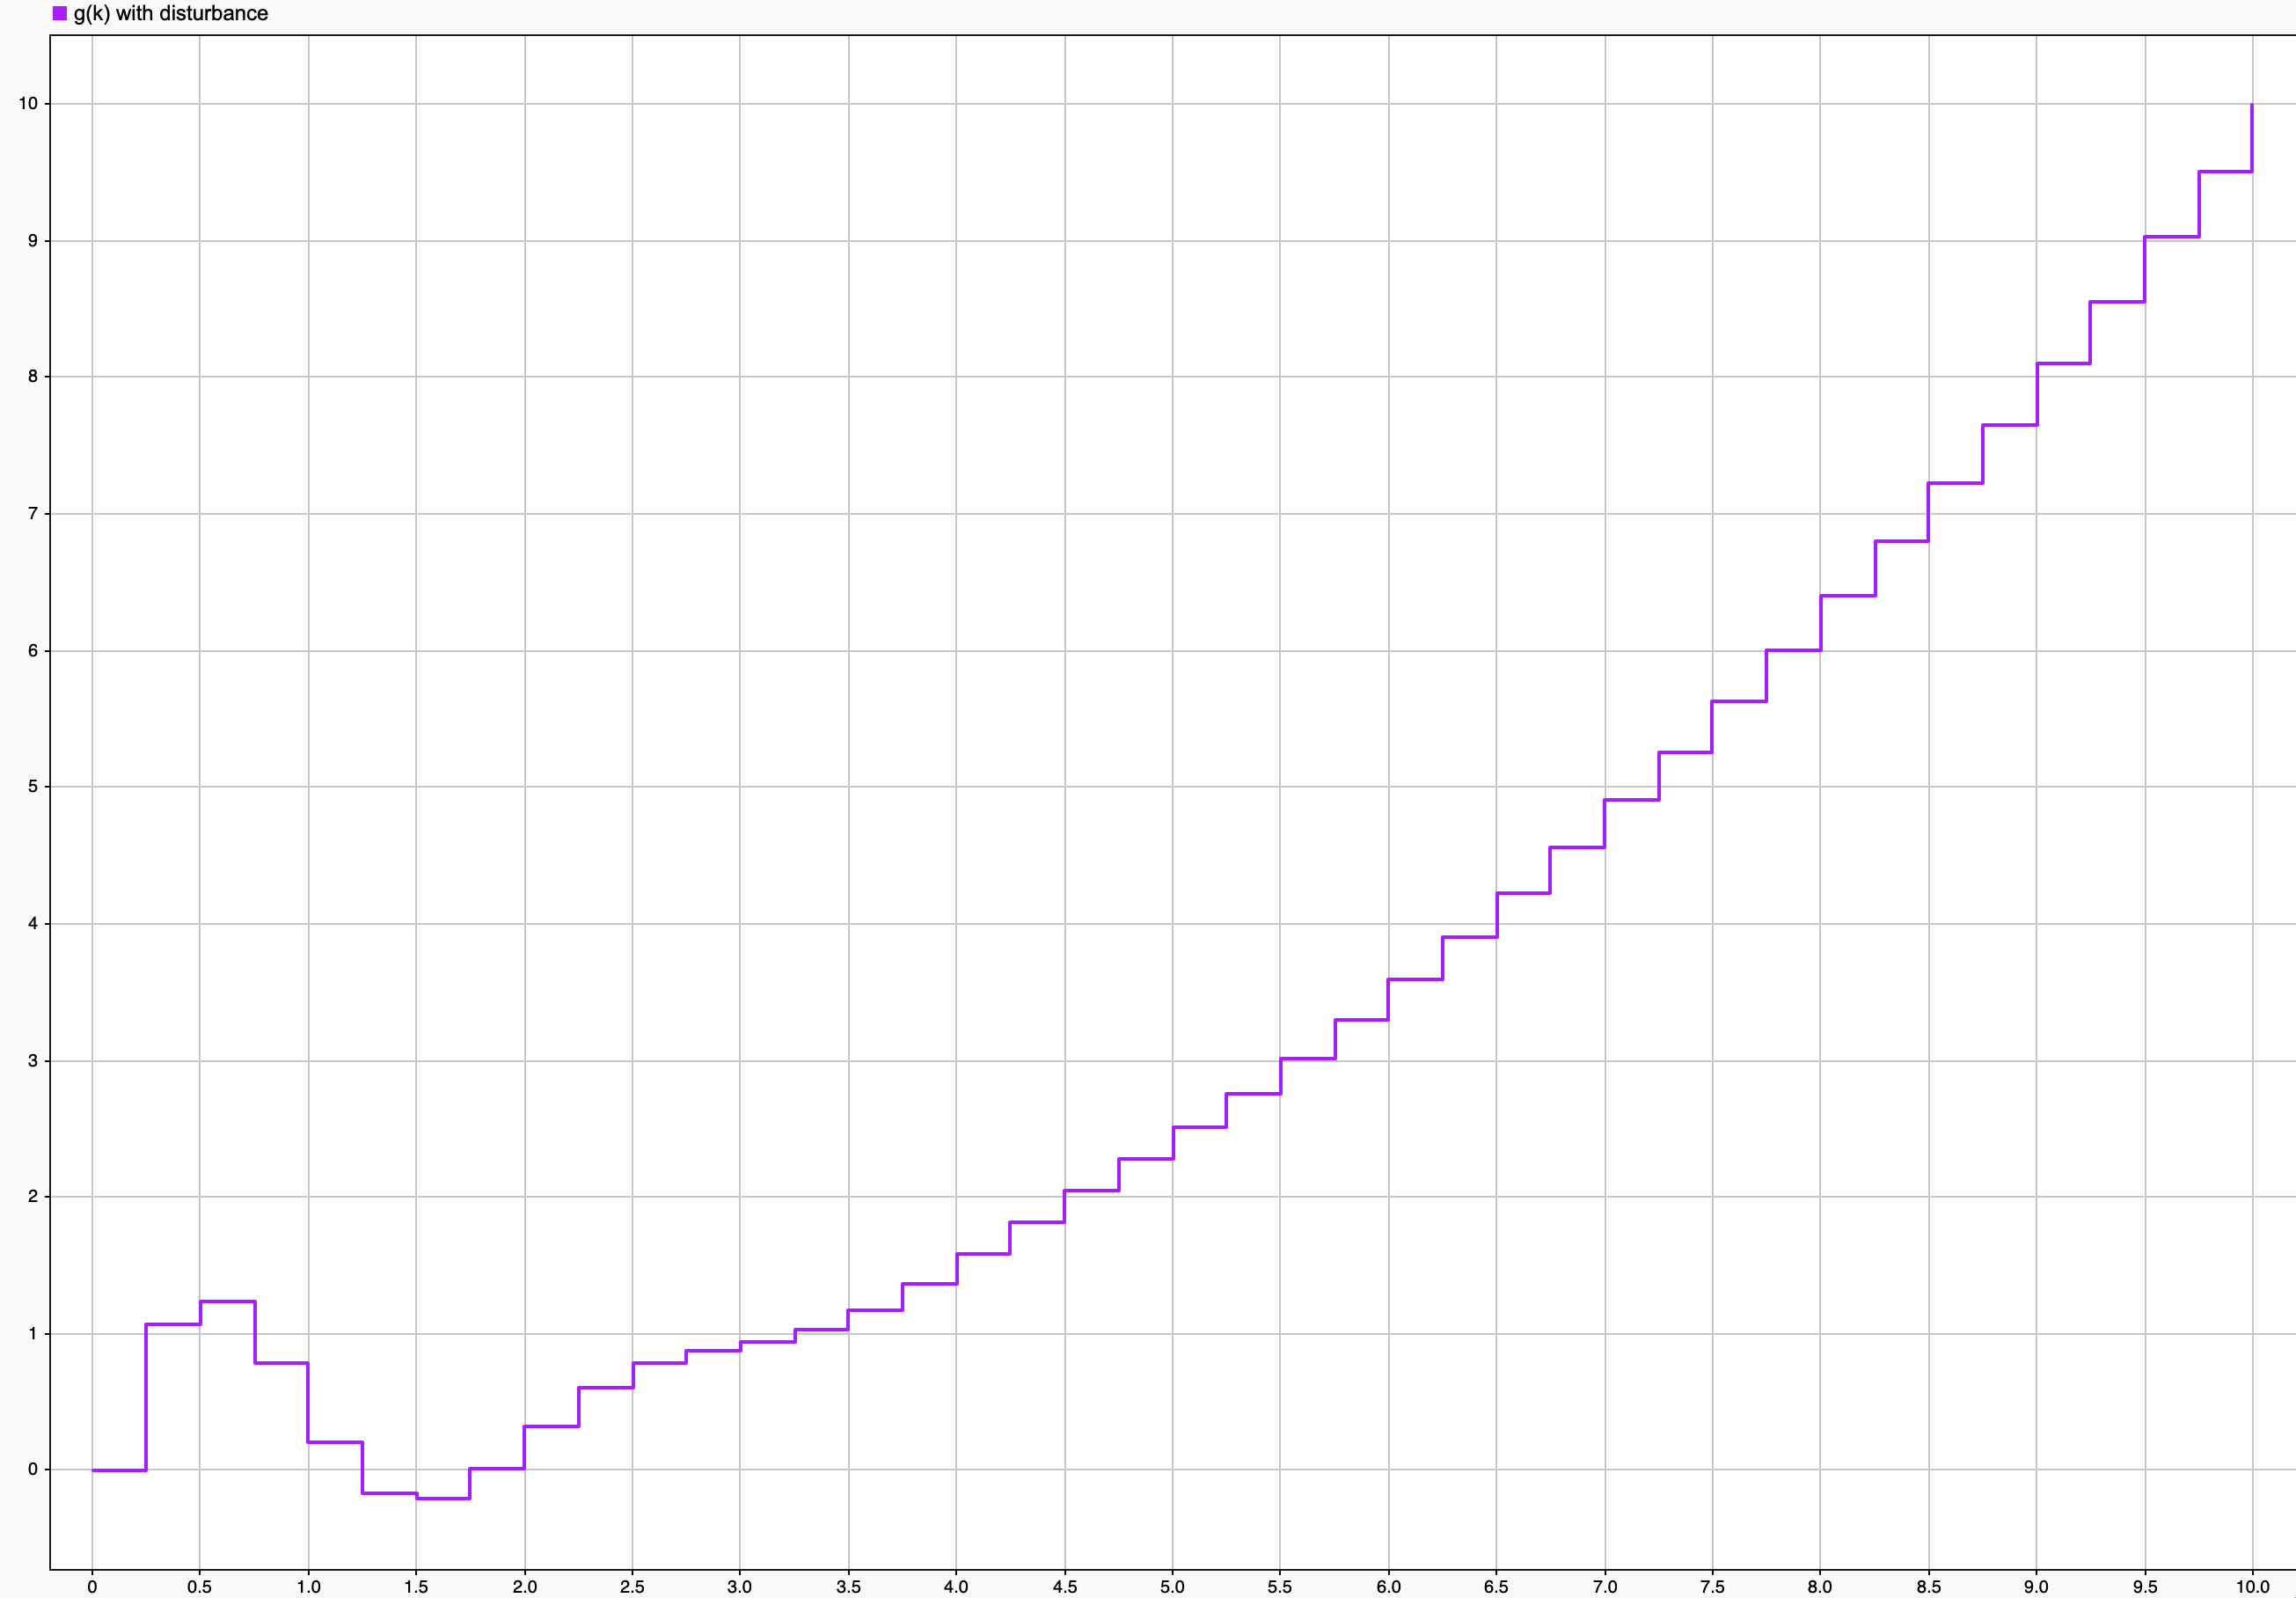
    <content type="html"><![CDATA[<!--excerpt--></p><p>In the past, I may use ramp and saturation in order to reach the non-zero reference (or, actually, tracking). I know this is not a good one, but it works. During the study of MPC, it’s quite good to have an opportunity for a proper tracking analysis.</p><!--toc--><h2 id="I-Simple-solution"><a href="#I-Simple-solution" class="headerlink" title="I. Simple solution"></a>I. Simple solution</h2><p>In terms of normal reference control, a traditional method was to introduce the error, and augmented the term into system matrices. And by minimizing the cost function with respect to error, that is $C_{a}x_{a}$. This method takes the $x_d$ into account when getting a optimal solution. However, in some cases, steady state error exists (Considering the optimal control solution may comes with sacrifices in states), e.g. a Mass-Spring-Damper system, to keep it in a certain position, extra force is required, but the required force does not satisfy the optimal principle.</p><p>Cost function under this case is:</p><script type="math/tex; mode=display">J=\frac{1}{2}x_a^\intercal\,S_a\,x_a+\frac{1}{2}\sum\left[x_a^\intercal\,Q_a\,x_a+ u^\intercal\,R\,u\right]</script><ul><li>Here the augmented matrix is defined as $\left[\begin{array}{cc}A&amp;0\\0&amp;I\end{array}\right]$</li></ul><hr><h2 id="II-Non-zero-constant-reference-control"><a href="#II-Non-zero-constant-reference-control" class="headerlink" title="II. Non-zero constant reference control"></a>II. Non-zero constant reference control</h2><p>Assume that when the system reaches $x_d$ and stabilized, and $A_d=I$.</p><script type="math/tex; mode=display">x_d = A_dx_d\, +\, Bu_d</script><p>Hence</p><script type="math/tex; mode=display">Bu_d=(I-A)x_d</script><p>Note that $B$ may be singular, so it may does not have inverse. We define the state error as</p><script type="math/tex; mode=display">e = x\,-\,x_d</script><p>Define steady-state error of input as</p><script type="math/tex; mode=display">\delta\,u=u+u_d</script><p>So naturally, compensate it, $u= \delta u+u_d$, substitute it into the regular discrete ss-representation,</p><script type="math/tex; mode=display">x_{k+1}=A\,x_k+B_\delta\,u_k+B\,u_d=A\,x_k+B_\delta\,u_k+(I-A)\,x_d</script><p>Define a new augmented matrix</p><script type="math/tex; mode=display">x_a = \left[\begin{array}{c}x\\x_d\end{array}\right],\,\,A_a\triangleq\left[\begin{array}{cc}A & (I-A)\\ 0 &I \end{array}\right],\,\,B_a\triangleq\left[\begin{array}{c}B\\ 0\end{array}\right],\,\,C_a = [I\,\, -I]</script><p>error could be obtained with $e = C_a\,x_a$, let $C_a^\intercal Q\,C_a=Q_a,\,\,\,C_a^\intercal S\,C_a=S_a$, thus establish a new cost function:</p><script type="math/tex; mode=display">J=\frac{1}{2}x_a^\intercal\,S_a\,x_a+\frac{1}{2}\sum\left[x_a^\intercal\,Q_a\,x_a+\delta u^\intercal\,R\,\delta u\right]</script><p>Here, $\delta u$ is selected as the cost, so the term $\delta u^\intercal\,R\,\delta u$ does not purse the lowest energy consumption, but to maintain the input around $u_d$.</p><hr><h2 id="III-Incremental-input-control"><a href="#III-Incremental-input-control" class="headerlink" title="III. Incremental input control"></a>III. Incremental input control</h2><p>It is said that for tracking control, this is more flexible. The input increment is defined as</p><script type="math/tex; mode=display">\triangle u_k = u_{k}-u_{k-1}</script><p>Adopt $u_k$ as one term of the cost will influence the rate of input, which results a smoother control, avoiding the system changes rapidly. Substitute new input form into the system, we have</p><script type="math/tex; mode=display">x_[k+1] = Ax_k\,+\,B\triangle u_k\,+\,B u_{k-1}</script><p>Set cost function as</p><script type="math/tex; mode=display">J = \frac{1}{2}e^\intercal\,S\,e+\frac{1}{2}\sum\left[e^\intercal Q e+\triangle u^\intercal R\triangle u\right]</script><p>Define the new augmented matrix</p><script type="math/tex; mode=display">x_a = \left[\begin{array}{c}x\\x_d\\u_{k-1}\end{array}\right],\,\,\,A_a = \left[\begin{array}{ccc}A & 0 & B\\0 & A_D & 0\\0 & 0 & I\end{array}\right],\,\,\,B_a = \left[\begin{array}{c}B\\0\\I\end{array}\right],\,\,\,C_a = \left[I\,\, -I\,\, 0\right]</script><p>So the performance index could be written as</p><script type="math/tex; mode=display">J = \frac{1}{2}x_a^\intercal\,S_a\,x_a+\frac{1}{2}\sum\left[x_a^\intercal Q_a x_a+\triangle u^\intercal R\triangle u\right]</script><p>This method could effectively reduce the overshoot in the system. However, for complicated matrix computations, I doubt if it will slow down too much of the process. e.g. the during the MPC calculation.</p><hr><p>After comparison, it is clear that these weights differed, however, some construction cannot be directly solved by matlab <code>lqr</code> or <code>dlqr</code>, which raises questions. Indeed, I have not previously controlled too many systems like MSD, which requires additional force to stablize at non-zero position.</p><p>Naturally, different $x_d$ does not affect the calculated gain.</p><p>Still, this part mainly includes the basic part for different tracking needs, which does not concern the tracking of distant position. That requires upper level of planning.</p>]]></content>
    
    
    <summary type="html">&lt;p&gt;Kinda different.</summary>


    <category term="Theory" scheme="https://redbowtie.github.io/categories/Theory/"/>
    
    
    <category term="Control" scheme="https://redbowtie.github.io/tags/Control/"/>
    
  </entry>
  
  <entry>
    <title>WSL, Cuda and Isaac Sim.</title>
    <link href="https://redbowtie.github.io/2024/01/10/WSLnCUDA/"/>
    <id>https://redbowtie.github.io/2024/01/10/WSLnCUDA/</id>
    <published>2024-01-10T15:02:00.000Z</published>
    <updated>2024-01-12T01:24:10.522Z</updated>
    
    <content type="html"><![CDATA[<p>“Hope it works”  <span id="more"></span></p><p>For quite a long time I’ve been interested in RL on the quadruped, however, Isaac Sim requires a RTX card. The only regret is that I bought a model with 4050 to save some bucks, not sure how this would influence the training process.</p><p>At first I thought that since Isaac sim is on windows, then maybe surely Isaac Gym is. It turned out that’s not how things work. The latter requires Ubuntu. And actually I’m not very fond of the idea of installing another system on my rig, as another laptop has already installed it and the fact proved that I won’t use it very often. It made me headache until I suddenly remembered the existence of WSL. Good thing that the level of GPU integration is quite high now, thanks a lot to MS and Nvidia, kinda magic.</p><p>And it was just like a joke that, I actually does not need Linux to run the demo, so maybe consider directly read Isaac Chapter.</p><hr><!--toc--><hr><h2 id="Environment"><a href="#Environment" class="headerlink" title="Environment"></a>Environment</h2><p>System: <code>Win 11 23H2</code><br>WSL: Ubuntu 20.04 LTS<br>Windows Terminal<br>Default Powershell<br>IsaacSim: <code>2023.1.1</code></p><hr><h2 id="WSL-installation-and-Setup"><a href="#WSL-installation-and-Setup" class="headerlink" title="WSL installation and Setup"></a>WSL installation and Setup</h2><p>In terminal (run as admin), type one command is enough,<br><figure class="highlight shell"><table><tr><td class="gutter"><pre><span class="line">1</span><br></pre></td><td class="code"><pre><span class="line"><span class="meta prompt_">&gt; </span><span class="language-bash">wsl --install</span></span><br></pre></td></tr></table></figure></p><p><strong>However</strong>, this by default installs the latest ubuntu, so try this to list all available distros<br><figure class="highlight shell"><table><tr><td class="gutter"><pre><span class="line">1</span><br></pre></td><td class="code"><pre><span class="line"><span class="meta prompt_">&gt; </span><span class="language-bash">wsl --list --online</span></span><br></pre></td></tr></table></figure><br>And get similar results:<img src="wsl1.jpg" alt=""></p><p>Then run <code>wsl —install -d “DistroName”</code>, in my case it will be<br><figure class="highlight shell"><table><tr><td class="gutter"><pre><span class="line">1</span><br></pre></td><td class="code"><pre><span class="line"><span class="meta prompt_">&gt; </span><span class="language-bash">wsl --install -d Ubuntu-20.04</span></span><br></pre></td></tr></table></figure></p><p>After everything is set. A reboot is needed to make changes take into effect. For more detailed documentation, check <a href="https://learn.microsoft.com/en-us/windows/wsl/install">here</a></p><p>After reboot, you should be able to see a Ubuntu logo in start menu, or just start it in the dropdown list of terminal. Once complete the preprocessing, it will ask to create username and password, just like regular linux. Also additional information can be checked <a href="https://learn.microsoft.com/en-us/windows/wsl/setup/environment#set-up-your-linux-username-and-password">here</a></p><hr><h2 id="CUDA-installation"><a href="#CUDA-installation" class="headerlink" title="CUDA installation"></a>CUDA installation</h2><p>There were a lot of documentations or tutorials on this, I only performed basic installation. So first, as the GPU support for WSL is quite good, run <code>nvidia-smi</code> in WSL terminal should be able to output the correct GPU, like this. <img src="wsl2.jpg" alt=""></p><p><strong>Installing GPU driver should only be performed on windows, do not install additional GPU driver on Linux</strong>.</p><p>Microsoft’s doc mainly hyperlinked two website from Nvidia, one is <a href="https://docs.nvidia.com/cuda/wsl-user-guide/index.html#getting-started-with-cuda-on-wsl">essential</a>.</p><p>According to the process</p><figure class="highlight bash"><table><tr><td class="gutter"><pre><span class="line">1</span><br><span class="line">2</span><br><span class="line">3</span><br><span class="line">4</span><br><span class="line">5</span><br><span class="line">6</span><br><span class="line">7</span><br><span class="line">8</span><br></pre></td><td class="code"><pre><span class="line">$ sudo apt-key del 7fa2af80 <span class="comment">#remove the old GPG key</span></span><br><span class="line">$ wget https://developer.download.nvidia.com/compute/cuda/repos/wsl-ubuntu/x86_64/cuda-wsl-ubuntu.pin</span><br><span class="line">$ sudo <span class="built_in">mv</span> cuda-wsl-ubuntu.pin /etc/apt/preferences.d/cuda-repository-pin-600</span><br><span class="line">$ wget https://developer.download.nvidia.com/compute/cuda/12.3.2/local_installers/cuda-repo-wsl-ubuntu-12-3-local_12.3.2-1_amd64.deb</span><br><span class="line">$ sudo dpkg -i cuda-repo-wsl-ubuntu-12-3-local_12.3.2-1_amd64.deb</span><br><span class="line">$ sudo <span class="built_in">cp</span> /var/cuda-repo-wsl-ubuntu-12-3-<span class="built_in">local</span>/cuda-*-keyring.gpg /usr/share/keyrings/</span><br><span class="line">$ sudo apt-get update</span><br><span class="line">$ sudo apt-get -y install cuda-toolkit-12-3</span><br></pre></td></tr></table></figure><p>After this, do a simple post-installation. Add the following lines into <code>~/.bashrc</code><br><figure class="highlight bash"><table><tr><td class="gutter"><pre><span class="line">1</span><br><span class="line">2</span><br><span class="line">3</span><br></pre></td><td class="code"><pre><span class="line"><span class="built_in">export</span> PATH=/usr/local/cuda-12.2/bin<span class="variable">$&#123;PATH:+:<span class="variable">$&#123;PATH&#125;</span>&#125;</span></span><br><span class="line"><span class="built_in">export</span> LD_LIBRARY_PATH=/usr/local/cuda-12.2/lib64\</span><br><span class="line">                         <span class="variable">$&#123;LD_LIBRARY_PATH:+:<span class="variable">$&#123;LD_LIBRARY_PATH&#125;</span>&#125;</span></span><br></pre></td></tr></table></figure><br>Remember to <code>source</code> the profile.</p><p>At this time (a reboot may be required), check <code>nvcc -V</code>, CUDA info should display correctly. It should be similar to this:<br><figure class="highlight shell"><table><tr><td class="gutter"><pre><span class="line">1</span><br><span class="line">2</span><br><span class="line">3</span><br><span class="line">4</span><br><span class="line">5</span><br></pre></td><td class="code"><pre><span class="line">nvcc: NVIDIA (R) Cuda compiler driver</span><br><span class="line">Copyright (c) 2005-2023 NVIDIA Corporation</span><br><span class="line">Built on Wed_Nov_22_10:17:15_PST_2023</span><br><span class="line">Cuda compilation tools, release 12.3, V12.3.107</span><br><span class="line">Build cuda_12.3.r12.3/compiler.33567101_0</span><br></pre></td></tr></table></figure></p><hr><h3 id="Problem"><a href="#Problem" class="headerlink" title="Problem"></a>Problem</h3><p>Everything went too smoothly that could be called as weird, so a problem came up. It actually comforted me, as it should.</p><div class="alert danger no-icon"><p>My linux penguin icon on the file explorer left panel disappeared. And unfortunately I didn’t know the exact time.</p></div><p>Maybe it’s due to the windows update, or maybe it’s the emulator disturbance, I found that WSL function in control panel is off, which is really weird. After turn it on and restart, things looks fine.</p><p>And as for the login info, I really suspect that I saw this more than once a day, maybe I’ll find out if it’s true tomorrow.</p><h3 id="Proxy"><a href="#Proxy" class="headerlink" title="Proxy"></a>Proxy</h3><p>Mainly followed this guy’s <a href="https://eastmonster.github.io/2022/10/05/clash-config-in-wsl/">tutorial</a>, and also realized that my proxy rule is not very helpful, sometimes I should use global for a proper connection.</p><h3 id="GUI-Glitch"><a href="#GUI-Glitch" class="headerlink" title="GUI Glitch"></a>GUI Glitch</h3><p>Same as <a href="https://github.com/microsoft/wslg/issues/1148">here</a>, glitch for all GUI apps.</p><p>As a temporary fix, restart wsl everytime the computer restarts.</p><hr><h2 id="Nvidia-Isaac-Sim"><a href="#Nvidia-Isaac-Sim" class="headerlink" title="Nvidia Isaac Sim"></a>Nvidia Isaac Sim</h2><p>Following the <a href="https://docs.omniverse.nvidia.com/isaacsim/latest/installation/install_workstation.html">Workstation Installation Guide</a>, running AppImage returns an error said that </p><div class="alert danger no-icon"><p>error while loading shared libraries: libgtk-3.so.0</p></div><p>The solution was to install <code>libgtk-3-0</code> via <code>apt</code></p><div class="alert danger no-icon"><p>Failed to register a custom protocol handler for omniverse on Linux:  Error: Command failed: xdg-desktop-menu install /tmp/omniverse-launcher-II4nbr/nvidia-omniverse.desktop<br>/bin/sh: 1: xdg-desktop-menu: not found</p></div><p>I suppose this could be ignored?</p><p>OK, guess problem solved, on the worse side, official community <a href="https://forums.developer.nvidia.com/t/my-issac-sim-at-omniverse-in-wsl2-can-not-launch/246932">confirmed</a> that it’s not supported on wsl2 yet. The error suggest that it requires a true desktop or display output, rather than virtual ones. Damn. So maybe I still need to ask for a laptop or PC for the following experiments. I think I gradually realized the necessity of laptops with storage bigger than 1TB (for develop purpose).</p><h4 id="Another-workaround"><a href="#Another-workaround" class="headerlink" title="Another workaround:"></a>Another workaround:</h4><p>So, I returned to the origin where I do not need Linux, funny it is.</p><p>On windows, the installation of Isaac Sim should be smooth and without any problem.</p><p>As suggested by Github <a href="https://github.com/NVIDIA-Omniverse/OmniIsaacGymEnvs">readme</a>, after the Sim is installed, clone the git repo into a workspace, and <code>cd</code> to the corresponding folder. Remember to find the correct <code>python_path</code>:<br><figure class="highlight shell"><table><tr><td class="gutter"><pre><span class="line">1</span><br><span class="line">2</span><br><span class="line">3</span><br></pre></td><td class="code"><pre><span class="line">For Linux: alias PYTHON_PATH=~/.local/share/ov/pkg/isaac_sim-*/python.sh</span><br><span class="line">For Windows: doskey PYTHON_PATH=C:\Users\user\AppData\Local\ov\pkg\isaac_sim-*\python.bat $*</span><br><span class="line">For IsaacSim Docker: alias PYTHON_PATH=/isaac-sim/python.sh</span><br></pre></td></tr></table></figure><br>And indeed the alias could be skipped.</p><p>After that, Install <code>OmniIsaacGymEnvs</code> as a python module for <code>PYTHON_PATH</code>: (Do not forget about the last <strong>dot</strong>)<br><figure class="highlight shell"><table><tr><td class="gutter"><pre><span class="line">1</span><br></pre></td><td class="code"><pre><span class="line">PYTHON_PATH -m pip install -e .</span><br></pre></td></tr></table></figure><br>The pip should be able to search and install a lot of dependencies. And if once is not enough, try type the line multiple times.<br><img src="wsl3.jpg" alt=""></p><p>To run a simple form of PPO from <code>rl_games</code>, use the single-threaded training script:<br><figure class="highlight shell"><table><tr><td class="gutter"><pre><span class="line">1</span><br></pre></td><td class="code"><pre><span class="line">PYTHON_PATH scripts/rlgames_train.py task=Cartpole</span><br></pre></td></tr></table></figure></p><blockquote><p><code>task=TASK</code> - Selects which task to use. Any of <code>AllegroHand</code>, <code>Ant</code>, <code>Anymal</code>, <code>AnymalTerrain</code>, <code>BallBalance</code>, <code>Cartpole</code>, etc. (these correspond to the config for each environment in the folder <code>omniisaacgymenvs/cfg/task)</code></p></blockquote><p>e.g. The following is the training of <code>AnymalTerrain </code></p><p><img src="wsl4.png" alt=""></p><p>Thanks to the MS’s DX12 that enabled GPU to accessing RAM, my 4050 ran out of dedicated VRAM. This thing is amazing. I think further investigation will be in the next post.</p><p><img src="wsl5.jpg" alt=""><br>It can be seen that at the start, they barely stands.</p><p>2000 epoch took about 28455s, which is close to 8hrs. And they seems to be able to go across different terrains.</p><p><img src="wsl6.png" alt=""></p><p><img src="wsl7.png" alt=""><br>Some of them seem to have pretty good poses. But still, not all of them act in desired behavior. As some move forward with front or rear knees on ground. The performance is worse than the trained weight used in the demo, not sure how many epoches did that take.</p>]]></content>
    
    
    <summary type="html">&lt;p&gt;“Hope it works”</summary>


    <category term="Environments" scheme="https://redbowtie.github.io/categories/Environments/"/>
    
    
    <category term="WSL" scheme="https://redbowtie.github.io/tags/WSL/"/>
    
    <category term="Cuda" scheme="https://redbowtie.github.io/tags/Cuda/"/>
    
  </entry>
  
  <entry>
    <title>RecurDyn Co-simulation with SIMULINK</title>
    <link href="https://redbowtie.github.io/2023/09/19/RecurDyn/"/>
    <id>https://redbowtie.github.io/2023/09/19/RecurDyn/</id>
    <published>2023-09-19T17:32:00.000Z</published>
    <updated>2024-01-10T02:26:59.664Z</updated>
    
    <content type="html"><![CDATA[<p>Latest things always(?) brings compatibility issues. <span id="more"></span></p><!--toc--><p>I can’t remember what problem I ran into concerning the compatibility. Maybe it’s the OpenOCD debugging, but that’s the opposite case. </p><p>Since that I cannot get access to a copy of solidworks file, and my teammate used RecurDyn, so I’ll do the same. The other attempts seems meaningless without accurate simulations. If I cannot get this done this week, I think I’ll obtain a proper reason to give up.</p><p><br></p><h2 id="Environment"><a href="#Environment" class="headerlink" title="Environment"></a>Environment</h2><hr><p>System : <code>Win 11</code><br>RecurDyn: <code>R9V5</code><br>MATLAB: <code>2023a</code><br><br></p><h2 id="Start-with-existing-examples"><a href="#Start-with-existing-examples" class="headerlink" title="Start with existing examples"></a>Start with existing examples</h2><hr><p>The main tutorial was followed by official tutorial <a href="https://www.bilibili.com/video/BV1K94y1F7Ku">video</a>(sort of).</p><p>At the first glance,  this is quite new to me. I have seen ANSYS when viewing thesis, glad that this software looks a little more modern.</p><p>So the official examples (Of R9V5) are located in <code>[RedurDyn main directory]/Help/Examples/Simulink_CoSim/</code>. It is suggested to copy the file to your workspace.</p><p>After opening the <code>rdyn</code> file, a very strange combination of objects will be showed.</p><p><img src="RDYN4.png" alt="mouse?"></p><p>By Default things could be different, and the interactions may take some time to get hands on. Note that the desk may be rendered as only wire, if it look awful, select it and right click, change the property under <code>each rendering</code>. It seems that the <code>Automatic</code> behave strangely.</p><p><br></p><h2 id="Set-Input-and-Output"><a href="#Set-Input-and-Output" class="headerlink" title="Set Input and Output"></a>Set Input and Output</h2><hr><p>In <code>Communicator</code> tab, select <code>Plant_in</code> and <code>Plant_out</code>. For input, just set the desired name first.  For the latter, you may use the internal functions (use with markers).</p><p>For example, opening the <code>Plant_in</code> you can see that <code>Control_torque</code> is already there. And in the corresponding Forces, the input is assigned to the rotational axial force.</p><p><img src="RDYN7.png" alt="Input"></p><p>As for output, you may enter <code>DX(1, 2)</code> and <code>VX(1, 2)</code> for calculating difference on displacement and velocity. In the drop-down list, left-click to use a function, and right click to see its manual, e.g.</p><p><img src="RDYN8.png" alt="Documentations"></p><p>You may also change the in/output name in the data base for better clarification.</p><p>Then, click <code>SimuLink</code> in <code>Communicator</code> Tab, check in/outputs again, select export.</p><p><img src="RDYN9.png" alt="eg"><br><br></p><h2 id="MATLAB-Side"><a href="#MATLAB-Side" class="headerlink" title="MATLAB Side"></a>MATLAB Side</h2><hr><p>In the command window, switch to the same workspace where the previous files are, run the following script one by one.<br><figure class="highlight matlab"><table><tr><td class="gutter"><pre><span class="line">1</span><br><span class="line">2</span><br></pre></td><td class="code"><pre><span class="line">&gt;&gt; mouse <span class="comment">% (The name of the project)</span></span><br><span class="line">&gt;&gt; rdlib</span><br></pre></td></tr></table></figure></p><div class="alert danger no-icon"><p>Note that if the second step returns an error, maybe considering check the last part of the article.</p></div><p>If everything is OK, a block will pop up, then the rest is regular.</p><p>Can be seen from the workspace data that S-function is also involved, interesting.</p><p><img src="RDYN10.png" alt="Block"></p><p>Use the <code>*.mdl</code> that comes along in the first part, replace the block, we’ll able to see the co-simulation running.</p><div class="alert success no-icon"><p>Note that, if the RecurDyn need to be closed in order to obtain the data record. And it’s normal that the program close itself.</p></div><p><br></p><h2 id="Plot-Viewing"><a href="#Plot-Viewing" class="headerlink" title="Plot Viewing"></a>Plot Viewing</h2><hr><p>The meaning of states can be found on official <a href="https://support.functionbay.cn/cn/faq/single/889">site</a></p><p>To load the animation, you may directly drag <code>[(project name)_(number)]/*.rad</code> file into RecurDyn.</p><p>As for detailed numerical plots, select <code>plot result</code> in <code>Analysis</code>. The layouts of windows can be changed in the corresponding tab, and in tool, click <code>LoadAni</code> can provide more direct analyzing experience.</p><p><img src="RDYN11.png" alt=""><br><br></p><h2 id="Problem-Caused-by-Version-Changes"><a href="#Problem-Caused-by-Version-Changes" class="headerlink" title="Problem Caused by Version Changes"></a>Problem Caused by Version Changes</h2><hr><p>I encountered this issue while running <code>rdlib</code> to generate the RecurDyn block in SIMULINK, Got an error that shows:</p><blockquote><p>rdlib Unrecognized function or variable ‘last_Matlab_version_str’. Error in rdlib (line 56) sys=[sys,last_Matlab_version_str,’_’,last_minor_version_str];</p></blockquote><p>However, when I googled this, the only suggestion is that the newer version of interface need to be used. This is kinda strange. Until I looked inside about the detailed code. And, according to the support <a href="https://functionbay-my.sharepoint.com/:x:/p/download/EescrUy_rXtGhW6HpP2c-MEB7VhB9pLuc12MIf-8_Ib-Ew?rtime=Sm8Agry420g">webpage</a>, the specified last support was up to 2020a. </p><p>In the past few major releases, MATLAB will change its secondary version number, i.e. from <code>9.12.xxx(2022a)</code> to <code>9.14.xxx(2023a)</code>. Since it has been in this way, cannot say that it’s strange not update the major version number. However, I did noticed that the major number become <code>23</code> in <code>2023b</code>. These changes can also be validated through online documentation <a href="https://www.mathworks.com/help/releases/R2023a/matlab/ref/version.html?searchHighlight=version&amp;s_tid=doc_srchtitle">2023a</a> and <a href="https://www.mathworks.com/help/releases/R2023b/matlab/ref/version.html?searchHighlight=version&amp;s_tid=doc_srchtitle">2023b</a>.</p><p>In general, this <code>rdlib</code> and the file with same project name rely on the return value of function <code>version</code>, and get its 2nd, 3rd and other character to determine the generated interface, rather than <strong>dot</strong>. However, as the version changed so the major number become two digits, the whole thing messed up. 3 becomes the major number, naturally, the interface is not suitable for the new SIMULINK.</p><p>The gimmick is to simply change relative references of <code>version</code> into the version number of 2023a and things will be fine. Like this.</p><p><img src="RDYN5.png" alt="mouse.m"></p><p><img src="RDYN6.png" alt="rdlib"></p>]]></content>
    
    
    <summary type="html">&lt;p&gt;Latest things always(?) brings compatibility issues.</summary>


    <category term="Simulation" scheme="https://redbowtie.github.io/categories/Simulation/"/>
    
    
    <category term="Dynamics" scheme="https://redbowtie.github.io/tags/Dynamics/"/>
    
    <category term="RecurDyn" scheme="https://redbowtie.github.io/tags/RecurDyn/"/>
    
    <category term="SIMULINK" scheme="https://redbowtie.github.io/tags/SIMULINK/"/>
    
  </entry>
  
  <entry>
    <title>Dynamics Review and Simscape Multibody</title>
    <link href="https://redbowtie.github.io/2023/09/14/Dynamics/"/>
    <id>https://redbowtie.github.io/2023/09/14/Dynamics/</id>
    <published>2023-09-14T21:32:00.000Z</published>
    <updated>2024-01-10T02:27:59.335Z</updated>
    
    <content type="html"><![CDATA[<!--excerpt--></p><!--toc--><p><br></p><h2 id="Where-it-started"><a href="#Where-it-started" class="headerlink" title="Where it started"></a>Where it started</h2><hr><p>At the start I was assigned with an mission to, eventually, realise a inverted-pendulum-ish object (after many simplification with certain constraints). It was a good chance that to get more familiar with SIMSCAPE. At least, the idea sounds good.</p><p>In the past simscape simulations, robots were fixed onto a axis (prismatic joint), which prevent from dropping. As by default, if you directly put something in it, then run. Things just falls. For many ideal objects, this method suits fine. It is suitable for investigating 2D movement, and no need to care for the wheels, and easy to damping coefficients.</p><p><img src="DYN_1.png" alt="Properties of prismatic joint"></p><h2 id="Spatial-Contact-Force-and-Rectangular-Joint"><a href="#Spatial-Contact-Force-and-Rectangular-Joint" class="headerlink" title="Spatial Contact Force and Rectangular Joint"></a>Spatial Contact Force and Rectangular Joint</h2><hr><p>However, in a more realistic sense, things could get off from the ground. Or, it could fall from certain height, and it could have friction force. I had a little research on this, and for the ground, it can be regular solid blocks, if surface with different height is required, then use <code>Grid surface</code> suits best. But how to make objects interactive with each other? Answer is on the title. Thanks to a project that I recently discovered, it is the very example I need. And rectangular joint also suits for bi-directional movement. If the torque suits, training for jump is also possible</p><p><img src="DYN_2.png" alt="SCF Block"></p><h2 id="Modelling-Problems"><a href="#Modelling-Problems" class="headerlink" title="Modelling Problems"></a>Modelling Problems</h2><hr><p>Seeing two different object collide in simscape is satisfying, as it is what I wanted to do. The object after simplification looks just like a RoboMaster <a href="https://zhuanlan.zhihu.com/p/563048952">Robot</a>, but obviously I didn’t take this article as an example. Just like Regular Lagrange method, I calculate <strong>Kinematics and Dynamics</strong> for the robot, get <strong>Lagrangian</strong>, and then solve the equation. Everything was good before that I saw my object took off in simscape simulation. That was hilarious, but also terrible.</p><p><img src="DYN_3.png" alt="Not this one, but similar results"></p><p>An idea came to me that, did I just messed up in modelling process? Indeed, because I’m not quite good at theoretical mechanics. It always confuse me that how to calculate the rotational energy of a object with aggregate translational and rotational velocities, especially the moment of inertia, the axis for analysis etc. Or maybe it’s the introduction of friction force would change the model greatly, which differs from my intuitive sense.</p><h2 id="Lagrange-Method"><a href="#Lagrange-Method" class="headerlink" title="Lagrange Method"></a>Lagrange Method</h2><hr><p>Anyway, I have to find a way to find out the exact problems. So starting from the simplest model I cold think of, a two-wheel self-balance vehicle, which also could use the <code>spatial contact block</code>. </p><p><img src="DYN_4.png" alt="Coordinates"></p><p>Analyse the systems by parts, but before that, list the positions for centers of mass, it helps to write derivatives.</p><h3 id="Centers-of-Mass"><a href="#Centers-of-Mass" class="headerlink" title="Centers of Mass"></a>Centers of Mass</h3><p>Wheel:</p><script type="math/tex; mode=display">[x_w,\, y_w]= [x,\,0]</script><p>Pendulum:</p><script type="math/tex; mode=display">[x_p,\, y_p]=[x+l\,\sin\theta,\, l\,\cos\theta]</script><h3 id="Translational-Velocity-and-Energy"><a href="#Translational-Velocity-and-Energy" class="headerlink" title="Translational Velocity and Energy"></a>Translational Velocity and Energy</h3><p>Wheel:</p><script type="math/tex; mode=display">\mathrm{V_w}=\left[\begin{array}{cc}\dot x&0\end{array}\right]^\intercal</script><script type="math/tex; mode=display">T_w = \frac{1}{2}m_w\dot x^2</script><p>Pendulum:</p><script type="math/tex; mode=display">\mathrm{V_p}=\left[\begin{array}{cc}\dot x+\dot\theta\,l\,\cos\theta & -\dot\theta\,l\,\sin\theta\end{array}\right]^\intercal</script><script type="math/tex; mode=display">T_p = \frac{1}{2}m_p[(\dot x+\dot\theta\,l\,\cos\theta)^2+(-\dot\theta\,l\,\sin\theta)^2]</script><h3 id="Rotational-Velocity-Moment-of-inertia-and-Energy"><a href="#Rotational-Velocity-Moment-of-inertia-and-Energy" class="headerlink" title="Rotational Velocity, Moment of inertia and Energy"></a>Rotational Velocity, Moment of inertia and Energy</h3><p>Wheel</p><script type="math/tex; mode=display">\omega_w=\frac{\dot x}{R},\,\,I_w=\frac{1}{2}m_wR^2</script><script type="math/tex; mode=display">P_w = \frac{1}{2}I_w\cdot\frac{\dot x^2}{R^2}</script><p>Pendulum</p><div class="alert success no-icon"><p>Note that, according to the <strong>König’s theorem</strong>, the following moment of inertia is with respect to the original center of mass. <strong>Do not</strong> apply <strong>Parallel axis theorem</strong> unless you’re sure it’s the case. I used to use the latter so the calculations always went wrong.</p></div><script type="math/tex; mode=display">\omega_p = \dot\theta,\,\,I_p = \frac{1}{12}(4\,l^2+b^2)</script><script type="math/tex; mode=display">P_p=\frac{1}{2}I_p\cdot\dot\theta^2</script><h3 id="Lagrangian"><a href="#Lagrangian" class="headerlink" title="Lagrangian"></a>Lagrangian</h3><p>As for the potential energy, the zero-potential surface crosses the center of the wheel, so only counts pendulum’s potential energy.</p><script type="math/tex; mode=display">\begin{array}{rcl}L&=&T\,-\,V\\&=&T_w\,+\,T_p\,+\,P_w\,+\,P_p-m_p\,g\,l\,\cos\theta\end{array}</script><p>Then list the generalized force to the corresponding generalized coordinate, list the equation.</p><script type="math/tex; mode=display">\left\{\begin{array}{rcl}\frac{d}{d\,t}\frac{\partial\,L}{\partial\,\dot x}-\frac{\partial\,L}{\partial\, x} &=& \frac{1}{R}\tau\\\frac{d}{d\,t}\frac{\partial\,L}{\partial\,\dot\theta} - \frac{\partial\,L}{\partial\,\theta} &=& -\tau\end{array}\right.</script><div class="alert danger no-icon"><p>Note that, <strong>generalized force</strong> is not limited to force, but all sort of input, however, <strong>the properties</strong> of the input and the coordinate <strong>should be aligned</strong>, e.g., force corresponds to the linear displacement, and torque corresponds to the angular one.</p></div><p>The rest is to use matrix product to get a nonlinear equation, after simple linearization, the model is obtained.</p><h2 id="Newton’s-method"><a href="#Newton’s-method" class="headerlink" title="Newton’s method"></a>Newton’s method</h2><hr><p>If getting used to it,  the pre-calculation part is quite simple. The analysis is also conducted in parts.</p><p>For the actuation wheel:</p><script type="math/tex; mode=display">\begin{array}{rcl}m_w\ddot x&=& N_f - N'\\I_w\frac{\ddot x}{R} &=& \tau - N_f\cdot R\\\\\textrm{where}\\N_f&&\textrm{Static friction applied on wheel}\\N,\,N'&& \textrm{Force applied from wheel to pendulum, and its reaction force}\\x&& \textrm{Linear displacement of the wheel}\end{array}</script><p>For the pendulum, we have:</p><script type="math/tex; mode=display">\begin{array}{rcl}N &=& m_p \frac{\partial^2}{\partial t^2}(x\,+\,L\,\sin\theta)\\P\,-\,m_p\,g &=& m_p \frac{\partial^2}{\partial t^2}(L\,\cos\theta)\\I_p\,\ddot\theta &=& P\,L\,\sin\theta\, -\,N\,L,\cos\theta\,-\tau\end{array}</script><p>When I completely figured it out, its quite straightforward.</p><p>However, the following solve systems of equations is way more complicated than the prior method. It is recommended to use MATLAB solve the equation and obtain its <code>Jacobian</code> at the equilibrium position.</p><h2 id="Summary"><a href="#Summary" class="headerlink" title="Summary"></a>Summary</h2><hr><p>Two methods should give the identical numerical result, otherwise maybe check somewhere that could go wrong. However, I’m not sure if I could figure out the solutions when some constraint is applied. At least in the simplified model, it worked, which encouraged me.</p>]]></content>
    
    
    <summary type="html">&lt;p&gt;It regularly makes me headache.</summary>


    <category term="Theory" scheme="https://redbowtie.github.io/categories/Theory/"/>
    
    
    <category term="Control" scheme="https://redbowtie.github.io/tags/Control/"/>
    
    <category term="MATLAB" scheme="https://redbowtie.github.io/tags/MATLAB/"/>
    
    <category term="Dynamics" scheme="https://redbowtie.github.io/tags/Dynamics/"/>
    
  </entry>
  
  <entry>
    <title>Storage Goes Boom</title>
    <link href="https://redbowtie.github.io/2023/08/10/Raid15/"/>
    <id>https://redbowtie.github.io/2023/08/10/Raid15/</id>
    <published>2023-08-10T18:32:00.000Z</published>
    <updated>2023-08-10T14:00:03.907Z</updated>
    
    <content type="html"><![CDATA[<!--excerpt--></p><h2 id="Episode-2-IO-ERROR-ERROR-and-ERRORS"><a href="#Episode-2-IO-ERROR-ERROR-and-ERRORS" class="headerlink" title="[Episode 2] IO ERROR, ERROR and ERRORS"></a>[Episode 2] IO ERROR, ERROR and ERRORS</h2><p>As Qbittorrent downloads more and more contents, IO error tends to be more frequent. Initially thought it was just the error on LSI or something else, nothing relavant, as everything seems to be fine after resume the process. So one day, the system suddenly failed to recognize the corresponding drive. Then I got. like 60+ IO errors.</p><p>Considering this could be the second time. At that moment I nearly got frozen. Damn. I SWEAR that I would never try to save bucks on my storage devices.</p><p>On the one hand, I recently have had this urge to purchase a new laptop, but not sure if I should choose 4050 or 4060. Naturally on that night, the answer came. let it be 4050 and the remaining money could be used to buy disks.</p><p>This time I went HC320, which should be arrived by tomorrow, will add some pics.</p><p>Then, another difficulty. A hard drive bay. ORICO has been notorious, so definitely no. But what are the differences between those models? There are so many of them. I spent hours and it really made me headache. So there’re mainly two brand, JMS and ASM, and the tech behind designs and manufacturing should be pretty mature. Then comes the problem: Some brands uses components with lower quality, and many models somes with 2A power supply, which is not enough for enterprise level disks. The latter one is relatively easy to handle, just buy 12V 3A supply from trusted ones, like MEAN WELL. But the former, collecting and analyzing information are really painful. Practical info are limited in Tieba, but also the availability is time limited, the overall quality of the product will not be the same all the time. Like MAIWO, it used to be the enthusiasts’ choice, but the QA grow worse; as for ULIKE, it was fine, until recently it degraded 5V chip and circuit peripheral designs, so no. It was the most surprising that, Ugreen, a brand I hated and in my impression is close to ORICO, provides fair products.</p><p>Double check my conclusions, I purchased CM588. To be honest, the quality is really good, heavy metal which helps to cool faster, worth the extra cost comparing with plastic model.</p><p><img src="1.jpg" alt="CM588"></p><p>And the next, is about hibenation strategy. Unlike mount in chasis, if auto hibernation is enabled, constant start-ups and turning off rises great current, which, after multiple times, cause damage to the disk. Unless that the drive is used as the cold spare. So according to my usage, I’ll need to get rid of that limitation.</p><p>The controller of this model is JMS578, though I previouly confirmed that with the support, the tech support asked me to show hardware id to double check. I get it, it makes sense, not all customers would remember what they’ve bought. It’s just, to let the bay to be recognized in the system, a drive must be inserted. This is not good. Glad that I have a spare 2.5inch drive that fits, otherwise I wouldn’t use the HC320 to do this.</p><p>According to the tutorials, it is weird that flash hardware still require a drive inside. As this is the first time, it did cause me concerns. But it turns out to be fine, guees it’s the price of the extra protection.</p><p>The provided software is just like regular EEPROM flash program, so the steps are really simple, not like early years, you have to short-wire some of the pins on the chip, yikes.<br><img src="2.png" alt="Flash"></p><p>Press start, if everythings correct, the <code>F/W</code> and <code>EEPROM</code> should have two green <strong>PASS</strong>. That’s all I can do today.</p><hr><h2 id="Episode-1-DO-NOT-FORGET-ABOUT-3-2-1-RULE"><a href="#Episode-1-DO-NOT-FORGET-ABOUT-3-2-1-RULE" class="headerlink" title="[Episode 1] DO NOT FORGET ABOUT 3-2-1 RULE."></a>[Episode 1] DO NOT FORGET ABOUT 3-2-1 RULE.</h2><p>Obviously, I didn’t, so… I lost almost all previous data in the last three years about my past courses. Though, for those I needed frequently to check, I got backups on my own laptop, so things aren’t that bad..</p><p>And I have been quite a while for me to use the  raid card.</p><p>In a nutshell, I think I’ve found what is the real criminal after all those data loss. <strong>THAT IS THE RAID CARD!!!</strong> To be unpartially, indeed, my drives are all cheap retired disks from servers, which, they are more likely to encouter problems. But the error rate is unusual and extremely unstable, even if I swapped a newer drive.</p><p>Well, I know I’d better to check this everyday for at least two or three weeks to make sure that it is really working correctly right now. I want no longer suffer such data loss. It’s terrible.</p><p>And in the future, I plan to expand the NAS, though the detailed scheme is not decided yet. Because there’re just too many things to bother right now.</p><p>And I haven’t tell my stories yet.</p>]]></content>
    
    
    <summary type="html">&lt;p&gt;Now comes the second episode.</summary>


    <category term="Tweak" scheme="https://redbowtie.github.io/categories/Tweak/"/>
    
    
    <category term="NAS" scheme="https://redbowtie.github.io/tags/NAS/"/>
    
    <category term="Storage" scheme="https://redbowtie.github.io/tags/Storage/"/>
    
    <category term="Raid" scheme="https://redbowtie.github.io/tags/Raid/"/>
    
  </entry>
  
  <entry>
    <title>Blog update logs</title>
    <link href="https://redbowtie.github.io/2023/08/03/Log/"/>
    <id>https://redbowtie.github.io/2023/08/03/Log/</id>
    <published>2023-08-04T01:32:00.000Z</published>
    <updated>2023-08-11T17:19:58.490Z</updated>
    
    <content type="html"><![CDATA[<p>Time to make a separate article for this matter.<span id="more"></span></p><hr><p>Today I finally re-installed my system. Hate migration the most. It is worth noting that, compiled node modules can be reused and the compatible node version is <strong>16</strong>, at least not the latest LTS. and there’s no need to install hexo globally, just in the folder is enough. while using add <code>npx</code> at front works fine.</p><hr><p>Every time I try to add some features and the blog will malfunction due to some dependency errors and what so ever, which takes a lot of extra time to do some update or check verions..etc.</p><p>When migrating I always forget what extensions I added in previous one.<br>Maybe just add here for reference.</p><p>[Sat Mar 11 2023, 15:42] Fix: Equation rendering on site<br>Rendering at <code>localhost</code> works fine, but unable to see them at remote site.<br>Chrome error:<br><figure class="highlight plaintext"><table><tr><td class="gutter"><pre><span class="line">1</span><br></pre></td><td class="code"><pre><span class="line">Mixed Content: The page at &#x27;xxx&#x27; was loaded over HTTPS, but requested an insecure script &#x27;http://cdn.mathjax.org/mathjax/latest/MathJax.js?config=TeX-AMS-MML_HTMLorMML&#x27;. This request has been blocked; the content must be served over HTTPS.</span><br></pre></td></tr></table></figure><br>Change <code>url</code> in <code>node_modules/hexo-renderer-mathjax/mathjax.html</code></p><div class="alert danger no-icon"><p>Mathjax CDN shutting down</p></div><figure class="highlight plaintext"><table><tr><td class="gutter"><pre><span class="line">1</span><br></pre></td><td class="code"><pre><span class="line">Using alternatives, like: &#x27;https://cdnjs.cloudflare.com/ajax/libs/mathjax/2.7.1/MathJax.js?...&#x27;</span><br></pre></td></tr></table></figure><hr><p>[Tue Mar 22 2022, 11:59] Index Improvement<br>Feed:<br><figure class="highlight shell"><table><tr><td class="gutter"><pre><span class="line">1</span><br></pre></td><td class="code"><pre><span class="line"><span class="meta prompt_">$ </span><span class="language-bash">npm i hexo-generator-feed</span> </span><br></pre></td></tr></table></figure><br>Pin-top:<br><figure class="highlight shell"><table><tr><td class="gutter"><pre><span class="line">1</span><br><span class="line">2</span><br></pre></td><td class="code"><pre><span class="line"><span class="meta prompt_">$ </span><span class="language-bash">npm un hexo-generator-index</span></span><br><span class="line"><span class="meta prompt_">$ </span><span class="language-bash">npm i hexo-generator-index-pin-top</span> </span><br></pre></td></tr></table></figure></p><hr><p>[Tue Mar 22 2022, 14:25] Latex support<br><figure class="highlight shell"><table><tr><td class="gutter"><pre><span class="line">1</span><br><span class="line">2</span><br><span class="line">3</span><br></pre></td><td class="code"><pre><span class="line"><span class="meta prompt_">$ </span><span class="language-bash">npm Un hero-renderer-marked</span></span><br><span class="line"><span class="meta prompt_">$ </span><span class="language-bash">npm i hexo-renderer-kramed</span></span><br><span class="line"><span class="meta prompt_">$ </span><span class="language-bash">npm i hexo-renderer-mathjax</span></span><br></pre></td></tr></table></figure><br>with <a href="https://blog.csdn.net/qq_44766883/article/details/107103668">modification</a> of<br><code>node_modules/hexo-renderer-kramed/lib/renderer.js</code><br><code>node_modules/kramed/lib/rules/inline.js</code><br><code>node_modules/hexo-renderer-mathjax/mathjax.html</code></p><p>But maybe there’s a more elegant way to render latex, the website itself is static, so there’s not too much to worry about even using some deprecated components. But there exists some extensions like <strong><em>hexo-math</em></strong>, which I don’t know how it works and why it didn’t work, but one day I should swtich to it.</p><p>Well and plus, kramed <strong>does</strong> render quick. A lot faster than pandoc.</p><p>BTW, because render for LaTeX wasn’t available, so many equations were typed in different ways, which I suppose, I could have little time to fix.</p>]]></content>
    
    
    <summary type="html">&lt;p&gt;Time to make a separate article for this matter.</summary>


  </entry>
  
  <entry>
    <title>Create Personal Network with Tailscale</title>
    <link href="https://redbowtie.github.io/2023/08/03/tailscale/"/>
    <id>https://redbowtie.github.io/2023/08/03/tailscale/</id>
    <published>2023-08-04T00:10:00.000Z</published>
    <updated>2023-08-16T16:17:54.268Z</updated>
    
    <content type="html"><![CDATA[<!--excerpt--></p><!--toc--><h2 id="Why-I-do-this"><a href="#Why-I-do-this" class="headerlink" title="Why I do this"></a>Why I do this</h2><p>Cannot sure since when have I had this idea of connecting all my personal computers together. Maybe it’s because I wanna remote my comupter, or pass through resources on my NAS, etc. The demand is there, but not quite strong.</p><p>In the past the most stable way was to ask for a public IP from ISP, or, some solution as <code>zerotier</code>, then rent a server as bridge to . However, these two method have some security issues, or potential ones. I had limited attention on this and I don’t wanna change some settings then jsut got hacked. That would be bad.</p><p>And one day I asked two of my friends who are acquainted with networks, they suggested <code>innernet</code>, <code>tailscale</code>, <code>netmaker</code> and <code>wireguard</code>. Among them, <code>tailscale</code> is the most convenient solution and works fine even without bridge server.</p><p>And, official guides are very helpful, which can be seen <a href="https://tailscale.com/kb/start/">here</a></p><h2 id="Installation"><a href="#Installation" class="headerlink" title="Installation"></a>Installation</h2><p>As <code>tailscale</code> based on open source <code>WireGuard</code> protocal, and even has GUI, supports variety of environment, installation may be simple as you want, download packages or using command line. both are OK.</p><p>links are <a href="https://tailscale.com/download/">here</a> </p><p><img src="tail2.png" alt="LINKS"></p><h2 id="Binding-Machines"><a href="#Binding-Machines" class="headerlink" title="Binding Machines"></a>Binding Machines</h2><p>Take GUI as example. When you login, the next step would be asking you if you need to add it into your network. And for CLI version, it needs to set keys, but no loigin required.</p><div class="alert success no-icon"><p>By default, the authorization cycle of each machine is set to 180 days, which can be changed in the settings device management, also, you can turn on device approval for futher protection.</p></div><p><img src="3.png" alt="demo"></p><p>Maybe you would think that 180 is still to short, then for any individual machine, you can disable expiry in <code>Machines</code> tab. Then you can see <code>Expiry disabled</code><br><img src="4.png" alt="show"></p><h2 id="Test"><a href="#Test" class="headerlink" title="Test"></a>Test</h2><p>As all similar services do, any joined machine would be assigned with a unique IP address (not only v4, but also v6). That’s how you could access other devices in your personal network. Considering my experience, using v6 when available is the best choice.</p><p>The simplest way to test is to use <code>ping</code></p><p>As exposing  IP add. is not safe, so jump to the conclusion.</p><p>Under exact same LAN, the average latency would be <code>30ms</code>. The numbers increase and then reverse to small ones like 2ms. Which looks really strange, this could be my router behavior.</p><p>Onto a more practical approach, two of the devices are ipad/Mac using China Unicom cell data, and one is my NAS using wired network from the same ISP.  Ipad used Microsoft RDP to control my NAS, when connection stablized, the lag was incredibly acceptable. On the Mac side, avg. ping requires <code>200ms</code>. </p><p><strong>Astonishing!</strong></p><h2 id="Subnet-Routers"><a href="#Subnet-Routers" class="headerlink" title="Subnet Routers"></a>Subnet Routers</h2><p>TBC..</p><h2 id="Potential-Problems"><a href="#Potential-Problems" class="headerlink" title="Potential Problems"></a>Potential Problems</h2><div class="alert success no-icon"><p>GUI version of Tailscale uses VPN approach and which, surely conflicts with my regular proxy.</p></div><p>OK that is a mistake that I forget to turn off the enhanced mode of <code>Surge</code>.</p><p>I tried a lot using go-compiled extension, and not sure if I really messed up with my utun configurations, and the documentation of the third way is really poor, never mind.</p>]]></content>
    
    
    <summary type="html">&lt;p&gt;Emm, simple but enough.</summary>


    <category term="Tweak" scheme="https://redbowtie.github.io/categories/Tweak/"/>
    
    
    <category term="Networks" scheme="https://redbowtie.github.io/tags/Networks/"/>
    
  </entry>
  
  <entry>
    <title>Begin, again</title>
    <link href="https://redbowtie.github.io/2023/06/28/beginAgain/"/>
    <id>https://redbowtie.github.io/2023/06/28/beginAgain/</id>
    <published>2023-06-29T03:41:18.000Z</published>
    <updated>2023-06-29T02:37:22.660Z</updated>
    
    <content type="html"><![CDATA[<!--excerpt--></p><p>Hard to say that if I’ve already predicted this, or at least I realized this could happen.</p><p>There were a lot to say. I’m not keen on taking photos with others. While indeed, that’s something. But I didn’t get any sense of relief. I did not expected that talking with my counsellor would bring me sadness of some sort. Maybe it’s because she’s the one who knows me longest during these years. Meanwhile, she became unsatisfied with the current status of insitute. Her tone was different from ever. Just like I was. Probably those feelings resonoted.</p><p>Regardless of the extent that I accepted my result, I’ll eventually do. Wish that I could see some words earlier. On the other hand, at least to my knowledge, some things are inevitable. So consider this a lesson.</p><p>Life is hard, especially harder when similar things went to bad ends. Courages were exhausted, and the leftovers was smashed into grounds, teared apart.</p><p>Things get a little better after I made a newer CV, feels like getting woven threads straight. I got a lot, a lot to do. But I cannot do things like reviewing. Project-based study would be more appropriate.</p><p>The next two months are for the wheeled bipedal, time is limited, if only using LQR would make it work then that would be great. The robot serves as a platform for the upcoming research, pity that I cannot continue. So the main part here was to practice the actual implementation of STM32 and prototyping abilities. As well as the skills that I was not familiar with, like multibody, motor control (if not DC motor), and gazebo.</p><p>As for the rest? Time would tell.</p>]]></content>
    
    
    <summary type="html">&lt;p&gt;Finally I wrote this.</summary>


  </entry>
  
  <entry>
    <title>Double Inverted Pendulum on Two-wheeled Self-balancing Vehicle</title>
    <link href="https://redbowtie.github.io/2023/05/15/GradThesis/"/>
    <id>https://redbowtie.github.io/2023/05/15/GradThesis/</id>
    <published>2023-05-15T18:32:00.000Z</published>
    <updated>2023-06-28T13:49:24.527Z</updated>
    
    <content type="html"><![CDATA[<p>Next time I could do better. <span id="more"></span></p><p>To view the topic part, click <a href = "#start">here</a>, for some substantiation, I’ve skipped them, as they’re not presented clearly from the beginning.</p><p>To view the problems encoutered during implementation, click <a href = "#Exp">here</a>.</p><hr><!--toc--><hr><h2 id="N-Prologue"><a href="#N-Prologue" class="headerlink" title="N. Prologue"></a>N. Prologue</h2><p>I didn’t expect this to begin so early. <del>So I’ll try to make this a combination of <strong>paper writing</strong> and the <strong>project designing.</strong></del> Instead, the paper writing technique will be separated to <a href="../PaperWriting/">here</a>.</p><p><del>Oh, and mabe if the article is too long, I’ll consider to make it two.</del></p><hr><h1 id="I-Previously-on-inverted-pendulum"><a href="#I-Previously-on-inverted-pendulum" class="headerlink" title="I. Previously on  inverted pendulum"></a>I. Previously on  inverted pendulum</h1><p>Some priorities:</p><ul><li>Remodelling the invert pendulum due to the conflict between two models.</li></ul><h2 id="Construct-mathematical-model"><a href="#Construct-mathematical-model" class="headerlink" title="Construct mathematical model"></a>Construct mathematical model</h2><p>Well there are many ways to make such model such as from</p><ul><li>Lagrange equation</li><li>Force analysis</li></ul><p>So maybe I can go through most of them.</p><h3 id="Lagrange-equation"><a href="#Lagrange-equation" class="headerlink" title="Lagrange equation"></a>Lagrange equation</h3><script type="math/tex; mode=display">\frac{d}{dt}(\frac{\partial L}{\partial \dot{q_i}})-\frac{\partial L}{\partial q_i}=Q_i\tag{1.1}</script><script type="math/tex; mode=display">L = T-V \tag{1.2}</script><p>For cart:</p><script type="math/tex; mode=display">M,\ x_c,\ \dot{x_c},\ F</script><p>For the pole:</p><script type="math/tex; mode=display">m,\ l,\ J_c,\ \theta,\ \dot{\theta}</script><p>Note that $l$ is the total length of the pole.</p><p>The moment of inertia to center of mass:</p><script type="math/tex; mode=display">J_c = \frac{1}{12}ml^2</script><p>The moment of intertia to one end of the pole, perpendicular</p><script type="math/tex; mode=display">J=J_c+\frac{1}{4}ml^2=\frac{1}{3}ml^2 \tag{1.3}</script><p>The kinematic and potential energy for cart:</p><script type="math/tex; mode=display">T_c=\frac{1}{2}M\dot{x_c}^2,\ \ V_c=0 \tag{1.4}</script><p>The position of the pole:</p><script type="math/tex; mode=display">x_p=x_c+\frac{1}{2}l\sin\theta,\ \ y_p=\frac{1}{2}l\cos\theta \tag{1.5}</script><p>From <em>Eq. 5</em>, derive the pole’s kinematic and potential energy:</p><script type="math/tex; mode=display">T_p=\frac{1}{2}J_c\dot{\theta}^2+\frac{1}{2}m(\dot{x}_p^2+\dot{y}_p^2),\ \ V_p=\frac{1}{2}mgl\cos\theta \tag{1.6}</script><p>where</p><script type="math/tex; mode=display">\dot{x}_p=\dot{x_c}+\frac{1}{2}l\cos\theta\dot{\theta}, \ \ \dot{y}_p=-\frac{1}{2}l\sin\theta\dot{\theta} \tag{1.7}</script><p>Substitute <em>Eq. 4, 6, 7</em> into <em>Eq. 2</em></p><script type="math/tex; mode=display">L=T_c+T_p-V_p\\=\frac{1}{2}M\dot{x_c}^2+\frac{1}{2}J_c\dot{\theta}^2+\frac{1}{2}m((\dot{x_c}+\frac{1}{2}l\cos\theta\dot{\theta})^2+(-\frac{1}{2}l\sin\theta\dot{\theta})^2)-\frac{1}{2}mgl\cos\theta</script><script type="math/tex; mode=display">=\frac{1}{2}M\dot{x_c}^2+\frac{1}{2}J_c\dot{\theta}^2+\frac{1}{2}m(\dot{x}_c^2+\dot{x}_cl\cos(\theta)\dot{\theta}+\frac{1}{4}l^2\cos^2(\theta)\dot{\theta}^2+\frac{1}{4}l^2\sin^2(\theta)\dot{\theta}^2)\\-\frac{1}{2}mgl\cos\theta</script><script type="math/tex; mode=display">=\frac{1}{2}M\dot{x_c}^2+\frac{1}{2}J_c\dot{\theta}^2+\frac{1}{2}m(\dot{x}_c^2+\dot{x}_cl\cos(\theta)\dot{\theta}+\frac{1}{4}l^2\dot{\theta}^2)-\frac{1}{2}mgl\cos\theta</script><script type="math/tex; mode=display">=\frac{1}{2}(M+m)\dot{x}_c^2+\frac{1}{2}(J_c+\frac{1}{4}ml^2)\dot{\theta}^2+\frac{1}{2}ml\cos(\theta)\dot{\theta}\dot{x}_c-\frac{1}{2}mgl\cos\theta\tag{1.8}</script><p>Using <em>Eq. 1</em> for displacement:</p><script type="math/tex; mode=display">x_c:\frac{d}{dt}(\frac{\partial L}{\partial\dot{x}_c})-\frac{\partial L}{\partial x_c}=F \tag{1.9}</script><script type="math/tex; mode=display">\frac{\partial L}{\partial\dot{x_c}}=(M+m)\dot{x}_c+\frac{1}{2}ml\cos(\theta)\dot{\theta}</script><script type="math/tex; mode=display">\frac{\partial L}{\partial x_c}=0</script><p>Substitute:</p><script type="math/tex; mode=display">\frac{d}{dt}(\frac{\partial L}{\partial\dot{x_c}})=(M+m)\ddot{x}_c+\frac{1}{2}ml(-\sin(\theta)\dot{\theta}^2+cos(\theta)\ddot{\theta})=F\tag{1.10}</script><p>Using <em>Eq. 1</em> for angle: </p><script type="math/tex; mode=display">\theta:\frac{d}{dt}(\frac{\partial L}{\partial\dot{\theta}})-\frac{\partial L}{\partial \theta}=0\tag{1.11}</script><script type="math/tex; mode=display">\frac{\partial L}{\partial\dot{\theta}}=(J_c+\frac{1}{4}ml^2)\dot{\theta}+\frac{1}{2}ml\cos(\theta)\dot{x}_c</script><script type="math/tex; mode=display">\frac{\partial L}{\partial \theta}=-\frac{1}{2}ml\sin(\theta)\dot{\theta}\dot{x}_c+\frac{1}{2}mgl\sin(\theta)</script><script type="math/tex; mode=display">\frac{d}{dt}(\frac{\partial L}{\partial\dot{\theta}})=(J_c+\frac{1}{4}ml^2)\ddot{\theta}-\frac{1}{2}ml\sin(\theta)\dot{\theta}\dot{x}_c+\frac{1}{2}mgl\cos(\theta)\ddot{x}_c</script><p>Substuting:</p><script type="math/tex; mode=display">(J_c+\frac{1}{4}ml^2)\ddot{\theta}-\frac{1}{2}ml\sin(\theta)\dot{\theta}\dot{x}_c+\frac{1}{2}mgl\cos(\theta)\ddot{x}_c\\ +\frac{1}{2}ml\sin(\theta)\dot{\theta}\dot{x}_c-\frac{1}{2}mgl\sin(\theta)</script><script type="math/tex; mode=display">= (J_c+\frac{1}{4}ml^2)\ddot{\theta}+\frac{1}{2}mgl\cos(\theta)\ddot{x}_c-\frac{1}{2}mgl\sin(\theta)=0\tag{1.12}</script><p>Now we have the following relation:</p><script type="math/tex; mode=display">\left\{\begin{array}{l}(M+m)\ddot{x}_c+\frac{1}{2}ml(-\sin(\theta)\dot{\theta}^2+cos(\theta)\ddot{\theta})=F,\\(J_c+\frac{1}{4}ml^2)\ddot{\theta}+\frac{1}{2}mgl\cos(\theta)\ddot{x}_c-\frac{1}{2}mgl\sin(\theta)=0\end{array}\right.\tag{1.13}</script><p>Rewrite the system into matrix form:</p><script type="math/tex; mode=display">\left[\begin{array}{cc}M+m & \frac{1}{2}ml\cos(\theta)\\\frac{1}{2}ml\cos(\theta) & J_c+\frac{1}{4}ml^2\end{array}\right]\left[\begin{array}{c}\ddot{x}_c \\\ddot{\theta}\end{array}\right]+\left[\begin{array}{cc}0 & -\frac{1}{2}ml\sin(\theta)\dot{\theta}\\0 & 0\end{array}\right]\left[\begin{array}{c}\dot{x}_c \\\dot{\theta}\end{array}\right]=\left[\begin{array}{c}F \\\frac{1}{2}mgl\sin(\theta)\end{array}\right]</script><p>Introduce</p><script type="math/tex; mode=display">Q=\left[\begin{array}{cc}M+m & \frac{1}{2}ml\cos(\theta)\\\frac{1}{2}ml\cos(\theta) & J_c+\frac{1}{4}ml^2\end{array}\right]</script><p>and whose inverse matrix:</p><script type="math/tex; mode=display">Q^{-1}=\left[\begin{array}{cc}\frac{4J}{\sigma} & -\frac{2ml\cos(\theta)}{\sigma}\\-\frac{2ml\cos(\theta)}{\sigma} & \frac{4(M+m)}{\sigma}\end{array}\right],\ \  \sigma=-m^2l^2\cos^2\theta+4J(M+m)</script><p>under the condition  $\theta\ll 1$</p><script type="math/tex; mode=display">cos\theta\approx 1,\ \ \sin\theta\approx\theta,\ \ \\sin(\theta)\dot{\theta}\approx0</script><script type="math/tex; mode=display">Q_l^{-1}=\left[\begin{array}{cc}\frac{4J}{\sigma} & -\frac{2ml}{\sigma}\\-\frac{2ml}{\sigma} & \frac{4(M+m)}{\sigma}\end{array}\right],\ \  \sigma=-m^2l^2+4J(M+m)</script><script type="math/tex; mode=display">\left[\begin{array}{c}\ddot{x}_c \\\ddot{\theta}\end{array}\right]=Q_l^{-1}\left[\begin{array}{c}F \\\frac{1}{2}mgl\theta\end{array}\right]</script><script type="math/tex; mode=display">\left[\begin{array}{c}\ddot{x}_c \\\ddot{\theta}\end{array}\right]=\left[\begin{array}{c}\frac{4FJ-gl^2m^2\theta}{\sigma}\\\frac{2ml((M+m)g\theta-F)}{\sigma}\end{array}\right],\ \ \sigma=-m^2l^2+4J(M+m)\tag{1.14}</script><p>Expand states, perform linearlization,</p><script type="math/tex; mode=display">\dot{x}=\left[\begin{array}{c}\dot{x}_c \\\ddot{x}_c \\\dot{\theta} \\\ddot{\theta}\end{array}\right], \ \ y=\left[\begin{array}{c}x_c \\\theta \\\end{array}\right]</script><p>In state-space representation</p><script type="math/tex; mode=display">\left[\begin{array}{c}\dot{x}_c \\\ddot{x}_c \\\dot{\theta} \\\ddot{\theta}\end{array}\right]=\left[\begin{array}{cccc}0 & 1 & 0 & 0 \\0 & 0 & \frac{-gm^2l^2}{\sigma}&0\\0 & 0 & 0 & 1\\0 & 0 & \frac{2ml(M+m)}{\sigma} & 0\end{array}\right]\left[\begin{array}{c}x_c \\\dot{x}_c \\\theta \\\dot{\theta}\end{array}\right]+\left[\begin{array}{c}\frac{4J}{\sigma}\\0\\\frac{-ml}{\sigma} \\0\end{array}\right]F\tag{1.15}</script><script type="math/tex; mode=display">\left[\begin{array}{c}x_c \\\theta \\\end{array}\right]=\left[\begin{array}{cccc}1&0&0&0\\0&0&1&0\\\end{array}\right]\left[\begin{array}{c}x_c \\\dot{x}_c \\\theta \\\dot{\theta}\end{array}\right]\tag{1.16}</script><hr><h3 id="Force-analysis"><a href="#Force-analysis" class="headerlink" title="Force analysis"></a>Force analysis</h3><p>As there are some notation error in the reference document, I assume I shouold do the process once again to ensure this is the right thing. </p><p>For the torque of pole with respect to one end:</p><script type="math/tex; mode=display">J\ddot{\theta} = F_y\cdot\frac{1}{2}l\sin(\theta)-F_x\cdot\frac{1}{2}l\cos(\theta)\tag{2.1}</script><p>(note that the sign for couter-clockwise torque is negative, while the positive direction of $F_y$ is downward)</p><p>Some process is eliminated to cut redundant part.</p><p>Newton’s third law on the pole’s center of mass (refer to <em>Eq 1.5</em>):</p><script type="math/tex; mode=display">F_x = m\frac{d^2}{d^2t}(x+\frac{1}{2}l\sin(\theta))\tag{2.2}</script><script type="math/tex; mode=display">F_y=mg-\frac{1}{2}ml\frac{d^2}{d^2t}(\cos(\theta))\tag{2.3}</script><p>And the motion of cart:</p><script type="math/tex; mode=display">F-F_x=M(\frac{d^2 x}{d^2t})\tag{2.4}</script><p>Considering the formulas above Eq 2.1, 2, 3, 4, obtain the mathematical model:</p><script type="math/tex; mode=display">\left\{\begin{array}{l}\ddot{x}=\frac{}{},\\\ddot{\theta}=\frac{}{}\end{array}\right.</script><p><strong>Currently, this part will be suspended until the main thesis is complete.</strong></p><hr><p><div id ="start"></div></p><h1 id="II-Thesis-Topic"><a href="#II-Thesis-Topic" class="headerlink" title="II. Thesis Topic"></a>II. Thesis Topic</h1><h3 id="The-Design-of-Controllers-for-Two-wheeled-Self-balancing-Robot"><a href="#The-Design-of-Controllers-for-Two-wheeled-Self-balancing-Robot" class="headerlink" title="The Design of Controllers for Two-wheeled Self-balancing Robot"></a>The Design of Controllers for Two-wheeled Self-balancing Robot</h3><p><img src="https://i.imgur.com/FdfgmHT.png" alt="Structure"></p><p>As the robot itself, the <strong>double-pendulum</strong> structure is selected.</p><p>Notations for parameters of the robot are as follows:</p><div class="table-container"><table><thead><tr><th style="text-align:center">Parameter Name</th><th style="text-align:center">Symbol</th><th style="text-align:center">Unit</th></tr></thead><tbody><tr><td style="text-align:center">Mass of First pendulum</td><td style="text-align:center">$M_1$</td><td style="text-align:center">$kg$</td></tr><tr><td style="text-align:center">Mass of Second Pendulum</td><td style="text-align:center">$M_2$</td><td style="text-align:center">$kg$</td></tr><tr><td style="text-align:center">Length to the CoM the First pendulum</td><td style="text-align:center">$L_1$</td><td style="text-align:center">$m$</td></tr><tr><td style="text-align:center">Length to the CoM the Second pendulum</td><td style="text-align:center">$L_2$</td><td style="text-align:center">$m$</td></tr><tr><td style="text-align:center">Length between center of wheels</td><td style="text-align:center">$D_m$</td><td style="text-align:center">$m$</td></tr><tr><td style="text-align:center">Radius of wheels</td><td style="text-align:center">$R_w$</td><td style="text-align:center">$m$</td></tr><tr><td style="text-align:center">Mass of the wheels</td><td style="text-align:center">$M_L=M_R=M_w$</td><td style="text-align:center">$kg$</td></tr><tr><td style="text-align:center">Inertia of the wheels</td><td style="text-align:center">$J_L=J_R=J_w$</td><td style="text-align:center">$N\cdot m/rad$</td></tr></tbody></table></div><p>Notations for variables of the robot are as follows</p><div class="table-container"><table><thead><tr><th style="text-align:center">Parameter Name</th><th style="text-align:center">Symbol</th><th style="text-align:center">Unit</th></tr></thead><tbody><tr><td style="text-align:center">Pitch angle of lower pendulum</td><td style="text-align:center">$\theta_1$</td><td style="text-align:center">$rad$</td></tr><tr><td style="text-align:center">Pitch angle of upper pendulum</td><td style="text-align:center">$\theta_2$</td><td style="text-align:center">$rad$</td></tr><tr><td style="text-align:center">Yaw angle</td><td style="text-align:center">$\psi$</td><td style="text-align:center">$rad$</td></tr><tr><td style="text-align:center">Angular Displacement of wheels</td><td style="text-align:center">$\theta_L, \theta_R$</td><td style="text-align:center">$rad/s$</td></tr><tr><td style="text-align:center">Linear speed of the wheels</td><td style="text-align:center">$x_L, x_R$</td><td style="text-align:center">$m/s$</td></tr><tr><td style="text-align:center">System forward speed</td><td style="text-align:center">$x =(x_L+x_R)/2$</td><td style="text-align:center">$m/s$</td></tr></tbody></table></div><h2 id="1-Kinematics-Modelling"><a href="#1-Kinematics-Modelling" class="headerlink" title="1. Kinematics Modelling"></a>1. Kinematics Modelling</h2><p>Describing its relation without considering internal effects.</p><h3 id="Velocity-Analysis"><a href="#Velocity-Analysis" class="headerlink" title="Velocity Analysis"></a>Velocity Analysis</h3><h4 id="1-1-The-velocity-of-the-CoM-Center-of-Mass-for-lower-body"><a href="#1-1-The-velocity-of-the-CoM-Center-of-Mass-for-lower-body" class="headerlink" title="1.1 The velocity of the CoM (Center of Mass) for lower body:"></a>1.1 The velocity of the CoM (Center of Mass) for lower body:</h4><p>Yaw angle is not considered in the reasearch.</p><script type="math/tex; mode=display">V_{C1}=\left[\begin{array}{ccc}vX_{C1} & vY_{C1} & vZ_{C1}\end{array}\right]^\intercal = \left[\begin{array}{c}\dot{x}+l_1\dot{\theta}_1\cos\theta_1\\0\\-l_1\dot\theta_1\sin\theta_1\end{array}\right]\tag{1-1}</script><h4 id="1-2-The-speed-of-the-CoM-for-Upper-rod"><a href="#1-2-The-speed-of-the-CoM-for-Upper-rod" class="headerlink" title="1.2 The speed of the CoM for Upper rod:"></a>1.2 The speed of the CoM for Upper rod:</h4><script type="math/tex; mode=display">V_{C2}=\left[\begin{array}{ccc}vX_{C2} & vY_{C2} & vZ_{C2}\end{array}\right]^\intercal = \left[\begin{array}{c}\dot{x}+l_2\dot{\theta}_2\cos\theta_2+2l_1\dot\theta_1\cos\theta_1\\0\\-l_2\dot\theta_2\sin\theta_2-2l_1\dot\theta_1\sin\theta_1\end{array}\right]\tag{1-2}</script><h4 id="1-3-The-horizontal-linear-velocity-of-wheels-CoM"><a href="#1-3-The-horizontal-linear-velocity-of-wheels-CoM" class="headerlink" title="1.3 The horizontal linear velocity of wheels (CoM):"></a>1.3 The horizontal linear velocity of wheels (CoM):</h4><script type="math/tex; mode=display">\left\{\begin{array}{rcl}\dot x_L &=& R_w\dot\theta_L\\\dot x_R &=& R_w\dot\theta_R\\\dot x &=& \frac{1}{2}\cdot(\dot x_L + \dot x_R)\end{array}\right.</script><h4 id="1-4-The-velocity-for-B-1-B-2-in-angle-coordinates-deprecated"><a href="#1-4-The-velocity-for-B-1-B-2-in-angle-coordinates-deprecated" class="headerlink" title="1.4 The velocity for $B_1,\  B_2$ in angle coordinates. (deprecated)"></a>1.4 The velocity for $B_1,\  B_2$ in angle coordinates. (deprecated)</h4><script type="math/tex; mode=display">\Omega_i=\left[\begin{array}{ccc}\omega X_i & \omega Y_i & \omega Z_i\end{array}\right]^\intercal = \left[\begin{array}{ccc}\dot\phi\sin\theta_i & \dot\theta_i & \dot\phi\cos\theta_i\end{array}\right]^\intercal, (i=1,2)\tag{1-4}</script><h4 id="1-5-The-velocity-for-wheels-in-angle-coordinates-deprecated"><a href="#1-5-The-velocity-for-wheels-in-angle-coordinates-deprecated" class="headerlink" title="1.5 The velocity for wheels in angle coordinates: (deprecated)"></a>1.5 The velocity for wheels in angle coordinates: (deprecated)</h4><script type="math/tex; mode=display">\Omega_{w_k}=\left[\begin{array}{ccc}\omega X_k & \omega Y_k & \omega Z_k\end{array}\right]^\intercal = \left[\begin{array}{ccc}\dot\phi\sin\varphi_k & \dot\varphi_k & \dot\phi\cos\varphi_k\end{array}\right]^\intercal, (k=L, R)\tag{1-5}</script><h4 id="1-6-Plane-motion"><a href="#1-6-Plane-motion" class="headerlink" title="1.6 Plane motion"></a>1.6 Plane motion</h4><script type="math/tex; mode=display">\left\{\begin{array}{l}\dot x =\frac{R_w}{2}(\dot\theta_L+\dot\theta_R)\\\dot\psi= \frac{R_w}{D_m}(\dot\theta_R-\dot\theta_L)\end{array}\right.\tag{1-6}</script><script type="math/tex; mode=display">\left[\begin{array}{c}\dot\theta_L\\\dot\theta_R\end{array}\right]=\frac{1}{R_w}\left[\begin{array}{cc}-D_m/2 & 1\\D_m/2 & 1\end{array}\right]\left[\begin{array}{c}\dot x\\\dot\psi\end{array}\right]\tag{1-7}</script><hr><h2 id="2-Dynamics-Modelling"><a href="#2-Dynamics-Modelling" class="headerlink" title="2. Dynamics Modelling"></a>2. Dynamics Modelling</h2><h4 id="2-1-Select-3-DoF-of-the-robots-as-general-coordinates"><a href="#2-1-Select-3-DoF-of-the-robots-as-general-coordinates" class="headerlink" title="2.1 Select 3 DoF of the robots as general coordinates."></a>2.1 Select 3 DoF of the robots as general coordinates.</h4><script type="math/tex; mode=display">q=\left[\begin{array}{cccc}x & \theta_1 & \theta_2\end{array}\right]\tag{2-1}</script><h4 id="2-2-The-kinematic-engergy-for-the-system"><a href="#2-2-The-kinematic-engergy-for-the-system" class="headerlink" title="2.2 The kinematic engergy for the system"></a>2.2 The kinematic engergy for the system</h4><h5 id="Wheel"><a href="#Wheel" class="headerlink" title="Wheel:"></a>Wheel:</h5><p>The kinetic engergy include the translational kinetic engergy  $T_L$ and $T_R$, and the rotational kinetic engergy when wheels rotates around the shaft.</p><script type="math/tex; mode=display">T_L=\frac{1}{2}m_w\dot x_L^2=\frac{1}{2}m_wR_w^2\dot\theta_L^2</script><p>Similarly</p><script type="math/tex; mode=display">T_R=\frac{1}{2}m_w\dot x_R^2=\frac{1}{2}m_wR_w^2\dot\theta_R^2</script><p>As for ratational kinetic engery:</p><script type="math/tex; mode=display">\left\{\begin{array}{rcl}P_L &=& \frac{1}{2}J_w\dot\theta_L^2\\P_R &=& \frac{1}{2}J_w\dot\theta_R^2\end{array}\right.</script><script type="math/tex; mode=display">\begin{array}{rcl}T_1&=&T_L+T_R+P_L+P_R\\&=& \frac{1}{2}m_w(\dot x_L^2+\dot x_R^2)+\frac{1}{2}J_w(\dot\theta_L^2+\dot\theta_R^2)\\&=& \frac{1}{2}(m_wR_w^2+J_w)(\dot\theta_L^2+\dot\theta_R^2)\end{array}</script><p>As the turning is not considered, $\dot\theta_L=\dot\theta_R$</p><script type="math/tex; mode=display">\begin{array}{rcl}T_1&=&\frac{1}{2}(m_wR_w^2+J_w)\frac{2\dot x^2}{R_w^2}\\&=&\frac{(mR^2+J_w)}{R^2}\dot x^2\end{array}</script><h5 id="Cart"><a href="#Cart" class="headerlink" title="Cart:"></a>Cart:</h5><p>Cart - Translational</p><script type="math/tex; mode=display">\begin{array}{rcl}T_{c} &=& \frac{1}{2}m_1V_{C1}^\intercal V_{C1}\\&=& \frac{1}{2}m_1[(\dot{x}+l_1\dot{\theta}_1\cos\theta_1)^2+(-l_1\dot\theta_1\sin\theta_1)^2]\\&=&\frac{1}{2}m_1[l_1^2\dot\theta_1^2+2l_1\dot\theta_1\dot x\cos\theta_1+\dot x^2]\end{array}</script><p>Cart - Rotational</p><script type="math/tex; mode=display">P_{Yc}=\frac{1}{2}J_{\theta_1} \dot\theta_1^2</script><p>Cart - whole</p><script type="math/tex; mode=display">\begin{array}{rcl}T_2 &=& T_{c}+P_{Yc}\\&=& \frac{1}{2}m_1[l_1^2\dot\theta_1^2+2l_1\dot\theta_1\dot x\cos\theta_1+\dot x^2]+\frac{1}{2}J_{\theta_1} \dot\theta_1^2\\&=& \frac{1}{2}(m_1l_1^2+J_{\theta_1})\dot\theta_1^2+ m_1l_1\dot x\dot\theta_1\cos\theta_1+ \frac{1}{2}m_1\dot x^2\end{array}</script><h5 id="Pendulum"><a href="#Pendulum" class="headerlink" title="Pendulum:"></a>Pendulum:</h5><p>Pendulum - Translational</p><script type="math/tex; mode=display">\begin{array}{rcl}T_{p} &=& \frac{1}{2}m_2V_{C2}^\intercal V_{C2}\\&=& \frac{1}{2}m_2[(\dot{x}+l_2\dot{\theta}_2\cos\theta_2+2l_1\dot\theta_1\cos\theta_1)^2+ (-l_2\dot\theta_2\sin\theta_2-2l_1\dot\theta_1\sin\theta_1)^2]\\&=& \frac{1}{2}m_2[l_2^2\dot\theta_2^2+4l_1^2\dot\theta_1^2+(2l_2\dot\theta_2\cos\theta_2+4l_1\dot\theta_1\cos\theta_1)\dot x+4l_1l_2\dot\theta_1\dot\theta_2(\sin\theta_1\sin\theta_2+\cos\theta_1\cos\theta_2)+\dot x^2]\end{array}</script><p>Pendulum - Rotational</p><script type="math/tex; mode=display">P_{Yp}=\frac{1}{2}J_{\theta_2}\dot\theta_2^2</script><p>Pendulum - Whole</p><script type="math/tex; mode=display">\begin{array}{rcl}T_3  &=& T_p+P_{Yp}\\&=& \frac{1}{2}m_2[l_2^2\dot\theta_2^2+4l_1^2\dot\theta_1^2+(2l_2\dot\theta_2\cos\theta_2+4l_1\dot\theta_1\cos\theta_1)\dot x+4l_1l_2\dot\theta_1\dot\theta_2(\sin\theta_1\sin\theta_2+\cos\theta_1\cos\theta_2)+\dot x^2]+ \frac{1}{2}J_{\theta_2}\dot\theta_2^2\\&=& \frac{1}{2}(m_2l_2^2+J_{\theta_2})\dot\theta_2^2+2m_2l_1^2\dot\theta_1^2\\&&+m_2(l_2\dot\theta_2\cos\theta_2+2l_1\dot\theta_1\cos\theta_1)\dot x\\&&+2m_2l_1l_2\dot\theta_1\dot\theta_2(\sin\theta_1\sin\theta_2+\cos\theta_1\cos\theta_2)\\&&+\frac{1}{2}m_2\dot x^2\end{array}</script><p>Thus the whole kinetic engergy for the system:</p><script type="math/tex; mode=display">\begin{array}{rcl}T &=& T_1+T_2+T_3\\&=& [\frac{1}{2}(m_1+m_2)+\frac{(mR^2+J_w)}{R^2}]\dot x^2\\&& +\frac{1}{2}(m_1l_1^2+J_{\theta_1}+4m_2l_1^2)\dot\theta_1^2+\frac{1}{2}(m_2l_2^2+J_{\theta_2})\dot\theta_2^2\\&& +((m_1l_1+2m_2l_1)\dot\theta_1\cos\theta_1+m_2l_2\dot\theta_2\cos\theta_2)\dot x\\&& +2m_2l_1l_2\dot\theta_1\dot\theta_2\cos(\theta_1-\theta_2)\end{array}</script><p><strong>Potential engergy:</strong><br>The potential engergy for the sysstem equals:</p><script type="math/tex; mode=display">\begin{array}{rcl}V &=& m_1gl_1\cos\theta_1+m_2g(2l_1\cos\theta_1+l_2\cos\theta_2)\\&=& (m_1+2m_2)gl_1\cos\theta_1 + m_2gl_2\cos\theta_2\end{array}</script><h3 id="2-3-Lagrangian"><a href="#2-3-Lagrangian" class="headerlink" title="2.3 Lagrangian"></a>2.3 Lagrangian</h3><p>Now we have the <strong>Lagrangian</strong>:</p><script type="math/tex; mode=display">\begin{array}{rcl}L &=& T-V\\&=& [\frac{1}{2}(m_1+m_2)+\frac{(mR^2+J_w)}{R^2}]\dot x^2\\&&+\frac{1}{2}(m_1l_1^2+J_{\theta_1}+4m_2l_1^2)\dot\theta_1^2+\frac{1}{2}(m_2l_2^2+J_{\theta_2})\dot\theta_2^2\\&&+((m_1l_1+2m_2l_1)\dot\theta_1\cos\theta_1+m_2l_2\dot\theta_2\cos\theta_2)\dot x\\&&+2m_2l_1l_2\dot\theta_1\dot\theta_2(\sin\theta_1\sin\theta_2+\cos\theta_1\cos\theta_2)\\&&- (m_1+2m_2)gl_1\cos\theta_1 - m_2gl_2\cos\theta_2\end{array}</script><p>To simplify the lagrangian, using $M_{ij}$ to replace constant coefficients:</p><script type="math/tex; mode=display">\begin{array}{rcl}L&=& T-V\\&=& M_{11}\dot x^2\\&&+M_{21}\dot\theta_1^2+M_{22}\dot\theta_2^2\\&&+(M_{31}\dot\theta_1\cos\theta_1+M_{32}\dot\theta_2\cos\theta_2)\dot x\\&&+M_{41}\dot\theta_1\dot\theta_2(\sin\theta_1\sin\theta_2+\cos\theta_1\cos\theta_2)\\&&-M_{51}\cos\theta_1 - M_{52}\cos\theta_2\end{array}</script><p>where, </p><script type="math/tex; mode=display">\left[\begin{array}{c}M_{11}\\M_{21}\\M_{22}\\M_{31}\\M_{32}\\M_{41}\\M_{51}\\M_{52}\end{array}\right]=\left[\begin{array}{c}\frac{1}{2}(m_1+m_2)+\frac{(mR^2+J_w)}{R^2}\\\frac{1}{2}(m_1l_1^2+J_{\theta_1}+4m_2l_1^2)\\\frac{1}{2}(m_2l_2^2+J_{\theta_2})\\m_1l_1+2m_2l_1\\m_2l_2\\2m_2l_1l_2\\(m_1+2m_2)gl_1\\m_2gl_2\end{array}\right]</script><p><strong>Lagrangian equation:</strong><br>Generalized coordinates: $[x\ \theta_1\ \theta_2]$</p><script type="math/tex; mode=display">\left\{\begin{array}{rcl}\frac{d}{dt}(\frac{\partial L}{\partial\dot x})-\frac{\partial L}{\partial x}&=&\tau\\\frac{d}{dt}(\frac{\partial L}{\partial\dot \theta_1})-\frac{\partial L}{\partial \theta_1}&=&-2\tau\\\frac{d}{dt}(\frac{\partial L}{\partial\dot \theta_2})-\frac{\partial L}{\partial \theta_2}&=&0\\\end{array}\right.</script><p>Simplified equation:</p><script type="math/tex; mode=display">\left\{\begin{array}{rcl}2M_{11}\ddot x - M_{31}\dot\theta_1^2\sin\theta_1 - M_{32}\dot\theta_2^2\sin\theta_2 + M_{31}\ddot\theta_1\cos\theta_1 + M_{32}\ddot\theta_2\cos\theta_2 &=& \tau\\2M_{21}\ddot\theta_1 - M_{51}\sin\theta_1 + M_{31}\ddot x\cos\theta_1 - M_{41}\dot\theta_2^2\cos\theta_1\sin\theta_2  + M_{41}\dot\theta_2^2\cos\theta_2\sin\theta_1 +M_{41}\ddot\theta_2\cos\theta_1\cos\theta_2 +M_{41}\ddot\theta_2\sin\theta_1\sin\theta_2 &=& -2\tau \\2M_{22}\ddot\theta_2 - M_{52}\sin\theta_2 + M_{32}\ddot x\cos\theta_2 + M_{41}\dot\theta_1^2\cos\theta_1\sin\theta_2 - M_{41}\dot\theta_1^2\cos\theta_2\sin\theta_1 +M_{41}\ddot\theta_1\cos\theta_1\cos\theta_2 +M_{41}\ddot\theta_1\sin\theta_1\sin\theta_2 &=& 0\end{array}\right.</script><h3 id="2-4-Linearization"><a href="#2-4-Linearization" class="headerlink" title="2.4 Linearization"></a>2.4 Linearization</h3><p>Perform linearization around $[x, 0, 0]$, thus that $\cos\theta=1,\ \sin\theta=\theta,\ \dot\theta^2=0$,  so that:</p><script type="math/tex; mode=display">\left\{\begin{array}{rcl}2M_{11}\ddot x + M_{31}\ddot\theta_1+ M_{32}\ddot\theta_2&=& \tau\\2M_{21}\ddot\theta_1 - M_{51}\theta_1 + M_{31}\ddot x+M_{41}\ddot\theta_2+M_{41}\ddot\theta_2\theta_1\theta_2 &=& -2\tau \\2M_{22}\ddot\theta_2 - M_{52}\theta_2 + M_{32}\ddot x +M_{41}\ddot\theta_1+M_{41}\ddot\theta_1\theta_1\theta_2 &=& 0\end{array}\right.</script><p>Also treat $\theta_1\theta_2=0$, we have </p><script type="math/tex; mode=display">\left\{\begin{array}{rcl}2M_{11}\ddot x + M_{31}\ddot\theta_1+ M_{32}\ddot\theta_2&=& \tau\\M_{31}\ddot x+2M_{21}\ddot\theta_1 + M_{41}\ddot\theta_2 - M_{51}\theta_1 &=& -2\tau \\M_{32}\ddot x + M_{41}\ddot\theta_1+ 2M_{22}\ddot\theta_2 - M_{52}\theta_2 &=& 0\end{array}\right.</script><p>Transform into matrix form:</p><script type="math/tex; mode=display">\left[\begin{array}{ccc}2M_{11} & M_{31} & M_{32}\\M_{31} & 2M_{21} & M_{41}\\M_{32}  & M_{41} & 2M_{22}\end{array}\right]\cdot\left[\begin{array}{c}\ddot x\\\ddot\theta_1\\\ddot\theta_2\end{array}\right]+\left[\begin{array}{ccc}0 & 0 & 0\\0 & -M_{51} & 0\\0 & 0 & -M_{52}\end{array}\right]\cdot\left[\begin{array}{c}x\\\theta_1\\\theta_2\end{array}\right]=\left[\begin{array}{c}\tau\\-2\tau\\0\end{array}\right]</script><p>Set $M=\left[\begin{array}{ccc}2M_{11} &amp; M_{31} &amp; M_{32}\\M_{31} &amp; 2M_{21} &amp; M_{41}\\M_{32}  &amp; M_{41} &amp; 2M_{22}\end{array}\right],\ M_{aux}=\left[\begin{array}{ccc}0 &amp; 0 &amp; 0\\0 &amp; -M_{51} &amp; 0\\0 &amp; 0 &amp; -M_{52}\end{array}\right]$</p><script type="math/tex; mode=display">M\cdot\left[\begin{array}{c}\ddot x\\\ddot\theta_1\\\ddot\theta_2\end{array}\right]=-M_{aux}\cdot\left[\begin{array}{c}x\\\theta_1\\\theta_2\end{array}\right]+\left[\begin{array}{c}\tau\\-2\tau\\0\end{array}\right]</script><p>Then multiply its inverse on both side (if inverse exist)</p><script type="math/tex; mode=display">\left[\begin{array}{c}\ddot x\\\ddot\theta_1\\\ddot\theta_2\end{array}\right]=M^{-1}\cdot(-M_{aux})\cdot\left[\begin{array}{c}x\\\theta_1\\\theta_2\end{array}\right]+M^{-1}\cdot\left[\begin{array}{c}\tau\\-2\tau\\0\end{array}\right]</script><p>Regard $M_f=M^{-1}\cdot(-M_{aux}),\ \ M_b=M^{-1}\cdot[\begin{array}{ccc}1&amp; -2&amp; 0\end{array}]^\intercal$ </p><script type="math/tex; mode=display">\left[\begin{array}{l}\dot x\\\dot \theta_1\\\dot \theta_2\\\ddot x\\\ddot\theta_1\\\ddot\theta_2\end{array}\right]=\left[\begin{array}{cc}0_{3\times3} & I_{3\times3}\\M_f & 0_{3\times 3}\end{array}\right]\cdot\left[\begin{array}{l}x\\\theta_1\\\theta_2\\\dot x\\\dot\theta_1\\\dot\theta_2\end{array}\right]+\left[\begin{array}{c}0_{3\times 1}\\M_b\end{array}\right]\cdot\tau</script><p>Thus we have</p><script type="math/tex; mode=display">\dot q = Aq+B\tau</script><p>where </p><script type="math/tex; mode=display">A=\left[\begin{array}{cc}0_{3\times3} & eye(3)\\M_f & 0_{3\times 3}\end{array}\right],\ \ B = \left[\begin{array}{c}0_{3\times 1}\\M_b\end{array}\right]</script><p>This is an implementation of the simplest expansion, other possible methods are: Tylor expansion (Maclaurin expansion), these two are more accurate, meanwhile it takes time to derive the corresponding  </p><hr><h3 id="2-5-Nonlinear-model"><a href="#2-5-Nonlinear-model" class="headerlink" title="2.5 Nonlinear model"></a>2.5 Nonlinear model</h3><p>For original relation:</p><script type="math/tex; mode=display">\left\{\begin{array}{rcl}2M_{11}\ddot x - M_{31}\dot\theta_1^2\sin\theta_1 - M_{32}\dot\theta_2^2\sin\theta_2 + M_{31}\ddot\theta_1\cos\theta_1 + M_{32}\ddot\theta_2\cos\theta_2 &=& \tau\\2M_{21}\ddot\theta_1 - M_{51}\sin\theta_1 + M_{31}\ddot x\cos\theta_1 - M_{41}\dot\theta_2^2\cos\theta_1\sin\theta_2  + M_{41}\dot\theta_2^2\cos\theta_2\sin\theta_1 +M_{41}\ddot\theta_2\cos\theta_1\cos\theta_2 +M_{41}\ddot\theta_2\sin\theta_1\sin\theta_2 &=& -2\tau \\2M_{22}\ddot\theta_2 - M_{52}\sin\theta_2 + M_{32}\ddot x\cos\theta_2 + M_{41}\dot\theta_1^2\cos\theta_1\sin\theta_2 - M_{41}\dot\theta_1^2\cos\theta_2\sin\theta_1 +M_{41}\ddot\theta_1\cos\theta_1\cos\theta_2 +M_{41}\ddot\theta_1\sin\theta_1\sin\theta_2 &=& 0\end{array}\right.</script><p>Apply transform:</p><script type="math/tex; mode=display">\left[\begin{array}{ccc}2M_{11} & M_{31}\cos\theta_1 & M_{32}\cos\theta_2\\M_{31}\cos\theta_1 & 2M_{21}  & M_{41}\cdot(\cos\theta_1\cos\theta_2+\sin\theta_1\sin\theta_2)\\M_{32}\cos\theta_2  & M_{41}\cdot(\cos\theta_1\cos\theta_2+\sin\theta_1\sin\theta_2) & 2M_{22}\end{array}\right]\cdot\left[\begin{array}{c}\ddot x\\\ddot\theta_1\\\ddot\theta_2\end{array}\right]+\left[\begin{array}{ccc}0 & -M_{31}\dot\theta_1\sin\theta_1 & -M_{32}\dot\theta_2\sin\theta_2\\0 & 0 & -M_{41}\dot\theta_2(\cos\theta_1\sin\theta_2-\cos\theta_2\sin\theta_1)\\0 & M_{41}\dot\theta_1(\cos\theta_1\sin\theta_2-\cos\theta_2\sin\theta_1) & 0\end{array}\right]\cdot\left[\begin{array}{c}\dot x\\\dot\theta_1\\\dot\theta_2\end{array}\right]=\left[\begin{array}{c}\tau\\-2\tau+M_{51}\sin\theta_1\\M_{52}\sin\theta_2\end{array}\right]</script><p>Using trigonometric function to simplify:</p><script type="math/tex; mode=display">\left[\begin{array}{ccc}2M_{11} & M_{31}\cos\theta_1 & M_{32}\cos\theta_2\\M_{31}\cos\theta_1 & 2M_{21}  & M_{41}\cdot\cos(\theta_1-\theta_2)\\M_{32}\cos\theta_2  & M_{41}\cdot\cos(\theta_1-\theta_2) & 2M_{22}\end{array}\right]\cdot\left[\begin{array}{c}\ddot x\\\ddot\theta_1\\\ddot\theta_2\end{array}\right]+\left[\begin{array}{ccc}0 & -M_{31}\dot\theta_1\sin\theta_1 & -M_{32}\dot\theta_2\sin\theta_2\\0 & 0 & -M_{41}\dot\theta_2\sin(\theta_1-\theta_2)\\0 & M_{41}\dot\theta_1\sin(\theta_1-\theta_2) & 0\end{array}\right]\cdot\left[\begin{array}{c}\dot x\\\dot\theta_1\\\dot\theta_2\end{array}\right]+\left[\begin{array}{c}0\\-M_{51}\sin\theta_1\\-M_{52}\sin\theta_2\end{array}\right]=\left[\begin{array}{c}\tau\\-2\tau\\0\end{array}\right]</script><p>Correspondingly:</p><script type="math/tex; mode=display">M_n\cdot\left[\begin{array}{c}\ddot x\\\ddot\theta_1\\\ddot\theta_2\end{array}\right]+M_{naux1}\cdot\left[\begin{array}{c}\dot x\\\dot\theta_1\\\dot\theta_2\end{array}\right]+M_{naux2}=\left[\begin{array}{c}\tau\\-2\tau\\0\end{array}\right]</script><p>where, </p><script type="math/tex; mode=display">M_n=\left[\begin{array}{ccc}2M_{11} & M_{31}\cos\theta_1 & M_{32}\cos\theta_2\\M_{31}\cos\theta_1 & 2M_{21}  & M_{41}\cdot\cos(\theta_1-\theta_2)\\M_{32}\cos\theta_2  & M_{41}\cdot\cos(\theta_1-\theta_2) & 2M_{22}\end{array}\right]</script><script type="math/tex; mode=display">M_{naux1}=\left[\begin{array}{ccc}0 & -M_{31}\dot\theta_1\sin\theta_1 & -M_{32}\dot\theta_2\sin\theta_2\\0 & 0 & -M_{41}\dot\theta_2\sin(\theta_1-\theta_2)\\0 & M_{41}\dot\theta_1\sin(\theta_1-\theta_2) & 0\end{array}\right],\ \M_{naux2}=\left[\begin{array}{c}0\\-M_{51}\sin\theta_1\\-M_{52}\sin\theta_2\end{array}\right]</script><p>Transform</p><script type="math/tex; mode=display">\left[\begin{array}{c}\ddot x\\\ddot\theta_1\\\ddot\theta_2\end{array}\right]=M_n^{-1}\cdot(-M_{naux1})\cdot\left[\begin{array}{c}\dot x\\\dot\theta_1\\\dot\theta_2\end{array}\right]+M_n^{-1}\cdot(-M_{naux2})+M_n^{-1}\left[\begin{array}{c}1\\-2\\0\end{array}\right]\cdot\tau</script><script type="math/tex; mode=display">\left[\begin{array}{c}\ddot x\\\ddot\theta_1\\\ddot\theta_2\end{array}\right]=f_q(q)+b_q(q)\tau\\</script><p>where,</p><script type="math/tex; mode=display">\begin{array}{rcl}f_q(q)&=&M_n^{-1}\cdot(-M_{naux1})\cdot\left[\begin{array}{c}\dot x\\\dot\theta_1\\\dot\theta_2\end{array}\right]+M_n^{-1}\cdot(-M_{naux2})\end{array}</script><script type="math/tex; mode=display">\begin{array}{rcl}b_q(q) &=&M_n^{-1}\left[\begin{array}{c}1\\-2\\0\end{array}\right]\end{array}</script><hr><h2 id="3-Algorithms"><a href="#3-Algorithms" class="headerlink" title="3. Algorithms"></a>3. Algorithms</h2><h3 id="SMC"><a href="#SMC" class="headerlink" title="SMC"></a>SMC</h3><script type="math/tex; mode=display">\left\{\begin{array}{rcl}x_1 &=& x\\\dot x_1 &=& x_2\\\dot x_2 &=& f_1(x)+b_1(x)u+d_1\end{array}\right.</script><script type="math/tex; mode=display">e = x-x_d</script><script type="math/tex; mode=display">s = ce+\dot e,\ c>0</script><p>target:</p><script type="math/tex; mode=display">\left\{\begin{array}{c}s \rightarrow 0\\\dot s \rightarrow 0\end{array}\right.\Rightarrowc\dot{e}+\ddot{e}=0</script><script type="math/tex; mode=display">c(\dot x_1 - \dot x_d)+(\ddot x_1 - \ddot x_d)=0</script><p>When $x_d$ is constant</p><script type="math/tex; mode=display">c\cdot x_2+f_1(x)+b_1(x)\cdot u+d_1=0</script><p>We have </p><script type="math/tex; mode=display">u_{eq1}=-\frac{f_1(x)+cx_2+d_1}{b_1(x)}</script><p>Set</p><script type="math/tex; mode=display">u = u_{eq}+u_{sw}</script><p>Select Lynapnov function</p><script type="math/tex; mode=display">\left\{\begin{array}{rcl}V(t) &=& \frac{1}{2}s^2\\\dot V &=& s\cdot \dot s\le 0\end{array}\right.</script><script type="math/tex; mode=display">\begin{array}{rcl}\dot V &=& s(cx_2+\dot x_2)\\&=& s(cx_2+f_1+b_1(u_{eq}+u_{sw})+d_1)\\&=& s(cx_2+f_1+b_1u_{eq}+b_1u_{sw}+d_1)\\&=& s(b_1u_{sw}+d_1)\end{array}</script><p>and to do so, using exponential reaching law, let:</p><script type="math/tex; mode=display">\begin{array}{c}b_1u_{sw} = -\eta\ sgn(s)-k\cdot s\end{array}</script><p>Then the equation becomes:</p><script type="math/tex; mode=display">\begin{array}{rcl}\dot V &=& s(-\eta sgn(s)-ks+d_1)\\&=& -\eta|s|-ks^2+sd_1\\&\le & -\eta|s|-ks^2+|s|\cdot|d_1|\end{array}</script><p>As $d_1$ is bounded and $|d_1|\le d_M$</p><script type="math/tex; mode=display">\begin{array}{rcl}\dot V &\le & -\eta|s|-ks^2+|s|\cdot d_M\\&\le & -ks^2 -|s|\cdot(\eta-d_M)\end{array}</script><p>Its easy to find that when $\eta&gt;d_M$</p><script type="math/tex; mode=display">\dot V\le 0</script><p>The sliding surface is stable.</p><hr><h3 id="HSMC"><a href="#HSMC" class="headerlink" title="HSMC"></a>HSMC</h3><script type="math/tex; mode=display">\left\{\begin{array}{rcl}\dot x_{2n-1} &=& x_{2n}\\\dot x_{2n} &=& f_n(x)+b_n(x)u\end{array}\right.</script><p>Set Sliding Surface</p><script type="math/tex; mode=display">s_n = c_n\cdot e_n + \dot e_n</script><p>Correspondingly we will have $n$ equivalent control</p><script type="math/tex; mode=display">u_{eq_n}=-\frac{f_n(x)+c_n\cdot x_{2n}}{b_n(x)}</script><p>Set larger level of sliding surface:</p><script type="math/tex; mode=display">S = \alpha s_1 + \beta s_2 + \gamma s_3+\dots</script><script type="math/tex; mode=display">u=\sum_1^n u_{eq_i}+u_{sw}</script><p>To satisfy the Lyapunov function</p><script type="math/tex; mode=display">u_{sw}=-\frac{\alpha b_1(x)u_{eq_1}+\beta b_2(x)u_{eq_2}+\gamma b_3(x)u_{eq_3}+\dots+\eta\ sgn(S)+k(S)}{\alpha b_1(x)+\beta b_2(x)+\gamma b_3(x)+\dots}</script><p>Take 3-layer as an example</p><script type="math/tex; mode=display">\begin{array}{rcl}\dot V &=& S \dot S\\&=& S(\alpha\dot s_1+\beta\dot s_2+\gamma\dot s_3)\\&=& S[\alpha(c_1x_2+\dot x_2)+\beta(c_2x_4+\dot x_4)+\gamma(c_3x_6+\dot x_6)]\\&=& S[\alpha(c_1x_2+f_1+b_1(u_{eq1}+u_{eq2}+u_{eq3}+u_{sw})+d_1)\\&&+\beta(c_2x_4+f_2+b_2(u_{eq1}+u_{eq2}+u_{eq3}+u_{sw})+d_2)\\&&+\gamma(c_3x_6+f_3+b_3(u_{eq1}+u_{eq2}+u_{eq3}+u_{sw})+d_3)]\\&=&S[\alpha b_1(u_{eq2}+u_{eq3}+u_{sw})+\beta b_2(u_{eq1}+u_{eq3}+u_{sw})+\gamma b_3(u_{eq1}+u_{eq2}+u_{sw})+(\alpha d_1+\beta d_2+\gamma d_3)]\\&=& S[(\alpha b_1+\beta b_2+\gamma b_3)u_{sw}+(\alpha d_1+\beta d_2+\gamma d_3)\\&&+[(\beta b_2+\gamma b_3)u_{eq1}+(\alpha b_1+\gamma b_3)u_{eq2}+(\alpha b_1+\beta b_2)u_{eq3}]]\end{array}</script><p>Let $(\alpha b_1+\beta b_2+\gamma b_3)u_{sw}+[(\beta b_2+\gamma b_3)u_{eq1}+(\alpha b_1+\gamma b_3)u_{eq2}+(\alpha b_1+\beta b_2)u_{eq3}]=-\eta sgn(S)-kS$</p><script type="math/tex; mode=display">\begin{array}{rcl}u_{sw} &=& (\alpha b_1+\beta b_2+\gamma b_3)^{-1}\{-[(\beta b_2+\gamma b_3)u_{eq1}+(\alpha b_1+\gamma b_3)u_{eq2}+(\alpha b_1+\beta b_2)u_{eq3}]-\eta\cdot sgn(S)-kS\}\\&=& -(\alpha b_1+\beta b_2+\gamma b_3)^{-1}[(\beta b_2+\gamma b_3)u_{eq1}+(\alpha b_1+\gamma b_3)u_{eq2}+(\alpha b_1+\beta b_2)u_{eq3}+\eta\cdot sgn(S)+kS]\end{array}</script><p>he remaining Lyapunov function proof is similar</p><script type="math/tex; mode=display">\begin{array}{rcl}\dot V &=& S[-\eta\cdot sgn(S)-kS+(\alpha d_1+\beta d_2+\gamma d_3)]\\&=& -\eta|S|-kS^2+S(\alpha d_1+\beta d_2+\gamma d_3)\\&\le&  -\eta|S|-kS^2+|S|\cdot|(\alpha d_1+\beta d_2+\gamma d_3)|\end{array}</script><p>As $d_i$ is bounded, assume that $|(\alpha d_1+\beta d_2+\gamma d_3)|\le D_M$ so if $\eta &gt;D_M$</p><script type="math/tex; mode=display">\begin{array}{rcl}\dot V &\le&  -\eta|S|-kS^2+|S|\cdot|(\alpha d_1+\beta d_2+\gamma d_3)|\\&\le& -kS^2-|S|\cdot(\eta-|(\alpha d_1+\beta d_2+\gamma d_3)|)\\&\le& -kS^2-(\eta-D_M)|S|\le0\end{array}</script><p>And hence,</p><script type="math/tex; mode=display">\begin{array}{rcl}u &=& u_{eq1}+u_{eq2}+u_{eq3}+u_{sw}\\&=& (\alpha b_1+\beta b_2+\gamma b_3)^{-1}[\alpha b_1u_{eq1}+\beta b_2u_{eq2}+\gamma b_3 u_{eq3}-\eta\cdot sgn(S)-kS]\end{array}</script><hr><h2 id="4-Controller-Design"><a href="#4-Controller-Design" class="headerlink" title="4. Controller Design"></a>4. Controller Design</h2><p>For linearized model:</p><script type="math/tex; mode=display">\left\{\begin{array}{rcl}\ddot \theta_1 &=& M_f(2,2)\theta_1+M_f(2,3)\theta_2+B(2,1)\tau\\\ddot \theta_2 &=& M_f(3,2)\theta_1+M_f(3,3)\theta_2+B(3,1)\tau\\\ddot x &=& M_f(1,2)\theta_1+M_f(1,3)\theta_2+B(1,1)\tau\end{array}\right.</script><script type="math/tex; mode=display">\left\{\begin{array}{rcl}e_1 &=& \theta_1-\theta_{1d},\ \ \dot e_1=\dot\theta_1\\e_2 &=& \theta_2-\theta_{2d},\ \ \dot e_2=\dot\theta_2\\e_3 &=& x-x_d,\ \ \dot e_3=\dot x\end{array}\right.</script><p>Set first-level sliding surface:</p><script type="math/tex; mode=display">\left\{\begin{array}{rcl}s_1 &=& c_1e_1+\dot e_1\\s_2 &=& c_2e_2+\dot e_2\\s_3 &=& c_3e_3+\dot e_3\end{array}\right.</script><p>Thus we have equivalent control law:</p><script type="math/tex; mode=display">\left\{\begin{array}{rcl}u_{eq1} &=& -\frac{(M_f(2,2)\theta_1+M_f(2,3)\theta_2)+c_1\dot\theta_1}{B(2,1)}\\u_{eq2} &=& -\frac{(M_f(3,2)\theta_1+M_f(3,3)\theta_2)+c_2\dot\theta_2}{B(3,1)}\\u_{eq3} &=& -\frac{(M_f(1,2)\theta_1+M_f(1,3)\theta_2)+c_3\dot x}{B(1,1)}\\\end{array}\right.</script><p>Set second level sliding surface:</p><script type="math/tex; mode=display">S=\alpha s_1+\beta s_2+\gamma s_3</script><p>We have switching control law:</p><script type="math/tex; mode=display">u_{sw}=-(\alpha b_1+\beta b_2+\gamma b_3)^{-1}[\gamma b_1 u_{eq3}+\beta b_2 u_{eq2}+\alpha b_1u_{eq1}+\eta sgn(S)+kS]</script><p>Combining two terms:</p><script type="math/tex; mode=display">u=u_{eq}+u_{sw}=(\alpha b_1+\beta b_2)^{-1}[\alpha b_1u_{eq1}+\beta b_2u_{eq2}-\eta sgn(S)-kS]</script><hr><p><div id ="Exp"></div></p><h1 id="Problems-encountered"><a href="#Problems-encountered" class="headerlink" title="Problems encountered"></a>Problems encountered</h1><h2 id="1-Modelling"><a href="#1-Modelling" class="headerlink" title="1. Modelling"></a>1. Modelling</h2><p>In system modeling, for the convenience of theoretical research, factors such as internal mechanical friction and external disturbances are ignored, and the changes in the z-axis position of the robot are not considered, making the model less accurate and affecting the design of the controller. Therefore, in subsequent research, these factors need to be taken into account.</p><hr><h2 id="2-Linearization"><a href="#2-Linearization" class="headerlink" title="2. Linearization"></a>2. Linearization</h2><p>In linearizing the model near the balance point, the method used is too crude. In subsequent research, the Maclaurin expansion method can be used and the high-order terms can be discarded to make the linearized model more accurate. Fortunately, MALTAB provides function for the Taylor series, see <a href = "https://www.mathworks.com/help/symbolic/sym.taylor.html">here</a></p><hr><h2 id="3-S-function"><a href="#3-S-function" class="headerlink" title="3. S-function"></a>3. S-function</h2><p>In Version 2023a, level-1 s-function template in MATLAB language (sfunctmpl.m) is removed, and existing template in the cooresponding files are for level-2. The description web pages are <a href = "https://www.mathworks.com/help/simulink/sfg/s-function-concepts.html">link1</a>, <a href = "https://www.mathworks.com/help/simulink/sfg/maintaining-level-1-matlab-s-functions.html?searchHighlight=maintaining%20level-1%20s%20function&s_tid=srchtitle_maintaining%20level-1%20s%20function_1">link2</a>. Gladly the function is maintained, so the previous template can be used, as long as you can find it. According to the documentation, the storage of variables are indeed much safer, inspite that it could take some time convert a level-1 code into level-2. It is said that level-1 s-function runs faster than level-2, I’m not sure. At first I intended to use template in C, and only discovered that I did not have any embedded  C coding experience of any sort. So lastly I stick to the matlab language for consistency. In future, I would like to try it.</p><hr><h2 id="4-Tuning"><a href="#4-Tuning" class="headerlink" title="4. Tuning"></a>4. Tuning</h2><p>In the HSMC controller, due to the large number of adjustable parameters, trial and error method is finally used to determine the parameters, resulting in the performance of LQR and HSMC controllers not being optimized. Therefore, in future research, methods such as genetic algorithms can be considered to determine the parameters.</p><hr><h2 id="5-Switching-Law-Controller-Order"><a href="#5-Switching-Law-Controller-Order" class="headerlink" title="5. Switching Law, Controller Order"></a>5. Switching Law, Controller Order</h2><p>In the HSMC controller used in this paper, only the most basic exponential reaching law is used, which involves the sign function $sgn()$, leading to the emergence of chattering phenomenon, and it is impossible to achieve such a high switching frequency in reality. Therefore, in subsequent research, the saturation function can be considered, or higher-order sliding mode can be applied.</p><hr><h2 id="6-Intelligent-Control"><a href="#6-Intelligent-Control" class="headerlink" title="6. Intelligent Control"></a>6. Intelligent Control</h2><p>From the simulation results of controllers designed based on linear and nonlinear models, the HSMC controller based on nonlinear models cannot stabilize the system, which is due to the lack of handling coupling problems in the nonlinear model. The decoupling method in this paper only involves linearization, but this makes the model less accurate. Therefore, in subsequent research, more complex controllers can be considered, such as recursive LQR controllers, PSO optimized LQR controllers or fuzzy controllers, etc.</p>]]></content>
    
    
    <summary type="html">&lt;p&gt;Next time I could do better.</summary>


    <category term="Robotics" scheme="https://redbowtie.github.io/categories/Robotics/"/>
    
    
    <category term="Control" scheme="https://redbowtie.github.io/tags/Control/"/>
    
    <category term="MATLAB" scheme="https://redbowtie.github.io/tags/MATLAB/"/>
    
    <category term="Paper" scheme="https://redbowtie.github.io/tags/Paper/"/>
    
  </entry>
  
  <entry>
    <title>Experience with LaTex</title>
    <link href="https://redbowtie.github.io/2023/04/21/LaTexTechnique/"/>
    <id>https://redbowtie.github.io/2023/04/21/LaTexTechnique/</id>
    <published>2023-04-22T00:32:00.000Z</published>
    <updated>2023-05-15T07:19:11.424Z</updated>
    
    <content type="html"><![CDATA[<!--excerpt--></p><p>This mainly records some of  the errors I encoutered when using LaTex.</p><h2 id="Contents"><a href="#Contents" class="headerlink" title="Contents"></a>Contents</h2><ol><li><a href = "#1">inkscape</a></li><li><a href = "#2">graphicx package option clash</a></li><li><a href = "#3">Subfigure and Subfloat</a></li></ol><hr><p><div id="1"></div></p><h2 id="1-inkscape"><a href="#1-inkscape" class="headerlink" title="1. inkscape"></a>1. inkscape</h2><p>According to the example file of ITMO template, to import the vector graphics, this tool must be installed. I’ve never insert any figure of this kind before.</p><p>As many other tools are installed along with TeX itself, so I searched in TeX Live Utility first. There’s a package called <code>svg-inkscape</code>.  On that moment I didn’t reailize that the name of a certain package will not have any other prefix on it.</p><p>I checked its description, seems alright: <strong>How to include an SVG image in LaTeX using Inkscape</strong>. Though in the documentation, the date is a little suspicious. I was 2013. And of course, when I tried to call it, errors emerged.</p><p>Through searching, so the tool works like this: it convert the <code>svg</code> file into a pdf file with same name and insert it into the position.</p><p>So skipping those trials and errors, I belive this <a href = "https://www.baeldung.com/cs/latex-svg-images">site</a> also gives a clear tutorial.</p><p>For installing <code>Inkscape</code>, I used <code>brew</code>.<br><figure class="highlight shell"><table><tr><td class="gutter"><pre><span class="line">1</span><br></pre></td><td class="code"><pre><span class="line"><span class="meta prompt_">$ </span><span class="language-bash">brew install --cask inkscape</span></span><br></pre></td></tr></table></figure></p><p>By default, the shell won’t call a external program, so options must be added when compiling.<br><figure class="highlight shell"><table><tr><td class="gutter"><pre><span class="line">1</span><br></pre></td><td class="code"><pre><span class="line"><span class="meta prompt_">$ </span><span class="language-bash">pdflatex --shell-escape file.tex</span></span><br></pre></td></tr></table></figure><br>This is a direct execution, as I used <code>LaTeX workshop</code> in VSCode, so settings should be changed.</p><p>Search the keyword <code>recipe</code> in settings, select <code>edit in settings.json</code>, with the preset, copy and modify new tools first, like this (note the comma):<br><figure class="highlight json"><table><tr><td class="gutter"><pre><span class="line">1</span><br><span class="line">2</span><br><span class="line">3</span><br><span class="line">4</span><br><span class="line">5</span><br><span class="line">6</span><br><span class="line">7</span><br><span class="line">8</span><br><span class="line">9</span><br><span class="line">10</span><br><span class="line">11</span><br></pre></td><td class="code"><pre><span class="line"><span class="punctuation">&#123;</span></span><br><span class="line"><span class="attr">&quot;name&quot;</span><span class="punctuation">:</span> <span class="string">&quot;pdflatex-escape&quot;</span><span class="punctuation">,</span></span><br><span class="line"><span class="attr">&quot;command&quot;</span><span class="punctuation">:</span> <span class="string">&quot;pdflatex&quot;</span><span class="punctuation">,</span></span><br><span class="line"><span class="attr">&quot;args&quot;</span><span class="punctuation">:</span> <span class="punctuation">[</span></span><br><span class="line"><span class="string">&quot;-shell-escpae&quot;</span><span class="punctuation">,</span></span><br><span class="line"><span class="string">&quot;-synctex=1&quot;</span><span class="punctuation">,</span></span><br><span class="line"><span class="string">&quot;-interaction=nonstopmode&quot;</span><span class="punctuation">,</span></span><br><span class="line"><span class="string">&quot;-file-line-error&quot;</span><span class="punctuation">,</span></span><br><span class="line"><span class="string">&quot;%DOC%&quot;</span></span><br><span class="line"><span class="punctuation">]</span></span><br><span class="line"><span class="punctuation">&#125;</span><span class="punctuation">,</span></span><br></pre></td></tr></table></figure><br>Then adda a new recipe (just example, use what you need instead):<br><figure class="highlight json"><table><tr><td class="gutter"><pre><span class="line">1</span><br><span class="line">2</span><br><span class="line">3</span><br><span class="line">4</span><br><span class="line">5</span><br><span class="line">6</span><br></pre></td><td class="code"><pre><span class="line"><span class="punctuation">&#123;</span></span><br><span class="line"><span class="attr">&quot;name&quot;</span><span class="punctuation">:</span> <span class="string">&quot;pdflatex (escape)&quot;</span><span class="punctuation">,</span></span><br><span class="line"><span class="attr">&quot;tools&quot;</span><span class="punctuation">:</span> <span class="punctuation">[</span></span><br><span class="line"><span class="string">&quot;pdflatex-escape&quot;</span></span><br><span class="line"><span class="punctuation">]</span></span><br><span class="line"><span class="punctuation">&#125;</span><span class="punctuation">,</span></span><br></pre></td></tr></table></figure></p><hr><p><div id="2"></div></p><h2 id="2-Option-clash-for-package-graphicx"><a href="#2-Option-clash-for-package-graphicx" class="headerlink" title="2. Option clash for package graphicx"></a>2. Option clash for package graphicx</h2><p>Directly starts with error:<br><div class="alert danger no-icon"><p>The package graphicx has already been loaded with options []<br>There has nowbeen an attempt to load it with options [pdftex]</p></div><br>The error message is stright forward,  you may look for the exact position where include this package, and change the include order, as the options have set relations. And sometimes it could be hard, as some packages will include packages that you may already defined. In my case the real package conflict are between <code>svg</code> and <code>graphicx</code>.</p><hr><p><div id="3"></div></p><h2 id="3-Subfigure-and-Subfloat"><a href="#3-Subfigure-and-Subfloat" class="headerlink" title="3. Subfigure and Subfloat"></a>3. Subfigure and Subfloat</h2><p><code>Subfigure</code> is sort of deprecated package. As I found it first and in the first template I used, there was no conflict, so I kept using it for some semesters. Till recently in the ITMO template, it clashed. So I went for other ways around.</p><p>Forgot to mention that, subfigure has two way of implementation, the first one, as documented on over leaf, also failed in my first template. And another way, the syntax is similar to that of <code>subfloat</code>, which is:<br><figure class="highlight tex"><table><tr><td class="gutter"><pre><span class="line">1</span><br><span class="line">2</span><br><span class="line">3</span><br><span class="line">4</span><br><span class="line">5</span><br><span class="line">6</span><br><span class="line">7</span><br><span class="line">8</span><br><span class="line">9</span><br><span class="line">10</span><br><span class="line">11</span><br><span class="line">12</span><br><span class="line">13</span><br><span class="line">14</span><br><span class="line">15</span><br></pre></td><td class="code"><pre><span class="line"><span class="keyword">\begin</span>&#123;figure&#125;[!htb]</span><br><span class="line"><span class="keyword">\hfill</span></span><br><span class="line"><span class="keyword">\centering</span></span><br><span class="line"><span class="keyword">\subfloat</span>[sub label]&#123;</span><br><span class="line"><span class="keyword">\centering</span></span><br><span class="line"><span class="keyword">\includegraphics</span>[width=0.45<span class="keyword">\textwidth</span>]&#123;pic1&#125;</span><br><span class="line">&#125;</span><br><span class="line"><span class="keyword">\hfill</span></span><br><span class="line"><span class="keyword">\subfloat</span>[sub label]&#123;</span><br><span class="line"><span class="keyword">\includegraphics</span>[width=0.45<span class="keyword">\textwidth</span>]&#123;pic2&#125;</span><br><span class="line">&#125;</span><br><span class="line"><span class="keyword">\hfill</span><span class="keyword">\null</span></span><br><span class="line"><span class="keyword">\caption</span>&#123; &#125;</span><br><span class="line"><span class="keyword">\label</span>&#123;&#125;</span><br><span class="line"><span class="keyword">\end</span>&#123;figure&#125;</span><br></pre></td></tr></table></figure></p><p>And another thing is that engine automatically ingore the spaces at the end, so only adding <code>\hfill</code> will not make a difference, <code>\null</code> must be added behind it.</p>]]></content>
    
    
    <summary type="html">&lt;p&gt;I remember I used to write a similar article.</summary>


    <category term="Trick" scheme="https://redbowtie.github.io/categories/Trick/"/>
    
    
    <category term="LaTex" scheme="https://redbowtie.github.io/tags/LaTex/"/>
    
  </entry>
  
  <entry>
    <title>Tips on Paper Writing</title>
    <link href="https://redbowtie.github.io/2023/03/16/PaperWriting/"/>
    <id>https://redbowtie.github.io/2023/03/16/PaperWriting/</id>
    <published>2023-03-16T18:32:00.000Z</published>
    <updated>2023-08-28T17:06:34.918Z</updated>
    
    <content type="html"><![CDATA[<!--excerpt--></p><p>So, as for paper writing, unfortunately, I’ve lost the data.  Well, I suppose I still had chance to re-download it from the awful website, but with this chance, I gotta say that maybe I can review the instruction from <a href="https://space.bilibili.com/230105574/channel/seriesdetail?sid=1569600">Dr. Can</a>.</p><hr><h1 id="Paper-writing"><a href="#Paper-writing" class="headerlink" title="Paper writing"></a>Paper writing</h1><h2 id="I-Facts"><a href="#I-Facts" class="headerlink" title="I. Facts"></a>I. Facts</h2><p>Generally, there are 7 parts in a paper.</p><blockquote><ul><li>Title</li><li>Abstract</li><li>Introduction / Literature Review (Backgraound)</li><li>Method</li><li>Result / Discussion</li><li>Conclusion</li><li>Reference</li></ul></blockquote><p>Within which, the <code>method</code>, <code>result</code>, and <code>conclusion</code> is the most important.</p><p>Thus, it is recommend that to write in the following order</p><div class="alert success no-icon"><ol><li>Method</li><li>Result / Discussion</li><li>Conclusion</li><li>Introduction / Literature Review</li><li>Abstract &amp; Title</li><li>Reference.</li></ol></div><p>It’s clear that the most important thing is to confirm the method.</p><p><strong>To note</strong>, for a reviewer / editor, your <strong><em>figures and charts</em></strong> should be appealing.</p><hr><h2 id="II-Introduction"><a href="#II-Introduction" class="headerlink" title="II. Introduction"></a>II. Introduction</h2><p>I found this irritating to write one. Not sure if it’s due to the requirements or it’s just that I’m not good at this.</p><p>Introduction answers two problems. One is “What is the research”, and the other is Motivation. It has to be within logic. Contribution is the key.</p><ul><li>Background information<ul><li>Data</li><li>Statement</li><li>Phenomenon</li><li>It gets smaller</li></ul></li><li>Literature review<ul><li>Other results </li><li>Potential blanks</li></ul></li><li>Thesis statement</li></ul><p>Well, the more you read, the better you write.<br>Some tips are:</p><ol><li>Choose some recent paper to cite</li><li>Proper citation</li><li>A good graph (maybe)</li><li>It should be like 10%.</li></ol><hr><h2 id="III-Methodology"><a href="#III-Methodology" class="headerlink" title="III. Methodology"></a>III. Methodology</h2><p>When it comes with  paper, method is the first thing that one should confirm. It is hard to write exact contribution in it.</p><p>A theoretical one should obtain procedures and a proof should contain investigation method, or data processing.</p><p>For application, one should specify how writer get the results, that is, the results can be re-produced. e.g. mathematical modelling, simulation results.</p><p>In order to achieve this, you should provide ample and accurate technical details, including hypothesis, solving, verification, and equipment. Words should be simple and explicit. Orders are not identical to the real thinking process.</p><p>For typical controller design, it could be:</p><ul><li>Mathematical model</li><li>Controller design</li><li>Stability analysis</li><li>Equipment</li></ul><p>The notations should be consistent. You may introduce NOMENCLATURE at the beginning. When they’re first introduced, make sure descriptions are added.</p><hr><h2 id="IV-Result-amp-Discussion"><a href="#IV-Result-amp-Discussion" class="headerlink" title="IV. Result &amp; Discussion"></a>IV. Result &amp; Discussion</h2><p>Express things properly makes huge difference. Things takes time. You need more reading  and writing, and practicing. </p><p>A valid template could be </p><ul><li>Describe results<ul><li>Charts</li><li>Language</li><li>Quantities</li><li>Judgements</li></ul></li><li>Analysis<ul><li>Demonstrate</li><li>Comparison</li></ul></li><li>Discussion<ul><li>Critical thinking<ul><li>Meaning</li><li>Future</li><li>Guesses</li></ul></li></ul></li></ul><hr><h2 id="V-Figure-amp-Table"><a href="#V-Figure-amp-Table" class="headerlink" title="V. Figure &amp; Table"></a>V. Figure &amp; Table</h2><p>This could be the first thing that a reviewer may check.</p><ol><li>Author’s Guide, check template, figure number, Caption positions, <strong>abbr. or not.</strong></li><li>Every one of them should be cited.</li><li>Refer to number, not position.</li><li>Consistency</li><li>Chart should be self-explanatory</li><li>Multiple data should add legends( And words if grey)</li><li>Sub-captions explained in main caption</li><li>Preserve original data</li></ol><hr><h2 id="VI-Conclusion-abstract-and-title"><a href="#VI-Conclusion-abstract-and-title" class="headerlink" title="VI. Conclusion, abstract and title"></a>VI. Conclusion, abstract and title</h2><h3 id="Conclusion"><a href="#Conclusion" class="headerlink" title="Conclusion"></a>Conclusion</h3><ul><li>1-2 paragraph, but do not repeat results.</li><li>Discover, Extension and future plan (a summary to the discussion)</li><li>Consider Thesaurus</li><li>Emphasis contribution, and corresponds with introduction</li></ul><h3 id="Abstract"><a href="#Abstract" class="headerlink" title="Abstract"></a>Abstract</h3><ul><li>Key points selected from intro.</li><li>1-2 sentence about method</li><li>The most important results.</li><li>Rewrite contribution.</li></ul><h3 id="Title"><a href="#Title" class="headerlink" title="Title"></a>Title</h3><ul><li>Topic</li><li>Method</li><li>Result (improve/reduce)</li></ul><hr><h2 id="VII-Communication-with-reviewers"><a href="#VII-Communication-with-reviewers" class="headerlink" title="VII. Communication with reviewers"></a>VII. Communication with reviewers</h2><ul><li>Keep a good mind (rest one day)</li><li>They’re not your enemies</li><li>Respond To each comment</li><li>Explicitly demonstrate modifications</li><li>Show gratitude, do not directly deny their suggestions.</li><li></li></ul>]]></content>
    
    
    <summary type="html">&lt;p&gt;Trying to write one is better than just looking.</summary>


    <category term="Paper" scheme="https://redbowtie.github.io/tags/Paper/"/>
    
  </entry>
  
  <entry>
    <title>A weird IoT coursework, document for code</title>
    <link href="https://redbowtie.github.io/2022/10/10/IoTCoursework/"/>
    <id>https://redbowtie.github.io/2022/10/10/IoTCoursework/</id>
    <published>2022-10-11T00:32:00.000Z</published>
    <updated>2022-10-10T01:10:08.544Z</updated>
    
    <content type="html"><![CDATA[<p>It sucks. (Not IoT, but the instructor and the company) <span id="more"></span></p><p>So, this is kinda like the document of that <a href="https://github.com/RedBowtie/iot_prj_0">IoT project</a>, but just don’t have too much expectation on this article.</p><hr><h2 id="I-Env-and-tools"><a href="#I-Env-and-tools" class="headerlink" title="I. Env and tools"></a>I. Env and tools</h2><h4 id="Env"><a href="#Env" class="headerlink" title="Env:"></a>Env:</h4><ul><li>Linux (should be OK with most of distributions)</li><li>WINDOWS (optinal, because my instance of IoT application is forced to use a simulation app)</li></ul><h4 id="Packages"><a href="#Packages" class="headerlink" title="Packages:"></a>Packages:</h4><ul><li>paho.mqtt.c-1.3.0</li><li>gcc</li><li>arbitrary text editor or IDE</li><li><del>I forget the rest, but if the compile goes wrong, google it then install the corresponding package works fine</del></li></ul><h4 id="Preparation"><a href="#Preparation" class="headerlink" title="Preparation"></a>Preparation</h4><ul><li>Cannot remember anything that is important.</li><li>maybe open the simulation sofware and the project file to make it easier for test part</li></ul><hr><h2 id="II-Configuration"><a href="#II-Configuration" class="headerlink" title="II. Configuration"></a>II. Configuration</h2><ol><li><h4 id="Open-editor-and-goto-smartHome-conf"><a href="#Open-editor-and-goto-smartHome-conf" class="headerlink" title="Open editor and goto smartHome.conf"></a>Open editor and goto <code>smartHome.conf</code></h4><p> Change the <code>uri</code> (and maybe as well as <code>port</code>) term into the correspoding <code>ip address</code> where the mqtt server holds.</p> <figure class="highlight json"><table><tr><td class="gutter"><pre><span class="line">1</span><br><span class="line">2</span><br><span class="line">3</span><br><span class="line">4</span><br></pre></td><td class="code"><pre><span class="line"><span class="punctuation">[</span>mqtt<span class="punctuation">]</span></span><br><span class="line">uri=tcp<span class="punctuation">:</span><span class="comment">//192.168.114.107:1883</span></span><br><span class="line"><span class="punctuation">[</span>server<span class="punctuation">]</span></span><br><span class="line">port=<span class="number">8888</span></span><br></pre></td></tr></table></figure><blockquote><p>As I used virtual platform, so the whole thing runs locally. It <strong>should</strong> work fine with regular network, but the <strong>proper configuration of the firewall</strong> settings is required, otherwise the connection will be refused.</p></blockquote></li><li><h4 id="In-mqtt-c"><a href="#In-mqtt-c" class="headerlink" title="In mqtt.c"></a>In <code>mqtt.c</code></h4><p> Change the following terms in <code>preprocessing derivatives</code></p><ul><li><code>ADDRESS</code></li><li><code>MQTT_SUB_TOPIC</code><figure class="highlight c"><table><tr><td class="gutter"><pre><span class="line">1</span><br><span class="line">2</span><br></pre></td><td class="code"><pre><span class="line"><span class="meta">#<span class="keyword">define</span> ADDRESS <span class="string">&quot;tcp://192.168.114.107:1883&quot;</span></span></span><br><span class="line"><span class="meta">#<span class="keyword">define</span> MQTT_SUB_TOPIC <span class="string">&quot;1663401252952/AIOTSIM2APP&quot;</span></span></span><br></pre></td></tr></table></figure></li></ul></li><li><h4 id="In-main-c"><a href="#In-main-c" class="headerlink" title="In main.c"></a>In <code>main.c</code></h4><p> Change the following terms in <code>preprocessing derivatives</code></p><ul><li><code>CTRL_PUB_TOPIC</code></li><li><code>SUB_TOPIC</code>  <figure class="highlight c"><table><tr><td class="gutter"><pre><span class="line">1</span><br><span class="line">2</span><br></pre></td><td class="code"><pre><span class="line"><span class="meta">#<span class="keyword">define</span> CTRL_PUB_TOPIC <span class="string">&quot;1663401252952/APP2AIOTSIM&quot;</span></span></span><br><span class="line"><span class="meta">#<span class="keyword">define</span> SUB_TOPIC <span class="string">&quot;1663401252952/AIOTSIM2APP&quot;</span></span></span><br></pre></td></tr></table></figure></li></ul></li></ol><p>This should be the <strong>least change</strong> to make the code running.</p><hr><h2 id="III-Compile-and-run"><a href="#III-Compile-and-run" class="headerlink" title="III. Compile and run"></a>III. Compile and run</h2><p>To compile the files</p><figure class="highlight shell"><table><tr><td class="gutter"><pre><span class="line">1</span><br></pre></td><td class="code"><pre><span class="line"><span class="meta prompt_">$ </span><span class="language-bash">make</span></span><br></pre></td></tr></table></figure><p>Run the executable</p><figure class="highlight shell"><table><tr><td class="gutter"><pre><span class="line">1</span><br></pre></td><td class="code"><pre><span class="line"><span class="meta prompt_">$ </span><span class="language-bash">./smart_home</span></span><br></pre></td></tr></table></figure><hr><h2 id="IV-Customization"><a href="#IV-Customization" class="headerlink" title="IV.  Customization"></a>IV.  Customization</h2><h2 id="Some-comments"><a href="#Some-comments" class="headerlink" title="Some comments"></a>Some comments</h2><ol><li><h4 id="Estabilish-Connection"><a href="#Estabilish-Connection" class="headerlink" title="Estabilish Connection"></a>Estabilish Connection</h4> In <code>main.c</code> mqtt funcions are called to <strong>connect to the server</strong> and <strong>subscribe the topic</strong>. <blockquote><p>The process is mainly done with official means, while in <code>Callback</code> function, the original <code> publication topic</code> is set to default, and is not used since. Thus I highly doubt this is the right way.<br><br></p></blockquote></li><li><h4 id="Data-Collection"><a href="#Data-Collection" class="headerlink" title="Data Collection"></a>Data Collection</h4><p> The time interval can be changed as you like, however, the shorter the interval, the more likely some value cannot be updated.</p><blockquote><p>It should be noted that due to some <a href="https://github.com/RedBowtie/iot_prj_0/issues?q=is%3Aissue+is%3Aclosed">issue</a>, the shorter the interval is, the more likely you’re going to miss data from the very beginning.</p></blockquote><p> <br><br> In <code>mqtt.c</code>, when the function <code>get_virtual_env()</code> is not called, every(most) <code>JSON</code> msg will be captured, and then handled separately with many IFs to store the value into corresponding term in a <strong>dedicate structure</strong>.<br> <div class="alert warning no-icon"><p>The value handling for number types is simple, however  if string (char array) is involved, it should be consider whether the comparison should be handled instantly, or assign new memory for it.<br><br><br>As both comparison are <strong>fulltext</strong>, thus the time complexity are both <code>O(N)</code> to either <strong>assign and copy the string</strong> content, or make a <strong>instant comparison</strong>. The latter only need to store a single digit to represent the result. And remember to deal with <em>fallback situations</em>, especially for certain kind of msg that will not constantly update its value.</p></div><br></p></li><li><h4 id="Data-Handling"><a href="#Data-Handling" class="headerlink" title="Data Handling"></a>Data Handling</h4><p> After the data is retrieved into <code>main</code>, again accessing the elements one by one to decide corresponding measures, again here, the command can be also preset in preprocessing derivatives for a straight forward code reading experience.</p><p> Due to the need of showing status and detailed problem, there should be flags to indicate the condition of each sensor values, however, that will be a lot more extra code, so I use a single variable to store the status in sum of powers of 2. To me this is clearer.</p></li><li><h3 id="Report"><a href="#Report" class="headerlink" title="Report"></a>Report</h3><p> I think there’s no need for explaination on this on.</p></li></ol><h3 id="Modification-suggestions"><a href="#Modification-suggestions" class="headerlink" title="Modification suggestions"></a>Modification suggestions</h3><ol><li><h4 id="Change-Structure-definition-in-mqtt-h"><a href="#Change-Structure-definition-in-mqtt-h" class="headerlink" title="Change Structure definition in mqtt.h."></a>Change Structure definition in <code>mqtt.h</code>.</h4></li><li><h4 id="Add-Data-handdling-in-transfer-virtual-data"><a href="#Add-Data-handdling-in-transfer-virtual-data" class="headerlink" title="Add Data handdling in transfer_virtual_data()"></a>Add Data handdling in <code>transfer_virtual_data()</code></h4></li><li><h4 id="Add-preset-behavior-in-main-c"><a href="#Add-preset-behavior-in-main-c" class="headerlink" title="Add preset behavior in main.c"></a>Add preset behavior in <code>main.c</code></h4></li><li><h4 id="Change-conditions-and-exception-handling-in-main"><a href="#Change-conditions-and-exception-handling-in-main" class="headerlink" title="Change conditions and exception handling in main()"></a>Change conditions and exception handling in <code>main()</code></h4></li><li><h4 id="Fix-bad-posix-Don’t-waste-time-on-it"><a href="#Fix-bad-posix-Don’t-waste-time-on-it" class="headerlink" title="Fix bad posix Don’t waste time on it"></a><del>Fix bad posix</del> Don’t waste time on it</h4></li></ol>]]></content>
    
    
    <summary type="html">&lt;p&gt;It sucks. (Not IoT, but the instructor and the company)</summary>


    <category term="Term7" scheme="https://redbowtie.github.io/categories/Term7/"/>
    
    
    <category term="IoT" scheme="https://redbowtie.github.io/tags/IoT/"/>
    
    <category term="C" scheme="https://redbowtie.github.io/tags/C/"/>
    
  </entry>
  
  <entry>
    <title>Discrete Control - Practical assignments</title>
    <link href="https://redbowtie.github.io/2022/09/28/DiscreteCtrl/"/>
    <id>https://redbowtie.github.io/2022/09/28/DiscreteCtrl/</id>
    <published>2022-09-28T23:32:00.000Z</published>
    <updated>2022-11-15T08:14:35.187Z</updated>
    
    <content type="html"><![CDATA[<p>Comparing with merely repeat the textbook or slides, record the ideas to the problems could be more helpful. <span id="more"></span></p><hr><h2 id="Practice-1-Modeling-of-the-linear-discrete-systems"><a href="#Practice-1-Modeling-of-the-linear-discrete-systems" class="headerlink" title="Practice 1. Modeling of the linear discrete systems"></a>Practice 1. Modeling of the linear discrete systems</h2><p>It mainly involves the idea of a <strong>zero-order extrapolator</strong>.</p><p>A linear pulse system is such an automatic control system (ACS), which, in addition to the links described by lin- ear differential equations, includes a pulse element (PE), which converts a continuous input into a sequence of pulses.</p><p>The continuous part of the system is a set of elementary continuous links which usually describe the operation of the control object (CO). PE is a device that is part of a digital-to-analog converter.</p><p>This practice is mainly focused on tuning coefficient, the scheme is given.</p><p><img src="/images/DiscreteCtrl/pr1-scheme.png" alt="ZOH"></p><p>In terms of stability border, at first I thought the neutral and oscillatory represent different situations, while it turns out both two terms refer to the marginal stability, that can be regard as Lyapunov stability.</p><script type="math/tex; mode=display">|z|<1</script><script type="math/tex; mode=display">|1-K_{FB}K_{CO}T|<1</script><script type="math/tex; mode=display">|K_{FB}K_{CO}T-1|<1</script><ul><li>stability border<script type="math/tex; mode=display">0<K_{FB}<\frac{2}{K_{CO}\cdot T}</script>When<script type="math/tex; mode=display">\frac{1}{K_{CO}\cdot T}\le K_{FB}\le\frac{2}{K_{CO}\cdot T}</script>system has oscillations .</li></ul><p>In the oscillation process, the larger the $K_{FB}$ is, the larger the amplitude, the slower the attenuation, the longer the transient time, before finally reach the stability boundry.</p><p><strong>As for time optimal, and I still have problem</strong>, when determine the value, </p><script type="math/tex; mode=display">t^*\le-\frac{3T}{\ln\eta}</script><script type="math/tex; mode=display">(1-K_{FB}K_{CO}T)\rightarrow0</script><script type="math/tex; mode=display">K_{FB}\rightarrow\frac{1}{K_{CO}\cdot T}</script><hr><h2 id="Practice-2-Second-order-linear-discrete-systems-dynamic-properties"><a href="#Practice-2-Second-order-linear-discrete-systems-dynamic-properties" class="headerlink" title="Practice 2 Second order linear discrete systems dynamic properties"></a>Practice 2 Second order linear discrete systems dynamic properties</h2><p>This part mainly involves the discrete process of a state space model, derive corresponding feedback coefficient from given roots of character polymonial, and the plot of discrete phase portrait, other than time-consuming, there seems to be not much problem.</p><p><img src="/images/DiscreteCtrl/pr2-scheme.png" alt="ZOH"></p><hr><h2 id="Practice-3-Reference-signals-discrete-generators"><a href="#Practice-3-Reference-signals-discrete-generators" class="headerlink" title="Practice 3 Reference signals discrete generators"></a>Practice 3 Reference signals discrete generators</h2><p>If I gotta say, the idea would be like what I learned in the modelling of nonlinear systems, but slightly different. Well, after all such representation is general. However, the idea of such <strong>generator</strong> is really smart.</p><h4 id="Discrete-Generator"><a href="#Discrete-Generator" class="headerlink" title="Discrete Generator"></a>Discrete Generator</h4><script type="math/tex; mode=display">\xi_1(k+1)=\xi_2(k)</script><script type="math/tex; mode=display">\xi_2(k+1)=2\cdot \xi_2(k)\cos(\omega T)-\xi_1(k)</script><script type="math/tex; mode=display">g(k)=\xi_1(k)=A\sin(\omega kT)</script><p>In my case $T=0.2,\ A=1,\ \omega=0.08$</p><script type="math/tex; mode=display">\xi(0)=\left[\begin{array}{c}0\\0.016\end{array}\right]</script><script type="math/tex; mode=display">\xi_2(k+1)=-\xi_1(k)+1.9997\cdot \xi_2(k)</script><p>thus</p><script type="math/tex; mode=display">\xi(k+1)=\left[\begin{array}{cc}0&1\\-1&1.9997\end{array}\right]\xi(k)</script><p><img src="/images/DiscreteCtrl/scheme1_f.png" alt="Generator"></p><p><img src="/images/DiscreteCtrl/gen1-1.png" alt="transient"> </p><p><img src="/images/DiscreteCtrl/gen1-2.png" alt="transient"></p><h4 id="External-disturbance"><a href="#External-disturbance" class="headerlink" title="External disturbance"></a>External disturbance</h4><p>Given</p><script type="math/tex; mode=display">g(k)=2e^{-kT}\sin(3kT)+0.1(kT)^2</script><p><strong>The Idea is to create three generators</strong></p><script type="math/tex; mode=display">g_1(k)=2e^{-kT}</script><script type="math/tex; mode=display">g_2(k)=\sin(3kT)</script><script type="math/tex; mode=display">g_3(k)=0.1(kT)^2</script><script type="math/tex; mode=display">g(k)=g_1(k)g_2(k)+g_3(k)</script><h5 id="First-generator"><a href="#First-generator" class="headerlink" title="First generator"></a>First generator</h5><script type="math/tex; mode=display">a_1(k)=g_1</script><script type="math/tex; mode=display">a_2(k)=a_1(k+1)=2\cdot e^{-kT}\cdot e^{-T}=a_1(k)\cdot e^{-T}</script><script type="math/tex; mode=display">a(k+1)=\left[\begin{array}{cc}0&1\\e^{-T}&0\end{array}\right]a(k)</script><h5 id="Second-generator"><a href="#Second-generator" class="headerlink" title="Second generator"></a>Second generator</h5><script type="math/tex; mode=display">b_1(k)=g_2(k)</script><script type="math/tex; mode=display">b_2(k)=b_1(k+1)=\cos(3T)\cdot\sin(3kT)+sin(3T)\cdot \cos(3kT)</script><script type="math/tex; mode=display">b_3(k)=b_2(k+1)=2\cdot b_2(k)\cdot\cos(3T)-b_1(k)</script><script type="math/tex; mode=display">b(k+1)=\left[\begin{array}{cc}0&1\\-1&2\cos(3T)\end{array}\right]b(k)</script><ul><li><h5 id="Third-generator"><a href="#Third-generator" class="headerlink" title="Third generator"></a>Third generator</h5><script type="math/tex; mode=display">c_1=g_3(k)</script><script type="math/tex; mode=display">c_2(k)=c_1(k+1)=0.1((k+1)T)^2=0.1((kT)^2+2kT^2+T^2)=\\c_1(k)+0.2kT^2+0.1T^2</script><script type="math/tex; mode=display">c_2(k)-c_1(k)=0.2kT^2+0.1T^2</script><script type="math/tex; mode=display">c_3(k)=c_2(k+1)=c_1(k+1)+0.2(k+1)T^2+0.1T^2\\=c_2(k)+0.2kT^2+0.3T^2</script><script type="math/tex; mode=display">c_3(k)-c_2(k)=c_2(k)-c_1(k)+0.2T^2</script><script type="math/tex; mode=display">c_4(k)=c_3(k+1)=c_3(k)+c_2(k)-c_1(k) +2（c_3(k)-2c_2(k)+c_1(k)）\\=3c_3(k)-3c2(k)+c_1(k)</script><script type="math/tex; mode=display">c(k+1)=\left[\begin{array}{ccc}0&1&0\\0&0&1\\1&-3&3\end{array}\right]c(k)</script><p>Then the left synthesis would be easy.<br><img src="/images/DiscreteCtrl/scheme2_f.png" alt="scheme"> </p><p><img src="/images/DiscreteCtrl/dis1.png" alt="transient"></p></li></ul><hr><h2 id="Practice-4-Synthesis-of-the-discrete-stabilizing-control-algorithms"><a href="#Practice-4-Synthesis-of-the-discrete-stabilizing-control-algorithms" class="headerlink" title="Practice 4. Synthesis of the discrete stabilizing control algorithms"></a>Practice 4. Synthesis of the discrete stabilizing control algorithms</h2><hr><h2 id="Course-Work"><a href="#Course-Work" class="headerlink" title="Course Work"></a>Course Work</h2><h3 id="State-space-representation"><a href="#State-space-representation" class="headerlink" title="State-space representation"></a>State-space representation</h3><script type="math/tex; mode=display">K_2 = 425.00\ \\ T_2 = 0.12\ \\ K_3 = 0.25</script><script type="math/tex; mode=display">W_2 = \frac{K_2}{T_2 p+1}\ \\W_3 = \frac{K_3}{p}</script><script type="math/tex; mode=display">\left\{\begin{array}{l}\dot{x}_1=K_3 \cdot x_2\\\dot{x}_2=\frac{1}{T_2}(-x_2+K_2)\end{array}\right.</script><p>Transform to state-space form</p><script type="math/tex; mode=display">\dot{X}=A_HX+B_HU,\\Y=CX</script><p>where</p><script type="math/tex; mode=display">X=\left[\begin{array}{c}x_1\\x_2\end{array}\right],\ A_H=\left[\begin{array}{cc}0&K_3\\0&-\frac{1}{T_2}\end{array}\right],\ B_H=\left[\begin{array}{c}0\\\frac{K_2}{T_2}\end{array}\right],\ C=\left[\begin{array}{cc}1&0\end{array}\right]</script><p>Skip the <strong>discretization</strong> process and the representation (for convenience), to note $T=0.003$</p><script type="math/tex; mode=display">A_d=e^{A_H\cdot T},\ B_d=(\sum_{i=1}^\infty\frac{T^i A_H^{i-1}}{i!})B_H</script><h3 id="Systhesis-PI-controller"><a href="#Systhesis-PI-controller" class="headerlink" title="Systhesis PI controller"></a>Systhesis PI controller</h3><p>Old fashioned modal control (which again, I didn’t find any relavent info online, maybe Russians prefer to call it in this way)</p><p>First construct <strong>augmented matrix</strong>, as there’s no disturbance, the term is not written.</p><p>$v(k)$ is the integral term, and $g(k)$ represents reference signal</p><script type="math/tex; mode=display">u(k)=K_{FB}\cdot e(k)</script><p>And naturally for integral,</p><script type="math/tex; mode=display">v(k+1)=v(k)+e(k)=v(k)+g(k)-x_1(k),\ v(0)=0</script><script type="math/tex; mode=display">u(k)=K_p\cdot e(k)+K_i\cdot v(k)-K_2\cdot x_2(k)\ \\=K_p\cdot g(k)+K_i\cdot v(k)-(K_p\cdot x_1(k)+K_2\cdot x_2(k))</script><script type="math/tex; mode=display">x(k+1)=A_d\cdot x(k)+B_d\cdot u(k)</script><p>Perform augmentation,</p><script type="math/tex; mode=display">\left[\begin{array}{c}v(k+1)\\x(k+1)\end{array}\right]=\left[\begin{array}{cc}1&-C\\0&A_d\end{array}\right]\left[\begin{array}{c}v(k)\\x(k)\end{array}\right]+\left[\begin{array}{c}0\\B_d\end{array}\right]+\left[\begin{array}{c}1\\0\end{array}\right]g(k)</script><script type="math/tex; mode=display">u(k)=K_p g(k)-\bar{K}\bar{x}(k)</script><p>Choose standard binomial polynomial of the third degree as reference  </p><script type="math/tex; mode=display">(\lambda+\omega_0)^3, t_\Pi \cdot \omega_0=8.5</script><p><strong>(required more investigation here, as this number is different from the content in documentation used before)</strong></p><script type="math/tex; mode=display">\lambda_{1,2,3}=-\frac{t_\Pi \cdot \omega_0}{t_{desire}}</script><script type="math/tex; mode=display">\Gamma_H=\left[\begin{array}{ccc}\lambda&1&0\\0 &\lambda&1\\0&0&\lambda\end{array}\right]</script><script type="math/tex; mode=display">H=\left[\begin{array}{cc}1&0&0\end{array}\right]\ \\ G_d=e^{\Gamma_H\cdot T}</script><script type="math/tex; mode=display">-\bar{A}\cdot M+G_d\cdot M+\bar{B}\cdot H=0</script><p>solve the sylvester equation with <code>sylv(-A,G,B*H)</code> or <code>lyap(-A,G,B*H)</code></p><p>and</p><script type="math/tex; mode=display">\bar{K}=HM^{-1}</script><p>Obtain</p><script type="math/tex; mode=display">K=\left[\begin{array}{cc}-K_i&K_p&K_2\end{array}\right]</script><p>The rest should be really simple like making simulations and evaluations. (e.g. <code>lsiminfo</code>)</p><p><img src="/images/DiscreteCtrl/SynthesizedScheme.png" alt="SynScheme"> </p><p><img src="/images/DiscreteCtrl/evaluation1.png" alt="QI"> </p><p>At first, I didn’t realize that the implementation of I regulator requires an additional states, so the derived M looks really weird, but now I see.</p><p>Oh my, the report writing… it’s killing me.</p><hr><h2 id="Practice-5"><a href="#Practice-5" class="headerlink" title="Practice 5."></a>Practice 5.</h2><hr><h2 id="Practice-6"><a href="#Practice-6" class="headerlink" title="Practice 6."></a>Practice 6.</h2><p>Design complete dimension observer:</p><script type="math/tex; mode=display">\left\{\begin{array}{l}\hat{x}(k+1)=A_d\cdot \hat{x}(k)+L(y_m(k)-C_m\cdot \hat{x}(k))+B_d\cdot u(k)\\u(k)=K_d\cdot \hat{x}(k)\end{array}\right.</script><p>Consider representing the error of observer:</p><script type="math/tex; mode=display">\tilde{x}(k)=x(k)-\hat{x}(k)</script><script type="math/tex; mode=display">\tilde{x}(k+1)=A_d\cdot \tilde{x}(k)-L\cdot C_m\cdot \tilde{x}(k)=F_z\cdot \tilde{x}(k)</script><script type="math/tex; mode=display">F_z = A_d-L\cdot C_m</script><hr><h2 id="P3"><a href="#P3" class="headerlink" title="P3"></a>P3</h2><script type="math/tex; mode=display">1+G_R(z)G_P(z)=0</script><p>where $G_R(z)$ is the controller $\frac{Q}{P}$, and the latter is the <strong>process</strong> $\frac{B}{A}$</p><script type="math/tex; mode=display">(z-z_{a1})(z-z_{a2})\dots(z-z_{a(m+2+d)})=0</script><script type="math/tex; mode=display">m=2-d,\ d=0</script><script type="math/tex; mode=display">P(z^{-1})=(1-z^{-1})(1+\gamma_1 z^{-1})</script><script type="math/tex; mode=display">A(z)=(z-z_1)(z-z_2)=z^2-(z_1+z_2)z+z_1z_2</script><script type="math/tex; mode=display">A(z^{-1})=1+a_1z^{-1}+a_2z^{-2}</script><p>where</p><script type="math/tex; mode=display">a_1=(z_{p1}+z_{p2}),\  a_2=z_{p1}z_{p2}</script><script type="math/tex; mode=display">Q(z^{-1})=q_0+q_1z^{-1}+q_2z^{-2}</script><script type="math/tex; mode=display">B(z^{-1})=b_1z^{-1}+b_2z^{-2}</script><hr><script type="math/tex; mode=display">\left\{\begin{array}{lcl}\gamma+q_0b_1 & = &-(z_1+z_2+z_3+z_4)+1-a_1,\\\gamma(a_1-1)+q_0b_2+q_1b_1 & = & z_1z_2+z_3z_4+(z_1+z_2)(z_3+z_4)-a_2+a_1,\\\gamma(a_2-a_1)+q_1b_2+q_2b_1 & = & -z_1z_2(z_3+z_4)-z_3z_4(z_1+z_2)+a_2,\\q_2b_2-\gamma a_2 & = & z_1z_2z_3z_4.\end{array}\right.</script>]]></content>
    
    
    <summary type="html">&lt;p&gt;Comparing with merely repeat the textbook or slides, record the ideas to the problems could be more helpful.</summary>


    <category term="Term7" scheme="https://redbowtie.github.io/categories/Term7/"/>
    
    
    <category term="Control" scheme="https://redbowtie.github.io/tags/Control/"/>
    
    <category term="MATLAB" scheme="https://redbowtie.github.io/tags/MATLAB/"/>
    
    <category term="Discrete System" scheme="https://redbowtie.github.io/tags/Discrete-System/"/>
    
  </entry>
  
  <entry>
    <title>Quadruped Basics</title>
    <link href="https://redbowtie.github.io/2022/07/05/Quadruped/"/>
    <id>https://redbowtie.github.io/2022/07/05/Quadruped/</id>
    <published>2022-07-05T04:32:00.000Z</published>
    <updated>2023-06-28T14:06:34.170Z</updated>
    
    <content type="html"><![CDATA[<p>Things are getting clearer now. <span id="more"></span></p><p>The analysis of forward and reverse kinematics and etc. will be supplemented in the future from manual scripts.</p><hr><!--toc--><hr><h2 id="2D-Modelling"><a href="#2D-Modelling" class="headerlink" title="2D - Modelling"></a>2D - Modelling</h2><p>tbc</p><hr><h2 id="3D-Modelling"><a href="#3D-Modelling" class="headerlink" title="3D - Modelling"></a>3D - Modelling</h2><p>tbc</p><hr><h2 id="Pitch"><a href="#Pitch" class="headerlink" title="Pitch"></a>Pitch</h2><hr><h2 id="Roll"><a href="#Roll" class="headerlink" title="Roll"></a>Roll</h2><hr><h2 id="Yaw"><a href="#Yaw" class="headerlink" title="Yaw"></a>Yaw</h2><hr><h2 id="Trajectory-Planning"><a href="#Trajectory-Planning" class="headerlink" title="Trajectory Planning"></a>Trajectory Planning</h2><h3 id="Cycloid"><a href="#Cycloid" class="headerlink" title="Cycloid"></a>Cycloid</h3><h3 id="Bazier"><a href="#Bazier" class="headerlink" title="Bazier"></a>Bazier</h3><hr><h2 id="Dynamics-Basics"><a href="#Dynamics-Basics" class="headerlink" title="Dynamics Basics"></a>Dynamics Basics</h2><p>Previously, the modelling of legs is done, however, only the kinematics part is not enough. As the robot is in motion, which is a time-variant system. During the process, velocity and acceleration may change with time. Natrually, force is involved with acceleration, and the analysis of force requires dynamics.</p><h3 id="1-Velocity-and-static-force"><a href="#1-Velocity-and-static-force" class="headerlink" title="1.Velocity and static force"></a>1.Velocity and static force</h3><p>Starting with rigid motion.</p><h4 id="1-1-Time-variant-representations"><a href="#1-1-Time-variant-representations" class="headerlink" title="1.1 Time-variant representations"></a>1.1 Time-variant representations</h4><h5 id="Differential-of-position-vector"><a href="#Differential-of-position-vector" class="headerlink" title="Differential of position vector"></a>Differential of position vector</h5><p>When the mass of an object can be concentrate into one point, the rotation of the object itself can be ignored, and only linear velocity needs to be considered.</p><p>Define a point $Q$ in reference coodinate $B$, the position can be represent as $^B P_Q$, and the velocity as $^B V_Q$</p><p>The following relation exists:</p><script type="math/tex; mode=display">^B V_Q=\frac{d^B P_Q}{dt}=\lim_{\triangle t\rightarrow0 }\frac{^B P_Q(t+\triangle t)- {^B P_Q(t)}}{\triangle t}</script><blockquote><p>The reference frame is very important, as the frame itself may be moving.</p></blockquote><p>Similar to transformation of position, the velocity can also be changed between coordinate.</p><script type="math/tex; mode=display">^A(^B V_Q)=^A(\frac{d^B V_Q}{dt})=^A_B R^B V_Q</script><blockquote><p>In most cases, there’ll be discussion about the relative velocity of origin to the world reference frame, without considering the relative velocity to any other coordinate:</p><script type="math/tex; mode=display">v_C={^U V_{CORG}}</script></blockquote><h5 id="Angular-velocity"><a href="#Angular-velocity" class="headerlink" title="Angular velocity"></a>Angular velocity</h5><p>When the object cannot be regard as an mass point, the rotation needs to be considered, which will usually be represented as $\Omega$.</p><p>Assume to observe point $Q$ from coordinate $\{B\}$, and the position is invariant to time, while $\{B\}$ is rotating relatively to $\{A\}$, compute the velocity of $Q$ in $\{A\}$,</p><script type="math/tex; mode=display">^A V_Q = {^A\Omega_B} \times {^A P_Q}</script><blockquote><p>The cross product equation:<script type="math/tex">a\times b=(l,m,n)\times(o,p,q)=(mq-np,no-lq,lp-mo)</script></p></blockquote><p>In which,</p><script type="math/tex; mode=display">^A P_Q = {^A_B R^B P_Q}</script><p>Normally, $Q$ is changing relatively to $\{B\}$, thus the linear velocity compoent.</p><script type="math/tex; mode=display">^A V_Q={^A_B R {^B V_Q}}+{^A\Omega_B}\times{^A_B R_BP_Q}</script><p>Adding velocity of origin,</p><script type="math/tex; mode=display">^A V_Q={^A V_{BORG}}+{^A R_B {^B V_Q}}+{^A\Omega_B}\times{^A_B R_BP_Q}</script><hr><h3 id="2-Link-motion"><a href="#2-Link-motion" class="headerlink" title="2. Link motion"></a>2. Link motion</h3><p>Acording to D-H parameters, calculate angular velocity:</p><script type="math/tex; mode=display">^i\omega_{i+1}={^i\omega_{i}}+ {^i_{i+1}R\dot{\theta}_{i+1}}{^{i+1}}\hat{Z}_{i+1}</script><p>where:</p><script type="math/tex; mode=display">\theta_{i+1}{^{i+1}}\hat{Z}_{i+1}={^{i+1}}\left[\begin{array}{c}0\\0\\\dot{\theta}_{i+1}\end{array}\right]</script><blockquote><p>To note that, in DH parameter, the revolute joints are defined as $Z$ axis, hence</p><script type="math/tex; mode=display"> \theta_{i+1}{^{i+1}\hat{Z}_{i+1}}</script></blockquote><p>As the angular velocity of $(i+1)-th$ link is produced by joint motion, so its angular velocity with respect to $i-th$ link, equals the raw angular velocity of link $i$ plus the joint speed of link $i+1$</p><p>Multiply $^{i+1}_i R$ on both sides to change observation coordinate,</p><script type="math/tex; mode=display">^{i+1}\omega_{i+1}=^{i+1}_i R^i \omega_i+\dot{\theta}_{i+1}{^{i+1}}\hat{Z}_{i+1}</script><p>For linear velocity</p><script type="math/tex; mode=display">^i v_{i+1}={^iv_i}+{^i\omega_i}\times{^iP_{i+1}}</script><p>Similarly,</p><script type="math/tex; mode=display">^{i+1}v_{i+1}={^{i+1}_i}R(^iv_i+{^i\omega_i}\times{^iP_{i+1}})</script><hr><h2 id="Dynamics-Modelling"><a href="#Dynamics-Modelling" class="headerlink" title="Dynamics Modelling"></a>Dynamics Modelling</h2><h3 id="1-Review"><a href="#1-Review" class="headerlink" title="1. Review"></a>1. Review</h3><p>The equation for revolute joint are presented above. As for prismatic joints, the idea is about the same:</p><script type="math/tex; mode=display">^{i+1}\omega_{i+1}={^{i+1}_iR{^i\omega_i}}</script><script type="math/tex; mode=display">^{i+1}v_{i+1}={^{i+1}_iR(^iv_i+{^i\omega_i\times{^iP_{i+1}}})}+\dot{d}_{i+1}{^{i+1}\hat{Z}_{i+1}}</script><hr><h3 id="2-Rigid-body-acceleration"><a href="#2-Rigid-body-acceleration" class="headerlink" title="2. Rigid body acceleration"></a>2. Rigid body acceleration</h3><h4 id="2-1-Linear-acceleration"><a href="#2-1-Linear-acceleration" class="headerlink" title="2.1 Linear acceleration"></a>2.1 Linear acceleration</h4><p>Same as the previous process, differentiate the velocity to obtain acceleration.</p><script type="math/tex; mode=display">^BA_Q=\frac{d^BV_Q}{dt}=\lim_{\triangle t\rightarrow0}\frac{^BV_Q(t+\triangle t)-^BV_Q(t)}{\triangle t}</script><p>Thr transformation between coordiantes are</p><script type="math/tex; mode=display">^AA_Q={^AA_{BORG}}+^A\dot{\Omega}_B\times{^A_BR^BP_Q}+{^A\Omega_B\times({^A\Omega_B\times{^A_BR^BP_Q}})}+2{^A\Omega_B\times{^A_BR^BV_Q}}+{^A_BR^BA_Q}</script><h4 id="2-2-Angular-acceleration"><a href="#2-2-Angular-acceleration" class="headerlink" title="2.2 Angular acceleration"></a>2.2 Angular acceleration</h4><script type="math/tex; mode=display">^A\dot{\Omega}_B=\frac{d^A\Omega_B}{dt}=\lim_{\triangle t\rightarrow0}\frac{^A\Omega_B(t+\triangle t)-{^A\Omega_B(t)}}{\triangle t}</script><p>Transformation between coordinate is as follows, asusme the reference frame $\{B\}$ is rotating at an angular speed $^A\Omega_B$ with respect to reference frame $\{A\}$, and frame $\{C\}$  is rorating at the speed $^B\Omega_C$ with respect to frame $\{B\}$</p><script type="math/tex; mode=display">^A\Omega_C={^A\Omega_B}+{^A_BR^B\Omega_C}</script><script type="math/tex; mode=display">^A\dot{\Omega}_C={^A\dot{\Omega}_B}+{^A_BR^B\dot{\Omega_C}}+{^A\Omega_B}\times{^A_BR^B\Omega_C}</script><hr><h3 id="3-Parallel-axis-theorem"><a href="#3-Parallel-axis-theorem" class="headerlink" title="3. Parallel axis theorem"></a>3. Parallel axis theorem</h3><p>The theorem can be used to determine the moment of inertia or the second moment of area of a rigid body about any axis, given the body’s moment of inertia about a parallel axis through the object’s center of gravity and the perpendicular distance between the axes.</p><script type="math/tex; mode=display">^AI={^CI}+m(P^T_CP_CI_3-P_CP^T_C)</script><p>where $P_C=[x_C\ y_C\ z_C]^T$, representing the center of mass in coordinate $\{A\}$.</p><hr><h3 id="4-Newton-Euler-equation"><a href="#4-Newton-Euler-equation" class="headerlink" title="4. Newton / Euler equation"></a>4. Newton / Euler equation</h3><p>In Newton’s equation, $m$ is the mass of rigid body.</p><script type="math/tex; mode=display">F=m\dot{v}</script><p>In Euler’s equation, $\dot{\omega},\ \omega$ are angular acceleration and angupar speed respectively, $^CI$ represent the moment of inertia in rigid mass center corrdinate.</p><script type="math/tex; mode=display">N={^CI\dot{\omega}}+\omega\times{^CI\omega}</script><hr><h3 id="5-Iterative-Newton-Euler-dynamics"><a href="#5-Iterative-Newton-Euler-dynamics" class="headerlink" title="5. Iterative Newton-Euler dynamics"></a>5. Iterative Newton-Euler dynamics</h3><p>To calculate the inertia force applied to the link, the angular speed, linear speed and angular acceleration is required.</p><h4 id="5-1-Iteration-of-Acceleration"><a href="#5-1-Iteration-of-Acceleration" class="headerlink" title="5.1 Iteration of  Acceleration"></a>5.1 Iteration of  Acceleration</h4><h5 id="Angular-acceleration"><a href="#Angular-acceleration" class="headerlink" title="Angular acceleration"></a>Angular acceleration</h5><p>To differentiate the angular speed equation, to obtain angular acceleration.</p><script type="math/tex; mode=display">^{i+1}\dot{\omega}_{i+1}={^{i+1}_iR{^i\dot{\omega}_i}}+{^{i+1}_iR}{^i\omega_i}\times\dot{\theta}_{i+1}{^{i+1}\hat{Z}_{i+1}}</script><h5 id="Linear-acceleration"><a href="#Linear-acceleration" class="headerlink" title="Linear acceleration"></a>Linear acceleration</h5><script type="math/tex; mode=display">^{i+1}a_{i+1}={^{i+1}_i}R({^{i+1}_i}a_i+{^i\dot{\omega_i}\times{^iP_{i+1}+{^i\omega_i}({^i\omega_i}\times{^iP_{i+1}}}})</script><h5 id="Acceleration-of-mass-center"><a href="#Acceleration-of-mass-center" class="headerlink" title="Acceleration of mass center"></a>Acceleration of mass center</h5><script type="math/tex; mode=display">^ia_{c_i} = {^ia_i}+{^i\dot{\omega}_i\times{^iP_{c_i}}}+{^i\omega_i}\times({^i\omega_i\times {^iP_{c_i}}})</script><h4 id="5-2-Iteration-of-force-and-torque"><a href="#5-2-Iteration-of-force-and-torque" class="headerlink" title="5.2 Iteration of force and torque"></a>5.2 Iteration of force and torque</h4><script type="math/tex; mode=display">^if_i={^iF_i}+{^i_{i+1}R{^{i+1}}f_{i+1}}</script><script type="math/tex; mode=display">^in_i={^i_{i+1}R^{i+1}n_{i+1}}+{^iN_i} + {^iP_{c_i}}\times{^iF_i} + {^iP_{i+1}}\times {^i_{i+1}R^{i+1}f_{i+1}}</script><p>In static force, the joint torque can be derived via the torque applied to adjacent one by link on the $\hat{Z}$ component.</p><script type="math/tex; mode=display">\tau={^in^T_i}{^i\hat{Z}_i}</script><hr><h2 id="Unitree-Gazebo"><a href="#Unitree-Gazebo" class="headerlink" title="Unitree Gazebo"></a>Unitree Gazebo</h2><p>Previously, I tried once fore. But, at that time, I was in a hurry and barely had time to read the instructions thoroghouly.</p><p>The main problem was about the SKD called <em>unitree_ros_to_real</em>, in which the <em>legged_msgs</em> is required for simulating model A1, but I’ve been having isssues compiling the other one designed for manipulating real robots. </p><p>I was not aware of this, and the simplest solution was to remove that package.</p><p>Kinda dumb.</p><p>So, according to the offical <code>readme.md</code></p><blockquote><p>Robots and joints controller can be loaded in Gazebo, in order to perform low-level control (e.g. torque, position and angular velocity of the joints), while the high-level control, namely wakling is not supported.</p></blockquote><h3 id="Dependencies"><a href="#Dependencies" class="headerlink" title="Dependencies"></a>Dependencies</h3><ul><li>ROS Melodic or Kinetic</li><li>Gazebo</li><li>unitree_legged_msgs: It’s a package under <code>unitree_ros_to_real</code></li></ul><h3 id="Build"><a href="#Build" class="headerlink" title="Build"></a>Build</h3><p>For Melodic</p><figure class="highlight shell"><table><tr><td class="gutter"><pre><span class="line">1</span><br></pre></td><td class="code"><pre><span class="line">sudo apt-get install ros-melodic-controller-interface  ros-melodic-gazebo-ros-control ros-melodic-joint-state-controller ros-melodic-effort-controllers ros-melodic-joint-trajectory-controller</span><br></pre></td></tr></table></figure><p>In the file <code>unitree_gazebo/worlds/stairs.world</code>. At the end:</p><figure class="highlight xml"><table><tr><td class="gutter"><pre><span class="line">1</span><br><span class="line">2</span><br><span class="line">3</span><br></pre></td><td class="code"><pre><span class="line"><span class="tag">&lt;<span class="name">include</span>&gt;</span></span><br><span class="line"><span class="tag">&lt;<span class="name">uri</span>&gt;</span>model:///home/unitree/catkin_ws/src/unitree_ros/unitree_gazebo/worlds/building_editor_models/stairs<span class="tag">&lt;/<span class="name">uri</span>&gt;</span></span><br><span class="line"><span class="tag">&lt;/<span class="name">include</span>&gt;</span></span><br></pre></td></tr></table></figure><p>Change the path of <code>building_editor_models/stairs</code> to real path.</p><p>Then use catkin_make to build:</p><figure class="highlight bash"><table><tr><td class="gutter"><pre><span class="line">1</span><br><span class="line">2</span><br></pre></td><td class="code"><pre><span class="line"><span class="built_in">cd</span> ~/catkin_ws</span><br><span class="line">catkin_make</span><br></pre></td></tr></table></figure><h4 id="unitree-ros-to-real"><a href="#unitree-ros-to-real" class="headerlink" title="unitree_ros_to_real"></a>unitree_ros_to_real</h4><ul><li>Basic message function: <code>unitree_legged_msgs</code></li><li>The interface between ROS and real robot: <code>unitree_legged_real</code></li></ul><h5 id="Build-1"><a href="#Build-1" class="headerlink" title="Build"></a>Build</h5><p>Download the package, throw it in to source directory and then</p><figure class="highlight bash"><table><tr><td class="gutter"><pre><span class="line">1</span><br><span class="line">2</span><br></pre></td><td class="code"><pre><span class="line"><span class="built_in">cd</span> ~/ws</span><br><span class="line">catkin_make</span><br></pre></td></tr></table></figure><h4 id="unitree-legged-sdk"><a href="#unitree-legged-sdk" class="headerlink" title="unitree_legged_sdk"></a>unitree_legged_sdk</h4><p>It’s really strange that the different versions of SDK supports different product.</p><h5 id="Dependencies-1"><a href="#Dependencies-1" class="headerlink" title="Dependencies"></a>Dependencies</h5><ul><li>Boost</li><li>CMake</li><li>g++</li></ul><h5 id="Build-2"><a href="#Build-2" class="headerlink" title="Build"></a>Build</h5><figure class="highlight shell"><table><tr><td class="gutter"><pre><span class="line">1</span><br><span class="line">2</span><br><span class="line">3</span><br><span class="line">4</span><br></pre></td><td class="code"><pre><span class="line">mkdir build</span><br><span class="line">cd build</span><br><span class="line">cmake ../</span><br><span class="line">make</span><br></pre></td></tr></table></figure><h3 id="One-more-thing"><a href="#One-more-thing" class="headerlink" title="One more thing"></a>One more thing</h3><p>Remember to <code>source</code> the <code>workspace</code> in order to get things linked.</p><h3 id="Details-of-Packages"><a href="#Details-of-Packages" class="headerlink" title="Details of Packages"></a>Details of Packages</h3><h4 id="The-description-of-robots"><a href="#The-description-of-robots" class="headerlink" title="The description of robots"></a>The description of robots</h4><p>It contains the description of Go1, A1, Aliengo and Laikago, including mesh, urdf and xacro files of robot.</p><p>Model can be checked by</p><figure class="highlight shell"><table><tr><td class="gutter"><pre><span class="line">1</span><br></pre></td><td class="code"><pre><span class="line">roslaunch model_description model_rviz.launch</span><br></pre></td></tr></table></figure><h4 id="unitree-legged-controll"><a href="#unitree-legged-controll" class="headerlink" title="unitree_legged_controll"></a>unitree_legged_controll</h4><p>It contains the joints controllers for Gazebo simulation, which allows users to control joints with position, velocity and torque. </p><p>Refer to <code>unitree_ros/unitree_controllers/src/servo.cpp</code> for joint control examples in different modes.</p><h4 id="unitree-gazebo-amp-unitree-controller"><a href="#unitree-gazebo-amp-unitree-controller" class="headerlink" title="unitree_gazebo &amp; unitree_controller"></a>unitree_gazebo &amp; unitree_controller</h4><p>Launch gazebo simulation with the following command</p><figure class="highlight shell"><table><tr><td class="gutter"><pre><span class="line">1</span><br></pre></td><td class="code"><pre><span class="line">roslaunch unitree_gazebo normal.launch rname:=a1 wname:=stairs</span><br></pre></td></tr></table></figure><h4 id="Stand-controller"><a href="#Stand-controller" class="headerlink" title="Stand controller"></a>Stand controller</h4><p>After launching the gazebo, you can start to control the robot:</p><figure class="highlight shell"><table><tr><td class="gutter"><pre><span class="line">1</span><br></pre></td><td class="code"><pre><span class="line">rosrun unitree_controller unitree_servo</span><br></pre></td></tr></table></figure><p>External disturbances is also available</p><figure class="highlight shell"><table><tr><td class="gutter"><pre><span class="line">1</span><br></pre></td><td class="code"><pre><span class="line">rosrun unitree_controller unitree_external_force</span><br></pre></td></tr></table></figure><h4 id="Position-and-pose-publisher"><a href="#Position-and-pose-publisher" class="headerlink" title="Position and pose publisher"></a>Position and pose publisher</h4><p>Here we demonstrated how to control the position and pose of robot without a controller, which should be useful in SLAM or visual development.</p><p>Then run the position and pose publisher in another terminal:</p><figure class="highlight shell"><table><tr><td class="gutter"><pre><span class="line">1</span><br></pre></td><td class="code"><pre><span class="line">rosrun unitree_controller unitree_move_kinetic</span><br></pre></td></tr></table></figure><p>The robot will turn around the origin, which is the movement under the world coordinate frame. And inside of the source file move_publisher.cpp, we also provide the method to move using the robot coordinate frame. You can change the value of <code>def_frame</code> to <code>coord::ROBOT</code> and run the catkin_make again, then the <code>unitree_move_publisher</code> will move robot under its own coordinate frame.</p>]]></content>
    
    
    <summary type="html">&lt;p&gt;Things are getting clearer now.</summary>


    <category term="Robotics" scheme="https://redbowtie.github.io/categories/Robotics/"/>
    
    
    <category term="Quadruped" scheme="https://redbowtie.github.io/tags/Quadruped/"/>
    
  </entry>
  
  <entry>
    <title>END of the 3rd year</title>
    <link href="https://redbowtie.github.io/2022/06/29/YEAR3/"/>
    <id>https://redbowtie.github.io/2022/06/29/YEAR3/</id>
    <published>2022-06-29T13:05:04.000Z</published>
    <updated>2022-06-30T02:27:30.752Z</updated>
    
    <content type="html"><![CDATA[<p>So, it’s glad that I got my laptop again. <span id="more"></span></p><p>It has been a long time, I tried to summarize the past three years but the macbook got locked accidentally before I could have done anything. It was like suffering without it. Being savvy enough to set a more complex firmware password, but at the same time being careless to forget about it. That’s really funny.</p><p>And there’s a lot more that I’d like to say. Those thoughts were mostly lost in time I suppose, albeit they unlocked laptop in just one day.</p><p>So, what have I done in the past three years? Have I made the right choice? Not sure for now.</p><p>So far, the topics have been focused on two main part - actuators and automatic control theories. The fundamental basics of the former is the circuit analysis, and then about the magenet, its field and different kinds of motors. As for the latter, more about mathematics, the behaviour of the system, phase portrait, all kinds of controls and blah, blah. </p><p>In short, that could be all the important part. But this could be too short. The most complex control task that I dealt with is the double inverted pendulum. so the thing here is that, the controlled input is directly applied to be the cart under an ideal condition, which is, no need to consider how the force could be generated. So, this is actually how the problem should be split. So far the control of actuators have been simple and I currently have no way to achieve desired level of performance.</p><p>OK, I think I’ve got more clue now.</p><p>See if I could think of anything else in the following days.</p>]]></content>
    
    
    <summary type="html">&lt;p&gt;So, it’s glad that I got my laptop again.</summary>


  </entry>
  
  <entry>
    <title>Configuring CLION for STM32 development</title>
    <link href="https://redbowtie.github.io/2022/03/29/CLIONSTM32/"/>
    <id>https://redbowtie.github.io/2022/03/29/CLIONSTM32/</id>
    <published>2022-03-30T03:32:00.000Z</published>
    <updated>2023-06-28T14:04:15.864Z</updated>
    
    <content type="html"><![CDATA[<p>Finally. it really took longer than I expected to figure it out. <span id="more"></span></p><div class="alert success no-icon"><p><em>Reference</em>: <a href="https://zhuanlan.zhihu.com/p/145801160">配置CLion用于STM32开发【优雅の嵌入式开发】- Peng Zhihui</a></p></div><p>I suppose the outline is a imitation of his article. I’ll try to form my own one in the future.</p><hr><!--toc--><hr><h2 id="N-Prologue"><a href="#N-Prologue" class="headerlink" title="N. Prologue"></a>N. Prologue</h2><p>You may assume it’s not necessary, but I just like to continue from where I left.</p><p>Well the main reason is that I simply uses MacOS more. Yeah, despite the fact that I have a physical WINDOWS machine, but it’s like 10 meters away from me. Just very ridiculous considering I need to run over to see the board myself to get some feedback every time. So that’s a no.</p><p><strong><em>CLION</em></strong> have pretty much everything a modern IDE should have, with nice plugin support. <strong><em>Keil</em></strong> is just a little.. out of date, as least to me.</p><p>With in the process, I’ve met some problems without direct answer, each one took me approximately a day to solve. As relavant search results including MacOS is limited and most of which weren’t published recently, and it seems that they didn’t encounter the similar situation.</p><hr><h2 id="I-Env-and-tools"><a href="#I-Env-and-tools" class="headerlink" title="I. Env and tools"></a>I. Env and tools</h2><h4 id="Env"><a href="#Env" class="headerlink" title="Env:"></a>Env:</h4><ul><li>MacOS - Intel based</li></ul><h4 id="Packages"><a href="#Packages" class="headerlink" title="Packages:"></a>Packages:</h4><ul><li>STM32CubeMX</li><li>CLION</li><li>OpenOCD</li><li>Arm-none-eabi-gcc</li><li>Homebrew</li></ul><h4 id="Hardware"><a href="#Hardware" class="headerlink" title="Hardware:"></a>Hardware:</h4><ul><li>A 3-rd Party STM32F103RCT6</li><li>A ST-LINK/V2</li></ul><h3 id="Preparation"><a href="#Preparation" class="headerlink" title="Preparation"></a>Preparation</h3><ol><li><h5 id="STM32CubeMX"><a href="#STM32CubeMX" class="headerlink" title="STM32CubeMX"></a>STM32CubeMX</h5><p>Download the latest release from official website: <a href="https://www.st.com/en/development-tools/stm32cubemx.html">here</a></p></li><li><h5 id="CLION"><a href="#CLION" class="headerlink" title="CLION"></a>CLION</h5><p>Same as above: <a href="https://www.jetbrains.com/clion/">here</a></p></li><li><h5 id="OpenOCD"><a href="#OpenOCD" class="headerlink" title="OpenOCD"></a>OpenOCD</h5><figure class="highlight bash"><table><tr><td class="gutter"><pre><span class="line">1</span><br></pre></td><td class="code"><pre><span class="line">$ brew install openocd --HEAD</span><br></pre></td></tr></table></figure><blockquote><p>Please be sure to append <strong>“—HEAD”</strong>. As for the reason, check <strong>Troubleshooting - I</strong> </p></blockquote></li><li><h5 id="Arm-none-eabi-gcc"><a href="#Arm-none-eabi-gcc" class="headerlink" title="Arm-none-eabi-gcc"></a>Arm-none-eabi-gcc</h5><figure class="highlight bash"><table><tr><td class="gutter"><pre><span class="line">1</span><br></pre></td><td class="code"><pre><span class="line">$ brew install arm-none-eabi-gcc</span><br></pre></td></tr></table></figure></li></ol><p>If brew is used, packages should be linked automatically and there’s no need to configure additional environment variables.</p><hr><h2 id="II-CLION"><a href="#II-CLION" class="headerlink" title="II. CLION"></a>II. CLION</h2><ol><li><h3 id="Set-a-new-toolchain"><a href="#Set-a-new-toolchain" class="headerlink" title="Set a new toolchain"></a>Set a new toolchain</h3><p><code>Preferences - Build, Execution, Deployment - Toolchains</code></p><p>Add a new profile with the name you would recognize.</p><p>default CMake option<code>Bundled</code> should work fine.</p><p>Set <code>C/C++ Compiler</code>,<code>Debugger</code> into corresponding ones which you may find at where <code>arm-none-eabi-gcc</code> is.</p><p><img src="/images/CLIONSTM32/0.png" alt="toolchain"></p></li><li><h3 id="Set-a-new-CMake-profile"><a href="#Set-a-new-CMake-profile" class="headerlink" title="Set a new CMake profile"></a>Set a new CMake profile</h3><p>Create a new one with previous toolchain.</p><p><img src="/images/CLIONSTM32/1.png" alt="CMake"></p></li><li><p>Create a <code>STM32CubeMX</code> project.</p></li><li><p>Click on the <code>*.ioc</code> file, then proceed with <code>Open with STM32CubeMX</code></p></li></ol><h2 id="III-STM32CubeMX"><a href="#III-STM32CubeMX" class="headerlink" title="III.  STM32CubeMX"></a>III.  STM32CubeMX</h2><p>Just take turns.</p><ol><li><h3 id="Download-MCU-Packages"><a href="#Download-MCU-Packages" class="headerlink" title="Download MCU Packages"></a>Download MCU Packages</h3><p>If you were the first time open this software, this window may pop up, just select the series you need. In my case, it’s <code>STM32F1 Series</code>.</p></li><li><h3 id="Select-the-corresponding-MCU"><a href="#Select-the-corresponding-MCU" class="headerlink" title="Select the corresponding MCU"></a>Select the corresponding MCU</h3><p>The default one should be different with what you got.</p><p><img src="/images/CLIONSTM32/3.png" alt="3"></p></li><li><h3 id="Switch-to-tab-Project-Manager"><a href="#Switch-to-tab-Project-Manager" class="headerlink" title="Switch to tab - Project Manager"></a>Switch to tab - Project Manager</h3><p><img src="/images/CLIONSTM32/4.png" alt="4"></p><p>Make sure the <code>project name</code> and <code>project location</code> matches info in CLION.</p><p><del>Select SW4STM32  in  Toolchain/IDE.</del> ( Not that necessary, in new version the default works fine)</p></li><li><h3 id="Click-Generate-Code-on-upper-right-corner"><a href="#Click-Generate-Code-on-upper-right-corner" class="headerlink" title="Click Generate Code on upper right corner"></a>Click Generate Code on upper right corner</h3><p>Before doing so, remember to assign correct properties to pinouts.</p><p>And be sure to do this every time you changed some thing in STM32Cube.</p></li></ol><h3 id="Additional-Infomation"><a href="#Additional-Infomation" class="headerlink" title="Additional Infomation"></a>Additional Infomation</h3><p>In some other tutorial, one suggest</p><ul><li>In the same tab above, make sure <code>SYS - Debug</code> is <code>Serial Wire</code>.  This is for the convenience of all the following operations.</li></ul><p>(I’m <strong>not sure</strong> what is the exact effect of the following modification.)</p><ul><li><del>Change the <code>HCLK(MHz)</code> to 72 in <code>Clock Configuration</code></del><ul><li>Don’t do this if you’re not clear what you’re doing, see <strong>Troubleshooting - II</strong></li></ul></li><li>Toggle <code>Generate peripheral initialization as a pair of ‘.c/.h’ file per peripheral</code> in <code>Project Manager - Code Generator</code>.</li><li>Change <code>High Speed Clock</code> in <code>Pinout &amp; configuration</code> into <code>Crystal/Ceramic Resonator</code></li></ul><hr><h3 id="IV-OpenOCD"><a href="#IV-OpenOCD" class="headerlink" title="IV. OpenOCD"></a>IV. OpenOCD</h3><p>Heading back to CLION, a pop up window may apper suggest you to select <code>Board Config Files</code></p><p>Because I’m using a 3-rd party board, so <code>Cancel</code>  first. But you may use a existing one if it matches.</p><ol><li><h3 id="Before-the-following-operations"><a href="#Before-the-following-operations" class="headerlink" title="Before the following operations"></a>Before the following operations</h3><p>Maybe check if CMake returns any error first.</p><p>If it does, check the previous steps. But be sure that you are using the right profile.</p><p>Click circled button to refresh.</p><p><img src="/images/CLIONSTM32/6.png" alt="6"></p><p>And on the upper right corner, the icon of hammer, triangle and bug, correspond with <code>Compile</code>, <code>Flash</code> and <code>Debug</code></p><p><img src="/images/CLIONSTM32/5.png" alt="5"></p><p>Click on hammer, considering nothing is added to the code. You should have the following info.</p><p><img src="/images/CLIONSTM32/7.png" alt="7"></p><p>It’s a little different from those shown in other tutorials, no number percentage, no blue characters suggesting the <code>hex</code> and <code>bin</code> files are being built.</p><p>Despite of this, you should be able to find these two files under the <code>workspace - xxx-arm-xxx</code> directory.</p></li><li><h3 id="Config-file"><a href="#Config-file" class="headerlink" title="Config file"></a>Config file</h3><p>Using CLION to flash and debugging, and actually, you are doing so via <code>OpenOCD</code></p><p>The mentioned <code>*.cfg</code> file is necessary for OpenOCD to operate.</p><p>Create a folder inside <code>workspace</code> or some other place you like. Then create a new file <code>SomeName.cfg</code> with the following content ( for ST-link )</p><figure class="highlight bash"><table><tr><td class="gutter"><pre><span class="line">1</span><br><span class="line">2</span><br><span class="line">3</span><br><span class="line">4</span><br><span class="line">5</span><br><span class="line">6</span><br><span class="line">7</span><br><span class="line">8</span><br></pre></td><td class="code"><pre><span class="line"><span class="comment"># choose st-link/j-link/dap-link etc.</span></span><br><span class="line"><span class="comment"># adapter driver cmsis-dap</span></span><br><span class="line"><span class="comment"># transport select swd</span></span><br><span class="line"><span class="built_in">source</span> [find interface/stlink.cfg]</span><br><span class="line">transport select hla_swd</span><br><span class="line"><span class="built_in">source</span> [find target/stm32f1x.cfg]</span><br><span class="line"><span class="comment"># download speed = 10MHz</span></span><br><span class="line">adapter speed 10000</span><br></pre></td></tr></table></figure><p>Of course, after observing provided cfg files in <code>installedLocation\openocd\scripts</code></p><ul><li>Board - Configuration of some certified board</li><li>Interface - Configuration of debugger</li><li>Target - MCU configuration</li></ul><p>It’s clear that the first line determines the interface and type, while the following are MCU type and download speed.</p><blockquote><p>Maybe it’s better not to add <code>reset_config sirs_only</code>, which may cause flash to fail</p></blockquote></li><li><h3 id="Debug-Configuration"><a href="#Debug-Configuration" class="headerlink" title="Debug Configuration"></a>Debug Configuration</h3><p>Drag down the menu beside the <strong>hammer</strong> icon, select <code>Edit Configurations</code>.</p><p><img src="/images/CLIONSTM32/8.png" alt="8"></p><p>Browse and select the right cfg file.</p><p>The whole thing should be ready to go.</p></li></ol><hr><p>Besides, when in debug session, <code>Peripheral</code>, you may load <code>*.svd</code> files to check registers in detail. <code>SVD files</code> can be found on <a href="https://github.com/posborne/cmsis-svd">github</a> or just google it.</p><p><img src="/images/CLIONSTM32/12.png" alt="12"></p><hr><h2 id="Troubleshooting"><a href="#Troubleshooting" class="headerlink" title="Troubleshooting"></a>Troubleshooting</h2><div class="alert danger no-icon"><h3 id="I-SEGFAULT-when-running-opened-f-cfg"><a href="#I-SEGFAULT-when-running-opened-f-cfg" class="headerlink" title="I. SEGFAULT when running opened -f *.cfg"></a>I. <strong>SEGFAULT</strong> when running <strong>opened -f *.cfg</strong></h3></div><h4 id="It-all-started-here"><a href="#It-all-started-here" class="headerlink" title="It all started here:"></a>It all started here:</h4><p><img src="/images/CLIONSTM32/9.png" alt="9"></p><ul><li>When trying to flash the <code>*.bin</code> file, OpenOCD’s output info stopped after showing <code>Info: Clock speed 10000 kHz</code>.</li></ul><p>The screenshot taken is with the latest version, only for demonstration.</p><p>It actually quite strange, considering there’s <strong>no other error</strong> messages anymore. </p><h4 id="Checking-ST-LINK"><a href="#Checking-ST-LINK" class="headerlink" title="Checking ST-LINK"></a>Checking ST-LINK</h4><p>At first I doubt that if it was <code>ST-LINK</code>‘s problem, and maybe it’s related to firnware versions. As it’s a second-handed one, and last owner said that it had been eating dust for quite a while.</p><h5 id="Firmware"><a href="#Firmware" class="headerlink" title="Firmware"></a>Firmware</h5><p>Gladly, firmware update is available on MacOS. <a href="https://www.st.com/en/development-tools/stsw-link007.html">Check here</a></p><p>Using terminal commands to open, but be sure to get into the <code>System Preferences</code>, allow relavant dynamic library to run.</p><h5 id="Drive"><a href="#Drive" class="headerlink" title="Drive"></a>Drive</h5><figure class="highlight bash"><table><tr><td class="gutter"><pre><span class="line">1</span><br></pre></td><td class="code"><pre><span class="line">$ st-info --probe</span><br></pre></td></tr></table></figure><p>This command is used to detect info of connected board. If it cannot detect anything, maybe try to reconnect the pins ?</p><figure class="highlight bash"><table><tr><td class="gutter"><pre><span class="line">1</span><br></pre></td><td class="code"><pre><span class="line">$ st-flash write .../*.bin 0x8000000</span><br></pre></td></tr></table></figure><p>With this, you can flash built <code>bin</code> into the board, fully isolated from <code>openocd</code>.</p><p>For more usage, check the help message after input only <code>st-flash</code>, it provides sufficient examples.</p><p><img src="/images/CLIONSTM32/10.png" alt="10"></p><blockquote><p> The simple program works fine, so the problem is not on ST-LINK’s side.</p></blockquote><h3 id="Checking-OpenOCD"><a href="#Checking-OpenOCD" class="headerlink" title="Checking OpenOCD"></a>Checking OpenOCD</h3><figure class="highlight bash"><table><tr><td class="gutter"><pre><span class="line">1</span><br></pre></td><td class="code"><pre><span class="line">$ openocd [-f interface/stlink.cfg](optinal) -f ../var/yourProfile.cfg</span><br></pre></td></tr></table></figure><p>And <strong>bingo.</strong></p><p>This time, at least it returns an <code>SEGFAULT</code> error message.</p><p>With additional <code>-d</code> parameter, it can return more debug info, but not quite useful for finding the exact problem.</p><p>At first I thought it was related to the <code>serial</code>, as in terminal, previous index has a value behind it, but not this one.</p><p>After some searching, I found an issue on <a href="https://github.com/libusb/libusb/issues/928"><strong>github</strong> </a>, so my guess is wrong, but coindidentally it leads me to the right clue (actually only because it’s in the debugger info, that’s just it).</p><p><img src="/images/CLIONSTM32/11.png" alt="11"></p><p>Thanks to <strong>mcuee</strong>, he got into it and analyze the problem thoroughly. It was due to the minor changes in the interface of <code>libusb</code>, and, <code>OpenOCD</code> releases it’s major update in a slow pace. The latest one was in Feb, 2021. So what happens next is predictable. </p><p>OpenOCD fixed this issue in the later updates, but without making it as an release version. So the fix was like the presented above, pull the latest source code from github and compile it is the only solution.</p><figure class="highlight bash"><table><tr><td class="gutter"><pre><span class="line">1</span><br></pre></td><td class="code"><pre><span class="line">$ brew install openocd --HEAD</span><br></pre></td></tr></table></figure><hr><div class="alert danger no-icon"><h3 id="II-Unexpected-behaviour-when-flashing-but-ran-properly-in-debugging"><a href="#II-Unexpected-behaviour-when-flashing-but-ran-properly-in-debugging" class="headerlink" title="II. Unexpected behaviour when flashing, but ran properly in debugging."></a>II. Unexpected behaviour when flashing, but ran properly in debugging.</h3></div><p>So I tried to toggle LED on and off with in the <code>while loop</code>, but the <code>*.bin</code> file seems to have something wrong.</p><ul><li>Either perform the first line then stop forever.</li><li>Or, stop running at where <code>HAL_DELAY</code> is.</li></ul><p>And strangely, when using <code>debug mode</code></p><ul><li>The while loop repeats perfectly without <code>HAL_DELAY</code>. </li></ul><p>Remembering the last time I said that <code>ST-LINK</code> flashing was functional?</p><p>So I suspect it has something to do with <strong>compiling.</strong></p><p>And <code>HAL_DELAY</code> interrupting <code>Debug session</code> seems to be a known issue, but it should not be the same in terms of flashing. So currently not a clue.</p><blockquote><p><strong>Good news:</strong></p><p>​    After create a new project and repeat the previous step, this problem is gone.</p><p>​    Previously, the direct reason was that the process hangs on <code>Systick_handler()</code>.</p><p>​    And sometimes “connect while holding reset” is really helpful.</p><p><strong>Bad news:</strong></p><p>​    Still have no clue on what exactly caused this.</p><ul><li>Change of <code>Clock Speed </code>?<ul><li>Likely, remember that if after inputing the numbers and STM32CubeMX suggest that there’s no valid solution, don’t hit yes.</li></ul></li><li><del>Accidentally change some of the source code in other files ?</del><ul><li>Maybe not</li></ul></li></ul></blockquote><p>- End on 31 Mar. 2022</p>]]></content>
    
    
    <summary type="html">&lt;p&gt;Finally. it really took longer than I expected to figure it out.</summary>


    <category term="Trick" scheme="https://redbowtie.github.io/categories/Trick/"/>
    
    
    <category term="STM32" scheme="https://redbowtie.github.io/tags/STM32/"/>
    
    <category term="CLION" scheme="https://redbowtie.github.io/tags/CLION/"/>
    
  </entry>
  
  <entry>
    <title>Mathematical Basics of the System Theory PART III</title>
    <link href="https://redbowtie.github.io/2022/03/23/MathofSysT_III/"/>
    <id>https://redbowtie.github.io/2022/03/23/MathofSysT_III/</id>
    <published>2022-03-23T23:32:00.000Z</published>
    <updated>2022-05-11T00:41:03.277Z</updated>
    
    <content type="html"><![CDATA[<!--excerpt--></p><h2 id="Prac-8-Linearization-of-Plants-and-System-Models"><a href="#Prac-8-Linearization-of-Plants-and-System-Models" class="headerlink" title="Prac 8. Linearization of Plants and System Models"></a>Prac 8. Linearization of Plants and System Models</h2><p>Examples about finding quilibrium position</p><p>Good old <code>controllability</code> and <code>observability</code></p><h3 id="Assignment-discussion"><a href="#Assignment-discussion" class="headerlink" title="Assignment discussion"></a>Assignment discussion</h3><h4 id="Representation-of-the-derivative-by-the-ratio-of-finite-small-increments"><a href="#Representation-of-the-derivative-by-the-ratio-of-finite-small-increments" class="headerlink" title="Representation of the derivative by the ratio of finite small increments"></a>Representation of the derivative by the ratio of finite small increments</h4><p>The recurrent notaion</p><script type="math/tex; mode=display">x(k+1)=(I+A\triangle t)x(k)+(B\triangle t)u(k),\ y(k)=Cx(k).</script><p>Transfer function “input - output”</p><script type="math/tex; mode=display">W(s)=\frac{b_1 s+b_0}{(a_4 s+a_3)(a_2 s^2+a_1 s+a_0)}</script><p>Assume that after substitution values of parameters we get:</p><script type="math/tex; mode=display">W(s,q)=\frac{\frac{1}{4}s+\frac{1}{16}}{s^2+\frac{3}{4}s+\frac{1}{4}}\\A =\left[\begin{array}{c,c}0&1\\-0.25&-0.75\end{array}\right],B=\left[\begin{array}{c}0\\1\end{array}\right],C=\left[\begin{array}{c,c}0.0625&0.25\end{array}\right]</script><p>Write matrices $\bar{A},\bar{B},\bar{C}$ for the value of the sample time interval $\triangle t = 0.05s $</p><script type="math/tex; mode=display">\bar{A}\approx I+A\triangle t\\\bar{B}\approx B\triangle t\\\bar{C}=C</script><h4 id="Integral-model-of-the-continuous-time-plant-in-the-“input-output”-form"><a href="#Integral-model-of-the-continuous-time-plant-in-the-“input-output”-form" class="headerlink" title="Integral model of the continuous-time plant in the “input-output” form"></a>Integral model of the continuous-time plant in the “input-output” form</h4><script type="math/tex; mode=display">e^{A\triangle t}=\sum_{i=1}^\infty \frac{1}{i!}(A\triangle t)^i</script><p>Confine to the first k members as you wish.</p><script type="math/tex; mode=display">\bar{A} =e^{A\triangle t}\\\bar{B}=(e^{A\triangle t}-I)A^{-1}B\\\bar{C}=C</script><hr><h2 id="Lec-11-Controllability-and-Observability"><a href="#Lec-11-Controllability-and-Observability" class="headerlink" title="Lec 11. Controllability and Observability"></a>Lec 11. Controllability and Observability</h2><p>Purpose of control: we need a plant to behave the way to achieve some goal or perform some function</p><p>In order to control a plant (a device or a process) we create a system which includes control and measuring devices.</p><p>A <strong>control system</strong> is an interconnection of components forming a system configuration that will provide a desired system response.</p><h3 id="Stability"><a href="#Stability" class="headerlink" title="Stability"></a>Stability</h3><p>Definition (stability). Stability is a system property, in the presence of which the initial deviation of the dynamic process from its desired course decreases over time.</p><p><strong>Definition</strong> <strong>(stability condition).</strong> A system, regardless of its continuous or discrete nature, will be stable provided that the unforced response of the state vector and the output will decrease over time, and in the case of asymptotic stability tend to zero.</p><h3 id="Controllability"><a href="#Controllability" class="headerlink" title="Controllability"></a>Controllability</h3><p>Consider the problem of existence of a control that can transfer the system from the initial state $x_0(t)=x(t_0)$ to any other desired location $x_f(t)=x(t_f)$ in a finite time.</p><h3 id="Observability"><a href="#Observability" class="headerlink" title="Observability"></a>Observability</h3><p>Observability refers to the problem of the state vector estimation. It means that we need to determine if it is possible to find the state vector at the time $t_0$ if the control $u(t)$ and output $y(t)$ , $t\in[t_0,t_1],\ t_1&gt;t_0$ are measured.</p><h2 id="Prac-9-Autonomous-system-Phase-portraits"><a href="#Prac-9-Autonomous-system-Phase-portraits" class="headerlink" title="Prac 9. Autonomous system, Phase portraits"></a>Prac 9. Autonomous system, Phase portraits</h2><p>Consider the system</p><script type="math/tex; mode=display">\dot{x}(t)=Ax(t)+bu(t)</script><p>Find the solution of equation written as</p><script type="math/tex; mode=display">\dot{x}(t)-Ax(t)=bu(t)</script><p>To do this, multiply both parts by the matrix exponent $e^{-At}$</p><script type="math/tex; mode=display">e^{-At}\dot{x}(t)-Ae^{-At}x(t)=e^{-At}bu(t)\\\frac{d}{dt}(e^{-At}x(t))=-Ae^{-At}x(t)+e^{-At}\dot{x}(t)\\=e^{-At}bu(t)</script><p>Integrate</p><script type="math/tex; mode=display">e^{-At}x(t)=x(0)+\int_0^t e^{-A\tau}bu(\tau)d\tau\\x(t)=e^{At}x(0)+e^{At}\int_0^t e^{-A\tau}bu(\tau)d\tau</script><p>$e^{At}x(0)$ - unforced (free) component of the movement depends only on the initial conditions</p><p>And the rest, it the forced component.</p><h3 id="Algo-for-constructing-a-phase-portrait"><a href="#Algo-for-constructing-a-phase-portrait" class="headerlink" title="Algo for constructing a phase portrait"></a>Algo for constructing a phase portrait</h3><ol><li>Find the eigenvalues of the state matrix <em>A</em> by solving the auxiliary equation</li><li>Determine the type of the equilibrium point and the character of stability.</li><li>Find the equations of the isoclines:</li></ol><p>Vertical: $\frac{dx_1}{dt}=a_{11}x_1+a_{12}x_2$</p><p>Horizontal: $\frac{dx_x}{dt}=a_{21}x_1+a_{22}x_2$</p><ol><li><p>If the equilibrium position is a node or a saddle, it is necessary to compute the eigenvectors and draw the asymptotes parallel to the eigenvectors and passing through the origin.</p></li><li><p>Schematically draw the phase portrait. Show the direction of motion along the phase trajectories (this depends on the stability or instability of the equilibrium point).</p></li></ol><hr>]]></content>
    
    
    <summary type="html">&lt;p&gt;Back on the topic again</summary>


    <category term="Term6" scheme="https://redbowtie.github.io/categories/Term6/"/>
    
    
    <category term="System Theory" scheme="https://redbowtie.github.io/tags/System-Theory/"/>
    
    <category term="Math" scheme="https://redbowtie.github.io/tags/Math/"/>
    
  </entry>
  
  <entry>
    <title>Computer Vision PART I</title>
    <link href="https://redbowtie.github.io/2022/03/23/ComputerVision_I/"/>
    <id>https://redbowtie.github.io/2022/03/23/ComputerVision_I/</id>
    <published>2022-03-23T22:32:00.000Z</published>
    <updated>2022-03-27T09:18:24.906Z</updated>
    
    <content type="html"><![CDATA[<p>I have complicated feelings about CV <span id="more"></span></p><p>Only because that the previous courses are more detailed on the general view, hope this part may change a aspect. I wish to know more about real implementation, rather than well-packaged MATLAB function.</p><h2 id="Lec-1-Intro"><a href="#Lec-1-Intro" class="headerlink" title="Lec 1. Intro"></a>Lec 1. Intro</h2><p>More topic than ever.</p><p>The part for segmentation is earlier while in practice, it seems regular.</p><p>And again with many detailed requirements on report.</p><h2 id="Distance-measurement"><a href="#Distance-measurement" class="headerlink" title="Distance measurement"></a>Distance measurement</h2><h3 id="Disparity-map"><a href="#Disparity-map" class="headerlink" title="Disparity map:"></a><strong>Disparity map:</strong></h3><p> for each pixel in the <em>left picture</em> with coordinates $(x_0,y_0)$,<br> a pixel is searched for in the right picture with coordinates $(x_0-d,y_0)$ .</p><ul><li><p>Z  - distance</p></li><li><p>f - focal length</p></li><li><p>L - base length</p></li><li><p>D - disparity</p></li><li><p>x’ and x’’ - coordinates of the object in the image plane in the right and left pictures of the stereo pair, respectively.</p><script type="math/tex; mode=display">Z=\frac{f\cdot L}{x'-x''}=\frac{f\cdot L}{d}</script></li><li></li></ul><h2 id="Some-packages-and-notations"><a href="#Some-packages-and-notations" class="headerlink" title="Some packages and notations"></a>Some packages and notations</h2><p>No need to recite I suppose, nothing particular.</p><hr><h2 id="Lec-2-Segmentation"><a href="#Lec-2-Segmentation" class="headerlink" title="Lec 2. Segmentation"></a>Lec 2. Segmentation</h2><h3 id="Scoping"><a href="#Scoping" class="headerlink" title="Scoping"></a>Scoping</h3><ul><li>Selection of connected areas on binary images<ul><li>Neighbourhood:<ul><li>Coss : 4-connectivity</li><li>Square: 8-connectivity</li></ul></li></ul></li></ul><p>The connected area of the image is the area (a set of points):</p><ul><li>all points of which have the same value;</li><li>between any two points from the given area there is a continuous path consisting of points that also belong to the given area and are “neighbors” at the same time.</li></ul><h4 id="Available-algo-for-selecting"><a href="#Available-algo-for-selecting" class="headerlink" title="Available algo for selecting"></a>Available algo for selecting</h4><ol><li>Forest fire (Y&amp;U collision forms possible).</li><li>Two pass algo (avoid collision)</li></ol><h4 id="Segmentation"><a href="#Segmentation" class="headerlink" title="Segmentation"></a><strong>Segmentation</strong></h4><p>Dividing an image into non-overlapping areas, each of which is represented by a color or texture of the same type.</p><p><em>R</em> – is the entire area of the frame. Segmentation is the process of partitioning <em>R</em> into such a setofconnectedregions 𝑅! ,𝑖=1,…,𝑛,thatthefollowingbasicconditionsaremetfor them:</p><ul><li>$R=\cup R_{i=1,\dots,n}$ – splitting areas completely cover the frame;</li><li>$R_i\cap R_j=\phi,\forall i\ne j$ – the partitioning areas do not intersect in pairs;</li><li>$Pred(𝑅_i) = 𝑇𝑅𝑈𝐸, 𝑖 = 1, … , 𝑛$, where Pred(𝑅) is the Boolean homogeneity predicate of the area;</li><li>$Pred(𝑅_i\cup R_j)=FALSE,\forall i\ne j $ – the pairwise union of any two regions of the given partition does not satisfy the same homogeneity condition.</li></ul><p><strong>Merging areas:</strong></p><ul><li><p>Perform presegmentation of the image into “starting” areas using a non- iterative (single) method.</p></li><li><p>Determine the criterion for the merging of two neighboring regions.</p></li><li><p>Iteratively find and merge all pairs of neighboring regions that satisfy the</p><p>merge criterion.</p></li><li><p>If no pair of candidates for union is found, stop and exit the algorithm.</p></li></ul><p><strong>Splitting of regions</strong></p><ul><li><p>The partitioning begins with the representation of the entire image as a simple area, which does not always meet the uniformity condition.</p></li><li><p>During the segmentation process, the current areas of the image are sequentially split in accordance with the specified uniformity conditions.</p><p>The methods of merging and splitting areas do not always lead to the same segmentation results, even if they use the same homogeneity criterion.</p></li></ul><h3 id="Basic-Image-Segmentation-Methods"><a href="#Basic-Image-Segmentation-Methods" class="headerlink" title="Basic Image Segmentation Methods"></a>Basic Image Segmentation Methods</h3><ol><li><h4 id="Threshold-image-segmentation-by-brightness-levels"><a href="#Threshold-image-segmentation-by-brightness-levels" class="headerlink" title="Threshold image segmentation by brightness levels"></a>Threshold image segmentation by brightness levels</h4><p><strong>The main issue</strong> is the definition of the segmentation threshold.</p></li><li><h4 id="Range-Threshold-Segmentation"><a href="#Range-Threshold-Segmentation" class="headerlink" title="Range Threshold Segmentation"></a>Range Threshold Segmentation</h4><p>Instead of threshold, we use a range to discriminate.</p></li><li><h4 id="Multithreshold-segmentation"><a href="#Multithreshold-segmentation" class="headerlink" title="Multithreshold segmentation"></a>Multithreshold segmentation</h4><p>Instead of single range, we use multiple ones.</p></li><li><h4 id="k-means-segmentation-algorithm"><a href="#k-means-segmentation-algorithm" class="headerlink" title="k-means segmentation algorithm"></a>k-means segmentation algorithm</h4><blockquote><p><strong>1. Specify the number of classes</strong> <em>k</em> into which the image should be divided. All pixels are considered as a set of vectors $x_i,\ i=1,\dots,p$.</p><p><strong>2. Determine </strong>k<strong>-vectors </strong>𝑚”,𝑗=1,…,𝑘, which are declared as initial centers of clusters. Choose the values 𝑚” , 𝑗 = 1, … , 𝑘 (for example, randomly).</p><p><strong>3. Update the values</strong> of the mean vectors 𝑚”,𝑗=1,…,𝑘,(clustercenters).For this:</p><pre><code>* calculate the distance from each $x_i,\ i=1,\dots,p$ to each $m_j,\ j=1,\dots,k$* assign each $x_i$ to the cluster j*, the distance to the center of which mj* is minimal* recalculate the average values mj for all clusters</code></pre><p><strong>4.</strong> <strong>Repeat 2,3</strong> until the cluster centers stop changing.</p></blockquote></li><li><h4 id="Weber-segmentation-algo"><a href="#Weber-segmentation-algo" class="headerlink" title="Weber segmentation algo"></a>Weber segmentation algo</h4><p>See page 17/39</p><p><strong>Weber principle:</strong> a person does not distinguish between gray levels between [𝐼(𝑛),𝐼(𝑛) +𝑊(𝐼(𝑛))].</p></li><li><h4 id="Iterative-algo-of-Vezhnevets"><a href="#Iterative-algo-of-Vezhnevets" class="headerlink" title="Iterative algo of Vezhnevets"></a>Iterative algo of Vezhnevets</h4><p>See page 19/39</p></li><li><h4 id="Segmentation-by-skin-color"><a href="#Segmentation-by-skin-color" class="headerlink" title="Segmentation by skin color"></a>Segmentation by skin color</h4><p><strong>Advantages:</strong> skin color is independent of face orientation; pixel color analysis is computationally efficient.</p><p><strong>Task:</strong> finding a criterion for evaluating the proximity of the color of each pixel to the skin tone.</p><p><strong>Development of skin color model</strong>:</p><ol><li><p>Accumulation of training data using images that indicate “skin” and “non-skin” areas.</p><p>Based on this data, statistics of skin tones are accumulated.</p></li><li><p>Processing of the obtained statistics and selection of skin color model parameters for subsequent use; selection of criteria for evaluating whether pixels belong to the “skin” area;</p></li><li><p>Image processing using the obtained criteria.</p></li></ol></li></ol><h3 id="Texture-Segmentation"><a href="#Texture-Segmentation" class="headerlink" title="Texture Segmentation"></a>Texture Segmentation</h3><h4 id="Approaches-to-texture-segmentation"><a href="#Approaches-to-texture-segmentation" class="headerlink" title="Approaches to texture segmentation:"></a><strong>Approaches to texture segmentation:</strong></h4><ol><li><strong>Statistical</strong> - allows you to characterize the texture of the area as smooth, rough and grainy.</li><li><p><strong>Structural</strong> - define and describe the relative position of the simplest repeating image elements, for example, segments of parallel lines passing at a constant step, cells on a chessboard.</p></li><li><p><strong>Spectral.</strong></p></li></ol><h4 id="Segmentation-by-the-morphological-watershed-method"><a href="#Segmentation-by-the-morphological-watershed-method" class="headerlink" title="Segmentation by the morphological watershed method"></a>Segmentation by the morphological watershed method</h4><p>A grayscale image is a digital terrain model, where the brightness values are heights relative to a certain level, i.e. image is a matrix of heights.</p><ul><li>If it rains on such an area, many pools are formed. Water fills small pools, then overflows from overflowing pools and the pools combine into larger pools according to the heights of the water level.</li><li>The places where pools merge are marked as watershed lines. As a result, the entire area may be flooded.</li><li>The result of segmentation depends on the moment when the water supply stops. If the process is stopped early, the image will be segmented into small areas, if it is stopped late, into very large ones.</li></ul><h3 id="Area-Detectors"><a href="#Area-Detectors" class="headerlink" title="Area Detectors"></a>Area Detectors</h3><h4 id="IBR-detector-Intensity-extrema-based-regions"><a href="#IBR-detector-Intensity-extrema-based-regions" class="headerlink" title="IBR detector (Intensity-extrema based regions)"></a>IBR detector (Intensity-extrema based regions)</h4><p>It is necessary to go from the points of the local brightness extremum 𝐼$ along the rays, calculating some value 𝑓.</p><p>As soon as the peak of the value 𝑓 is found, it is necessary to stop. This point will be the boundary of the region.</p><script type="math/tex; mode=display">f(t)=\frac{|I(t)-I_0|}{\frac{1}{t}\int_0^t|I(t)-I_0|dt}</script><p>The areas on a pair of similar images may differ, so we describe ellipses around them. If the ellipses are turned into circles, then we get complete similarity up to rotation.</p><h4 id="MSER-detector-Maximally-Stable-Extreme-Regions"><a href="#MSER-detector-Maximally-Stable-Extreme-Regions" class="headerlink" title="MSER detector (Maximally Stable Extreme Regions)"></a>MSER detector (Maximally Stable Extreme Regions)</h4><p>Solves the problem of invariance of keypoints when scaling.</p><p><strong>MSER detector algorithm</strong>:</p><ol><li><p>Sort the set of all image pixels in ascending/descending order of intensity.</p></li><li><p>Construction of a pyramid of connected components. For each pixel of the sorted set, perform the following sequence of actions:</p><ul><li><p>updating the list of points included in the component;</p></li><li><p>updating the areas of the next components, as a result of which the pixels of the</p><p>previous level will be a subset of the pixels of the next level.</p></li></ul></li><li><p>For all components, search for local minima (we find pixels that are present in this component, but are not part of the previous ones). The set of local level minima corresponds to the extreme region in the image.</p></li></ol><h2 id="Lec-3-Hough-Transform"><a href="#Lec-3-Hough-Transform" class="headerlink" title="Lec 3.  Hough Transform"></a>Lec 3.  Hough Transform</h2><h3 id="1-Voting-points-method"><a href="#1-Voting-points-method" class="headerlink" title="1.  Voting points method"></a>1.  Voting points method</h3><p><strong>Idea:</strong> finding locus of points satisfying the given criteria, then find the intersection of locus</p><p><em>Locus is a set of points</em> <em>whose location satisfies the specified conditions</em></p><blockquote><ol><li><p><strong>Generalization of the method:</strong></p><ul><li><p>Points of each circle “voted” in favor of the possible position of the vertex</p></li><li><p>There are two “votes” at the intersection of the circles; in this case, this</p><p>point “won”, since it gained the maximum number of “votes”</p></li><li><p>The rest of the points of the plane received zero or one “ vote ”</p></li><li><p>The shape of the “voting curve” is determined by a priori knowledge about the voting object (in the example, the sides of the triangle are given)</p></li></ul></li><li><p>vertex is located in the circles intersection area)</p></li></ol></blockquote><p>• <strong>Task:</strong> detection of a circle of known radius in a binary set of points</p><p>• <strong>Solution</strong>:</p><ul><li>The set of centers of all circl es of radius 𝑅 passing through each point forms a circle of radius 𝑅 around that point</li></ul><ul><li><p>The locus of the points is a circle of the same size with the center at</p><p>the voting point</p></li><li><p>The best solution for finding the position of the center of a circle</p><p>with given radius is the intersection point of the maximum number of voting circles</p></li></ul><h3 id="2-Hough-transform-for-stright-lines"><a href="#2-Hough-transform-for-stright-lines" class="headerlink" title="2. Hough transform for stright lines"></a>2. Hough transform for stright lines</h3><p><strong>The classic Hough Transform</strong> (HT) was proposed in 1962 for finding lines in a binary</p><p>image.</p><p><strong>Idea:</strong> convert the set of points to a parameter space</p><ul><li><p>Let a straight line can be defined as</p><p>𝑌 = 𝑘𝑋 + 𝑏 </p><p>𝑋cosθ + 𝑌sinθ = ρ</p></li><li><p>Since a straight line on a plane is characterized by two parameters, the parameter space has the dimension 𝑛 = 2</p></li><li><p>The classical Hough transform uses parameters (𝜌, 𝜃)</p></li><li><p>Let the contour image be the set of points (𝑥, 𝑦) in the original space 𝐸 = (𝑋, 𝑌)</p></li><li><p>The set of lines passing through each point (𝑥, 𝑦) can be depicted as a set of points</p><p>(𝜌, 𝜃) in the space {𝜌, 𝜃}</p></li><li><p>The function of mapping a point in Hough space is called a “<em>response function</em>”</p></li></ul><blockquote><ul><li><strong>Genera idea of the method</strong></li><li>For each point of the parameter space, the number of votes given for it is summed up (<em>the number of points in the source image space that generate response in the parameter space that passes through a given point</em> (𝜌, 𝜃))</li><li>Each point of the source space generates a sinusoidal response function in the parameter space</li><li>Any two sinusoids in the parameter space intersect at the point <em>(</em>𝜌, 𝜃<em>)</em> only if the point of the source image space which generated them lie on a straight line</li></ul></blockquote><h4 id="Properties-of-the-Hough-transform"><a href="#Properties-of-the-Hough-transform" class="headerlink" title="Properties of the Hough transform"></a><strong>Properties of the Hough transform</strong></h4><ul><li>The Hough transform is i<strong>nvariant to translation, scaling, and rotation</strong></li><li>Since straight lines under any projective transformations of three-dimensional space always pass only into straight lines (in the degenerate case, into points), so the Hough transform makes it possible to detect lines invariantly not only to planar affine transformations, but also to the group of projective transformations in 3D space</li></ul><h4 id="Transformation-efficiency"><a href="#Transformation-efficiency" class="headerlink" title="Transformation efficiency"></a><strong>Transformation efficiency</strong></h4><ol><li>Under projective transformations, the straight line always turns into a straight line; therefore, the parameters space of low dimension (𝑛 = 2) is formed</li><li>Each pixel of the source image is processed only once, and further calculations are performed only for pixels that carry useful information (i.e., outline). The fewer the number of pixels that have the useful information, the higher is the computational efficiency</li></ol><h4 id="Disadvantages-of-Hough-transform"><a href="#Disadvantages-of-Hough-transform" class="headerlink" title="Disadvantages of Hough transform:"></a><strong>Disadvantages of Hough transform:</strong></h4><ol><li>Manual selection of phase space sampling</li><li>Noise leads to blurring of maxima</li><li>Evenly spaced points can lead to random peaks in the parameters space</li><li>Missing parts of source image data results in blurry values in the accumulator</li></ol><h4 id="Optimization-of-the-Hough-transform"><a href="#Optimization-of-the-Hough-transform" class="headerlink" title="Optimization of the Hough transform"></a><strong>Optimization of the Hough transform</strong></h4><ol><li><p><strong>Filter the unnecessary features:</strong> for lines it is worth taking points at the</p><p>edges only with a large gradient</p></li><li><p><strong>Choose the correct grid resolution</strong> (sampling step):<br> <strong>Too rough:</strong> several close lines will vote for same cell<br> <strong>Too shallow:</strong> can skip lines because noisy points will vote for different cells</p></li><li><p>To beter find the maxima, you can smooth the values in the accumulator</p></li><li><p><strong>It is necessary to mark the votes:</strong> which point corresponds to which line</p></li></ol><p>In order not to enumerate all possible angles, the effect of the gradient can be taken into an account. Since when detecting the contour, the value of the gradient has already been calculated</p><h4 id="Methods-for-parametrizing-the-straight-lines"><a href="#Methods-for-parametrizing-the-straight-lines" class="headerlink" title="Methods for parametrizing the straight lines"></a><strong>Methods for parametrizing the straight lines</strong></h4><p>As is known, images in digital systems are defined on a discrete rectangular grid, which allows only some appropriate discrete parameterization of the family of straight lines.</p><p>Consider the natural set of straight lines generated by an integer grid 𝑁×𝑁 of points containing     $𝑁^2$ elements.</p><p>Any two different points of the lattice define a line, so the size of the set will be$𝑁^2(𝑁^2−1)$ lines.</p><p>Many lines will be defined multiple times by their different line segments if they contain more than two points of the original grid.</p><h4 id="Ways-to-parameterize-the-Hough-transform"><a href="#Ways-to-parameterize-the-Hough-transform" class="headerlink" title="Ways to parameterize the Hough transform"></a><strong>Ways to parameterize the Hough transform</strong></h4><p><strong>1. Perimeter points (</strong>𝒎<strong>,</strong> 𝒏<strong>)</strong></p><ul><li><p>Lines are described by a pair of end points lying on the perimeter of the 𝑁×𝑁 grid.</p></li><li><p>Obviously, the number of points will be equal to 4𝑁 or (taking into account</p><p>symmetry) 1/2 Q 4𝑁×4𝑁 = 8𝑁$ lines</p></li><li><p>Since a quarter of these points lie on the same straight line (side of the square), the</p><p>final size of the parameter array will be 6𝑁$<br> <strong>Advantage:</strong> Application in the case of an image divided into smaller areas makes it easy to connect lines passing through several such areas, since they close to each other along the perimeter<br> <strong>Disadvantage:</strong> information about the angular position of straight lines is not explicitly stored</p></li></ul><p><strong>2. Perimeter point and angle</strong> 𝒂, 𝒏</p><ul><li>One point of intersection of the straight line with the grid perimeter 𝑛(0 ≤ 𝑛 &lt; 𝑁) is used</li><li>andanangledefinedbytheperimeterpoint𝑎 (–𝑁+1≤𝑎≤𝑁−1) sothat straight line passing through the grid center and point 𝑎 is parallel to a given one</li><li>The accumulator array contains 4$𝑁^2$ elements</li></ul><p><strong>3. Tilt and offset</strong> 𝒂, 𝒅</p><ul><li><p>The angle 𝑎 is defined by the direction of a line from the grid center to a perimeter point</p></li><li><p>The displacement of the line vertically or horizontally from the center is fixed using the distance from the center to the intersection of the straight line with the 𝑂у or 𝑂х axes</p></li><li><p>Generates 3$𝑁^2$ or 4$𝑁^2$ accumulator cells</p></li><li><p>The 𝑎, 𝑑 -parametrization is closely related to the (ρ, θ) - parametrization and with</p><p>the parameters of the equation 𝑦 = 𝑎𝑥 + 𝑏, where 𝑎 is interpreted as the slope of a straight line</p></li></ul><h3 id="3-Hough-transform-for-circles"><a href="#3-Hough-transform-for-circles" class="headerlink" title="3. Hough transform for circles"></a>3. Hough transform for circles</h3><ul><li><p>The described algorithm can work in exactly the same way when to detect any curve that can be described on the plane by a finite number of parameters: 𝐹 =$(𝑎_1,𝑎_2,…,𝑎_n,𝑥,𝑦)$</p></li><li><p>In the previously considered problem of finding circles of a given radius 𝑅, there was</p><p>a family of curves defined by a two-parameter equation $(𝑥 − 𝑥_0)^2+(𝑦 − 𝑦_0)^2 = 𝑅^2$</p></li><li><p>It is necessary to search for the maximum of the accumulator function 𝐴(𝑥, 𝑦) in the</p><p>parameter space (𝑥, 𝑦)</p></li><li><p>In this case, the parameter space practically coincides with the source image one</p><p>(𝑥, 𝑦)</p></li></ul><h3 id="4-Hough-transform-for-an-arbitrary-shape"><a href="#4-Hough-transform-for-an-arbitrary-shape" class="headerlink" title="4. Hough transform for an arbitrary shape"></a>4. Hough transform for an arbitrary shape</h3><h4 id="Algorithm-for-finding-circles-of-a-given-radius-on-halftone-images"><a href="#Algorithm-for-finding-circles-of-a-given-radius-on-halftone-images" class="headerlink" title="Algorithm for finding circles of a given radius on halftone images"></a><strong>Algorithm for finding circles of a given radius on halftone images</strong></h4><ol><li>Detect edge pixels that surround the perimeter of an object. A gradient operator can be used, such as the Sobel operator</li></ol><ul><li><p>Voting contour points are ones with a high gradient</p></li><li><p>For each detected edge pixel, an estimate of the position and</p><p>orientation of the contour is used to estimate the center of a circle of radius 𝑅 by moving a distance 𝑅 from the edge pixel in the direction of the normal to the contour (in the direction of the gradient vector).</p></li><li><p>Repeating this operation for each edge pixel will find a set of positions of the possible center points, which can be averaged to determine the exact location of the center</p></li><li><p>If the radius of the circle is unknown or is varying, it is necessary to include 𝑅 as an additional parameter in the parametric accumulator space</p></li><li><p>The local maxima search procedure should determine the radius as well as the position of the center by considering changes along the third dimension of the parametric space</p></li><li><p>If the size of the detected circle is out of interest and you only want to find its center, then you may not increase the dimension of the parameter space</p></li><li><p>For every possible direction to the “center”, the contour point votes with a ray in that direction.</p></li><li><p>As a result, all possible positions of the “center” will be involved at any scale of the object, which will allow searching for circles regardless of their radius</p></li></ul><ol><li>After finding the potential centers of the circles, it is necessary to find the radius of the circles with the centers at the found points</li></ol><h4 id="Analyzing-the-accumulator-function-when-searching-for-geometric-primitives"><a href="#Analyzing-the-accumulator-function-when-searching-for-geometric-primitives" class="headerlink" title="Analyzing the accumulator function when searching for geometric primitives"></a><strong>Analyzing the accumulator function when searching for geometric primitives</strong></h4><ol><li><p>Direct search for a fixed number of local maxima (one global maximum) in the parameter space. There are various ways to find such maxima</p></li><li><p>Threshold segmentation of the accumulator function and subsequent analysis of connected regions of the parameter space</p></li></ol><ul><li><p>If we chose the threshold equal to be equal to the value of the minimum of local maxima, then the second method will give the same result with the first one</p></li><li><p>The problem of the optimal choice of the threshold for a particular image remains</p></li></ul><p>Short lines (curve segments) will give relatively low peaks in accumulator function if compared to long ones. They will only be detected if it is known to be present in the image prior to setting the threshold</p><p><strong>How to avoid thresholding?</strong></p><ul><li>At each stage of the analysis, we search for single global maximum of the accumulator function</li><li>After finding the global maximum we subtract the income of all source image points that resulted in this line from the parameter space</li><li>Then start searching for the next global maximum<br> <strong>The result: a</strong> greater sensitivity to short lines and robustness to noise</li></ul><h4 id="Summary"><a href="#Summary" class="headerlink" title="Summary"></a><strong>Summary</strong></h4><ul><li>Hough transform modifications provide invariant detection of geometric primitives and objects in the image with a high degree of noise immunity and significant accuracy in determining the location and orientation parameters</li><li>The described algorithms do not detect grayscale objects themselves, but their outlines. Objects that do not have a well-defined outline cannot be detected using locus</li></ul><h2 id="Lec-4-Image-Features"><a href="#Lec-4-Image-Features" class="headerlink" title="Lec 4. Image Features"></a>Lec 4. Image Features</h2><h4 id="Marr-Paradigm"><a href="#Marr-Paradigm" class="headerlink" title="Marr Paradigm."></a><strong>Marr Paradigm</strong>.</h4><p>Image analysis goes from «iconic» data representation to «symbolic» representation</p><h4 id="Steps-of-image-processing"><a href="#Steps-of-image-processing" class="headerlink" title="Steps of image processing:"></a><strong>Steps of image processing:</strong></h4><ul><li>Image preprocessing</li><li>Primary image segmentation</li><li>Detecting the geometric structure</li><li>Detecting of the relative structure and semantics of the scene</li></ul><h4 id="Types-of-possible-features"><a href="#Types-of-possible-features" class="headerlink" title="Types of possible features"></a>Types of possible features</h4><p>Point, edge, erea, line, corner</p><h3 id="I-Feature-points"><a href="#I-Feature-points" class="headerlink" title="I. Feature points"></a>I. Feature points</h3><p>A feature point 𝑝 of an image 𝐼 is a point with a <strong>characteristic</strong> (special) neighborhood. This point different from all other points in a certain neighborhood</p><h3 id="II-Feature-point-detectors"><a href="#II-Feature-point-detectors" class="headerlink" title="II. Feature point detectors"></a>II. Feature point detectors</h3><h4 id="Corner-Detectors"><a href="#Corner-Detectors" class="headerlink" title="Corner Detectors"></a>Corner Detectors</h4><p><strong>Corners</strong> are well <strong>repeatable</strong> and <strong>distinguishable</strong>.<br> The main property of a corner: the image <strong>gradient</strong> has <strong>two dominant directions</strong> in the area around the corner.</p><h5 id="Moravec-Detector"><a href="#Moravec-Detector" class="headerlink" title="Moravec Detector"></a>Moravec Detector</h5><p>Measure the <strong>change in pixel intensity</strong> 𝐼 𝑥, 𝑦 by shifting a square window centered in 𝑥, 𝑦 to one pixel in each of <strong>eight principal directions</strong> (2 horizontal, 2 vertical and 4 diagonal).</p><h5 id="Sigma-Filter"><a href="#Sigma-Filter" class="headerlink" title="Sigma Filter"></a>Sigma Filter</h5><script type="math/tex; mode=display">h(x,y) = H*f(x,y)</script><p>where f - source image</p><p>H - operator of feature detection</p><p>$*$ - operation of applying the operator</p><h5 id="FAST-Detector"><a href="#FAST-Detector" class="headerlink" title="FAST Detector"></a>FAST Detector</h5><p>Features from Accelerated Segment Test<br>For each pixel 𝑃 of the image a neighbouring Bresenham circle around this pixel is considered. In case if 7x7 kernel is used, then it would contain 16 pixels.</p><p>A pixel is considered to be a corner point if it has 𝑁 adjacent pixels on the circle whose intensities satisfy the state condition 𝑑 or 𝑏.</p><h5 id="Harris-Detector"><a href="#Harris-Detector" class="headerlink" title="Harris Detector"></a>Harris Detector</h5><p>Let the variation in image intensities depend on the shift (𝑢, 𝑣). It can be evaluated according to the formula:</p><script type="math/tex; mode=display">E(u,v)=\sum w(x,y)(I(x+u,y+v)-I(x,y))^2</script><p>where 𝐼 𝑥,𝑦 – intensity in a point 𝑥,𝑦 ,<br> 𝑤(𝑥, 𝑦) – window function,<br> 𝐼(𝑥+𝑢,𝑦+𝑣) – shift of intensity.</p><ul><li><p>The window function 𝑤 (𝑥, 𝑦) can be defined either in a binary form or in the form of a Gaussian function.</p></li><li><p>By expanding the difference in intensities squared into a second-order Taylor series at the point (𝑥, 𝑦) (bilinear interpolation) for small shifts, we obtain the following approximation</p></li></ul><h6 id="Algorithm"><a href="#Algorithm" class="headerlink" title="Algorithm:"></a><strong>Algorithm:</strong></h6><ol><li><p>Calculate the gradient of the image in each pixel.</p></li><li><p>Calculate the matrix 𝐌 from the window around each pixel.</p></li><li><p>Calculate the response of the corner 𝐑.</p></li><li><p>Cut off weak corners at threshold 𝐑.</p></li><li><p>Find the local maxima of the response function in a neighborhood</p><p>of a given radius.</p></li><li><p>Choose 𝑵 the strongest local maxima.</p></li></ol><h4 id="Forstner-Detector"><a href="#Forstner-Detector" class="headerlink" title="Forstner Detector"></a>Forstner Detector</h4><script type="math/tex; mode=display">R=\frac{det(M)}{tr(M)}</script><h4 id="Detector-Invariance"><a href="#Detector-Invariance" class="headerlink" title="Detector Invariance"></a>Detector Invariance</h4><p>• <strong>Invariance Property</strong> – If apply a geometric (affine) or photometric (affine intensity change 𝐼 → 𝑎𝐼 + 𝑏) transformation to the image, then the detector must find the same set of points.</p><ol><li>Light invariance:</li></ol><ul><li>To light shifting (𝐼 → 𝐼 + 𝑏);</li><li>To light scaling (𝐼 → 𝑎𝐼).</li></ul><ol><li>Rotation Invariance</li><li>Scaling Invariance</li></ol><h3 id="III-Blob-detectors"><a href="#III-Blob-detectors" class="headerlink" title="III. Blob detectors"></a>III. Blob detectors</h3><h4 id="LoG-Laplacian-of-Gaussian-Detector"><a href="#LoG-Laplacian-of-Gaussian-Detector" class="headerlink" title="LoG (Laplacian of Gaussian) Detector"></a><strong>LoG</strong> (Laplacian of Gaussian) Detector</h4><ul><li>Blobs are blob-shaped groups of connected pixels that share a common property and are different from surrounding regions</li><li>Blob centers are feature points</li><li>Blobs are described by 4 parameters<ul><li>center coordinates (x, y) </li><li>scale</li><li>direction</li></ul></li></ul><p><strong>Gaussian</strong> is a Gauss function which are used to blur images.</p><p>$f$ - edge</p><p>$\frac{d}{dx}g$ - Derivative of Gaussian</p><p>$f*\frac{d}{dx}g$ - Edge = maximum of derivative</p><p>$f*\frac{d^2}{dx^2}g$ - Edge = zero transition of the second derivative</p><ul><li><p>«Edge» is a burst of function</p></li><li><p>«Blob» is a combination of two bursts</p></li><li><p>The magnitude of the Laplacian of Gaussian response reaches a</p><p>maximum in the center of the blob <strong>if the size</strong> of the Laplacian “<strong>corresponds”</strong> to the size of the blob</p></li><li><p>Search for blob characteristic size: convolution with Laplacian at several scales and search for maximum response</p></li><li><p>The response of the Laplacian fades if zooming scale</p></li><li><p>Multiscale blob detector: convolution of a blurry image using the normalized Laplace filter at several scales and the choice of scale with the maximum Laplacian response.</p></li></ul><h4 id="DoG-Difference-of-Gaussians"><a href="#DoG-Difference-of-Gaussians" class="headerlink" title="DoG (Difference of Gaussians)"></a>DoG (Difference of Gaussians)</h4><p>Method for the approximate calculation of the Laplacian of a Gaussian: the search for the difference of two Gaussians with different scales:</p><script type="math/tex; mode=display">DoG=G(x,y,k\sigma)-G(x,y,\sigma)</script><h4 id="Harris-Laplace-Detector"><a href="#Harris-Laplace-Detector" class="headerlink" title="Harris-Laplace Detector"></a>Harris-Laplace Detector</h4><p>Selecting the corners in the image, considering the characteristic size: looking for points that maximize the response of the Harris corner in the image and the Laplacian response in scale.</p><h3 id="IV-Scale-invariant-feature-point-detector"><a href="#IV-Scale-invariant-feature-point-detector" class="headerlink" title="IV. Scale-invariant feature point detector"></a>IV. Scale-invariant feature point detector</h3>]]></content>
    
    
    <summary type="html">&lt;p&gt;I have complicated feelings about CV</summary>


    <category term="Term6" scheme="https://redbowtie.github.io/categories/Term6/"/>
    
    
    <category term="CV" scheme="https://redbowtie.github.io/tags/CV/"/>
    
    <category term="MATLAB" scheme="https://redbowtie.github.io/tags/MATLAB/"/>
    
  </entry>
  
  <entry>
    <title>System Software PART I</title>
    <link href="https://redbowtie.github.io/2022/03/23/SystemSoftware_I/"/>
    <id>https://redbowtie.github.io/2022/03/23/SystemSoftware_I/</id>
    <published>2022-03-23T22:32:00.000Z</published>
    <updated>2023-06-28T14:07:03.346Z</updated>
    
    <content type="html"><![CDATA[<p>A course that is not concerned with MATLAB, great.<span id="more"></span></p><hr><!--toc--><hr><p>Well to be clear that I’m not meaning that MATLAB is awful, it’s just too ‘perfect’. All functions within are well encapsuled. A lack of interacting I suppose.</p><h2 id="Lec-1-Programming-in-C-language"><a href="#Lec-1-Programming-in-C-language" class="headerlink" title="Lec 1. Programming in C language"></a>Lec 1. Programming in C language</h2><h2 id="Course-structure"><a href="#Course-structure" class="headerlink" title="Course structure"></a>Course structure</h2><ul><li><p>the main tool for system programming – the C programming language;</p></li><li><p>(2) multithreaded programming with POSIX Threads;</p></li><li><p>(3) Linux operating system basics and shell;</p></li><li><p>(4) regular expression language.</p></li></ul><p>I have to admit that after seeing this, I’m super excited. Just right about what I wanted to learn.</p><h2 id="System-software"><a href="#System-software" class="headerlink" title="System software"></a>System software</h2><p>is a set of software that is a platform for the development and operation of other programs. For example, these are operating systems such as Windows, Linux, utilities (chmod, ipconfig, grep), game engines, programming tools</p><p>Layers can be seen at page 3.</p><h2 id="Multithreaded-programming"><a href="#Multithreaded-programming" class="headerlink" title="Multithreaded programming"></a>Multithreaded programming</h2><p>Multithreaded programming means program organization that can execute parallel operations (threads) in one process.</p><h2 id="Introduction-of-Linux-an-C"><a href="#Introduction-of-Linux-an-C" class="headerlink" title="Introduction of Linux an C"></a>Introduction of Linux an C</h2><p>Just as name suggest.</p><p>Some showcase of Assemly language optimization </p><h2 id="Kinds-of-Typing-and-examples"><a href="#Kinds-of-Typing-and-examples" class="headerlink" title="Kinds of Typing and examples"></a>Kinds of Typing and examples</h2><p><strong>Static typing -</strong> checking the correctness of expressions occurs at the compilation stage.</p><p><strong>Dynamic typing</strong> - works at run time.</p><p><strong>Strong typing</strong> means that we cannot perform operations on data that could lead to run-time errors due to data inconsistency or incompatibility.</p><p><strong>Weak typing</strong> allows the ability to implicitly convert data from type to type.</p><p><strong>Explicit typing</strong> − we explicitly specify data types.</p><p><strong>Implicit typing</strong> – the compiler itself can determine the data type from the expression.</p><blockquote><p>OCaml – static and strong-typed programming language</p><p>float + float</p><p> int + int</p><p>40 + 2.0 – error</p><p>Java – static and strong-typed programming language, BUT</p><p>40 + 2.0 = 42.0 //compiler automatically casts 40 (integer) to 40.0 (double)</p><p>Python – dynamic and strong-typed, duck-typed</p><p>Duck-typing means that variables are untyped, but objects (data) are has data types.</p><p>x = 1.0 + 2 #it is okay</p><p>JavaScript – dynamic and weakly-typed </p><p>x = ‘1’ + 1; //x has value ’11’ (string).</p></blockquote><p>As for grammer of the C, I think I’m pretty familiar with most of common ones, for which I’ll pass.</p><p>But sometimes I gotta remember the corresponding notations in English.</p><hr><h2 id="Lec-2-As-above"><a href="#Lec-2-As-above" class="headerlink" title="Lec 2. As above"></a>Lec 2. As above</h2><p>Focus on </p><ul><li>pointers</li><li>memory allocation / leakage</li><li>Directives</li><li>Some utilities</li></ul><hr><h2 id="Lec-3-Posix"><a href="#Lec-3-Posix" class="headerlink" title="Lec 3. Posix"></a>Lec 3. Posix</h2><blockquote><p>It’s a part of <strong>network programming.</strong></p><p>Thread is a single sequential <strong>flow</strong> of control within a program</p></blockquote><h3 id="Pros-and-Cons-of-Multithreading"><a href="#Pros-and-Cons-of-Multithreading" class="headerlink" title="Pros and Cons of Multithreading"></a>Pros and Cons of Multithreading</h3><ul><li>Pros<ul><li>Programming abstraction</li><li>Parallelism</li><li>Improving responsiveness</li><li>Blocking I/O<ul><li>Multiplexed I/O</li><li>Nonblocking Reads</li><li>Asynchronous I/O</li></ul></li><li>Context switching</li><li>Saving memory</li></ul></li></ul><h4 id="Cost-of-Multithreading"><a href="#Cost-of-Multithreading" class="headerlink" title="Cost of Multithreading"></a>Cost of Multithreading</h4><p>Limitation of the performance growth <code>$S_p$</code> of a computing system with an increase in the number of processors <code>$p$</code></p><script type="math/tex; mode=display">S_p=\frac{1}{\alpha+\frac{1-\alpha}{p}}</script><p>where, $S_p=Speedup$, $a=\frac{seqential}{sequential+parrallel}$,</p><h3 id="Threading-models"><a href="#Threading-models" class="headerlink" title="Threading models"></a>Threading models</h3><p>There are several approaches to the implementation of multithreading in a system with varying degrees of functionality provided by the kernel in user space.</p><ul><li>User threads : managed without kernel support</li><li>Kernel threads : managed directly by OS</li><li>Relationship b/w user and kernel thread<ul><li>Many-to-one model</li><li>One-to-one model</li><li>Many-to-many model</li></ul></li></ul><ol><li><h4 id="Kernel-level-threading"><a href="#Kernel-level-threading" class="headerlink" title="Kernel-level threading"></a>Kernel-level threading</h4><p>Simplest. One-to-one.</p></li><li><h4 id="User-level-threading"><a href="#User-level-threading" class="headerlink" title="User-level threading"></a>User-level threading</h4><p>Contra the first one. Many-to-one model.</p></li><li><h4 id="Hybrid-threading"><a href="#Hybrid-threading" class="headerlink" title="Hybrid threading"></a>Hybrid threading</h4><p>Many to many. combines preivous advantages, native threading support.</p></li><li><h4 id="Coroutines-and-Fibers"><a href="#Coroutines-and-Fibers" class="headerlink" title="Coroutines and Fibers"></a>Coroutines and Fibers</h4><p>They provide a unit of execution even lighter in weight than the thread.  For them scheduling and execution almost does not require user space support. They’re scheduled together, requiring only a clear transition from one to another.</p><p>They’re more needed to control program execution than to execute parallelism.</p></li></ol><h3 id="Threading-Patterns"><a href="#Threading-Patterns" class="headerlink" title="Threading Patterns"></a>Threading Patterns</h3><ul><li><h4 id="Thread-per-Connection"><a href="#Thread-per-Connection" class="headerlink" title="Thread-per-Connection"></a>Thread-per-Connection</h4><p>one thread is assigned to one execution item.</p><p>This thread is assigned to no more than one work item throughout all the work</p></li><li><h4 id="Event-Driven-Threading"><a href="#Event-Driven-Threading" class="headerlink" title="Event-Driven Threading"></a>Event-Driven Threading</h4><p>Event-driven approach can separate threads from connections, which only use threads for events on specific callbacks or handlers.</p></li></ul><h3 id="Race-Conditions"><a href="#Race-Conditions" class="headerlink" title="Race Conditions"></a>Race Conditions</h3><p>A race condition occurs when two or more threads can access shared data and they try to change it at the same time. Because the thread scheduling algorithm can swap between threads at any time, you don’t know the order in which the threads will attempt to access the shared data. Therefore, the result of the change in data is dependent on the thread scheduling algorithm, i.e. both threads are “racing” to access/change the data.</p><blockquote><p>So, thread  safety needs to be ensured.</p></blockquote><h3 id="Synchronization"><a href="#Synchronization" class="headerlink" title="Synchronization"></a>Synchronization</h3><p>The fundamental source of races is that critical regions are a window during which correct program behavior requires that threads do not interleave execution. To prevent race conditions, then, the programmer needs to synchronize access to that window, ensuring <strong>mutually exclusive access</strong> to the critical region.</p><p>In computer science, we say that an operation (or set of operations) is <strong>atomic</strong> if it is indivisible, unable to be interleaved with other operations. To the rest of the system, an atomic operation (or operations) appears to occur instantaneously. And that’s the problem with <strong>critical regions</strong>: they are not indivisible, they don’t occur instantaneously, they <strong>aren’t atomic</strong>.</p><h3 id="Mutexes-mutually-exclusive-access"><a href="#Mutexes-mutually-exclusive-access" class="headerlink" title="Mutexes - mutually exclusive access"></a>Mutexes - mutually exclusive access</h3><p>Only one person (thread) can enter the room (resource) if he has a key (lock).</p><p>There is only one key.  So at the same time only one thread can get the resource.</p><h3 id="Deadlocks"><a href="#Deadlocks" class="headerlink" title="Deadlocks"></a>Deadlocks</h3><p>A <strong>deadlock</strong> is a situation in which two threads are waiting for each other to finish, and thus neither does. In the case of mutexes, a deadlock occurs if two threads are both waiting for a different mutex, which the other thread holds. </p><blockquote><p><strong>POSIX</strong> <strong>Threads</strong></p><ul><li><strong>pthread</strong> POSIX standard tells us how threads should work on UNIX OS</li></ul><p><strong>important</strong> <strong>calls</strong>:</p><ul><li><strong>pthread_create</strong> : Create a new thread; analogous to fork</li><li><strong>pthread_exit</strong> : Terminating the calling thread. Analogous to exit , has return value</li><li><strong>pthread_join</strong> : Wait for another thread to exit. Analogous to wait - the caller cannot proceed other thread exists</li><li><strong>pthread_yield</strong> : Release the CPU, let another thread run.</li><li><strong>pthread_attr_init</strong> : Create and initialize a thread’s attributes. Contains info like priority of thread</li><li><strong>pthread_attr_destroy</strong> : Remove a thread’s attributes. Free up the memory holding the attribute info.</li><li><strong>pthread_cancel</strong> : Signal cancellation to a thread. Can be asynchronous or deferred, depending on thread attributes</li></ul><p>The <strong>pthread</strong> API is defined in <pthread.h>. Every function in the API is prefixed by pthread_. For example, the function to create a thread is called pthread_create(). <strong>Pthread</strong> <strong>functions</strong> may be broken into two large groupings:</p><p><strong>Thread management</strong></p><p>Functions to create, destroy, join, and detach threads.</p><p><strong>Synchronization</strong></p><p>Functions to manage the synchronization of threads, including mutexes, condition variables, and barriers.</p></blockquote><h3 id="Creating-threads"><a href="#Creating-threads" class="headerlink" title="Creating threads"></a>Creating threads</h3><p>When your program is first run and executes the main() function, <strong>it is single threaded</strong>. Indeed, other than the compiler enabling some <strong>thread safety options</strong> and the <strong>linker linking in the Pthreads library</strong>, your process isn’t any different from any other. From this initial thread, sometimes called the <strong>default or master thread</strong>, you must create one or more additional threads to become multithreaded.</p><figure class="highlight c"><table><tr><td class="gutter"><pre><span class="line">1</span><br><span class="line">2</span><br><span class="line">3</span><br><span class="line">4</span><br><span class="line">5</span><br></pre></td><td class="code"><pre><span class="line"><span class="meta">#<span class="keyword">include</span> <span class="string">&lt;pthread.h&gt;</span></span></span><br><span class="line"><span class="type">int</span> <span class="title function_">pthread_create</span> <span class="params">(<span class="type">pthread_t</span> *thread</span></span><br><span class="line"><span class="params">                   <span class="type">const</span> <span class="type">pthread_attr_t</span> *attr,</span></span><br><span class="line"><span class="params">                   <span class="type">void</span> *(*start_routine)(<span class="type">void</span> *),</span></span><br><span class="line"><span class="params">                   <span class="type">void</span> *arg)</span>;</span><br></pre></td></tr></table></figure><h3 id="Terminating-Threads"><a href="#Terminating-Threads" class="headerlink" title="Terminating Threads"></a>Terminating Threads</h3><p>Threads may terminate under several circumstances, all of which have analogues to process termination:</p><blockquote><p><em>If a thread returns from its start routine, it terminates. This is akin to “falling off the end” of main().</em></p><p><em>If a thread invokes the</em> <em>pthread_exit**() function (discussed subsequently), it</em> <em>terminates. This is akin to calling exit().</em></p><p><em>If the thread is canceled by another thread via the</em> <em>pthread_cancel**() function, it terminates. This is akin to being sent the SIGKILL signal via kill().</em></p></blockquote><figure class="highlight c"><table><tr><td class="gutter"><pre><span class="line">1</span><br><span class="line">2</span><br><span class="line">3</span><br></pre></td><td class="code"><pre><span class="line"><span class="comment">// Terminating the current thread</span></span><br><span class="line"><span class="meta">#<span class="keyword">include</span> <span class="string">&lt;pthread.h&gt;</span></span></span><br><span class="line"><span class="type">void</span> <span class="title function_">pthread_exit</span><span class="params">(<span class="type">void</span> *retval)</span>;</span><br></pre></td></tr></table></figure><p>Upon invocation, the calling thread is terminated. retval is provided to any thread waiting on the terminating thread’s death, similar to exit().</p><figure class="highlight c"><table><tr><td class="gutter"><pre><span class="line">1</span><br><span class="line">2</span><br><span class="line">3</span><br><span class="line">4</span><br><span class="line">5</span><br></pre></td><td class="code"><pre><span class="line"><span class="comment">//Terminating other threads</span></span><br><span class="line"><span class="meta">#<span class="keyword">include</span> <span class="string">&lt;pthread.h&gt;</span></span></span><br><span class="line"><span class="type">int</span> <span class="title function_">pthread_cancel</span> <span class="params">(<span class="type">pthread_t</span> thread)</span>;</span><br><span class="line"><span class="type">int</span> <span class="title function_">pthread_setcancelstate</span><span class="params">(<span class="type">int</span> state, <span class="type">int</span> *oldstate)</span>;</span><br><span class="line"><span class="type">int</span> <span class="title function_">pthread_setcanceltype</span><span class="params">(<span class="type">int</span> type, <span class="type">int</span> *oldtype)</span>;</span><br></pre></td></tr></table></figure><blockquote><p>On success, pthread_ cancel() returns zero. </p><p>On error, pthread_cancel() returns ESRCH, indicating that thread was invalid.</p><p>Threads can change their state via pthread_set cancelstate():</p><p>Threads can change their type via pthread_setcanceltype():</p></blockquote><h3 id="Joining-thread"><a href="#Joining-thread" class="headerlink" title="Joining thread"></a>Joining thread</h3><p><em>Joining</em> allows one thread to block while waiting for the termination of another:</p><figure class="highlight c"><table><tr><td class="gutter"><pre><span class="line">1</span><br><span class="line">2</span><br></pre></td><td class="code"><pre><span class="line"><span class="meta">#<span class="keyword">include</span> <span class="string">&lt;pthread.h&gt;</span></span></span><br><span class="line"><span class="type">void</span> <span class="title function_">pthread_exit</span><span class="params">(<span class="type">void</span> *retval)</span>;</span><br></pre></td></tr></table></figure><h3 id="Detaching-threads"><a href="#Detaching-threads" class="headerlink" title="Detaching threads"></a>Detaching threads</h3><p>By default, threads are created as <em>joinable</em>. Threads may, however, <em>detach</em>, rendering them no longer joinable. Because threads consume system resources until joined, just as processes consume system resources until their parent calls wait(), threads that you do not intend to join should be detached.</p><figure class="highlight c"><table><tr><td class="gutter"><pre><span class="line">1</span><br><span class="line">2</span><br></pre></td><td class="code"><pre><span class="line"><span class="meta">#<span class="keyword">include</span> <span class="string">&lt;pthread.h&gt;</span></span></span><br><span class="line"><span class="type">void</span> <span class="title function_">pthread_detach</span><span class="params">(<span class="type">pthread_t</span> thread)</span>;</span><br></pre></td></tr></table></figure><h3 id="Initializing-mutexes"><a href="#Initializing-mutexes" class="headerlink" title="Initializing mutexes"></a>Initializing mutexes</h3><p>Mutexes are represented by the pthread_mutex_t object. Like most of the objects in the Pthread API, it is meant to be an opaque structure provided to the various mutex interfaces. Although you can dynamically create mutexes, most uses are static:  </p><figure class="highlight c"><table><tr><td class="gutter"><pre><span class="line">1</span><br><span class="line">2</span><br></pre></td><td class="code"><pre><span class="line"><span class="meta">#<span class="keyword">include</span> <span class="string">&lt;pthread.h&gt;</span></span></span><br><span class="line"><span class="type">pthread_mutex_t</span> mutex = PHTHREAD_MUTEX_INITIALIZER;</span><br></pre></td></tr></table></figure><h3 id="Locking-Unlocking-mutexes"><a href="#Locking-Unlocking-mutexes" class="headerlink" title="Locking / Unlocking mutexes"></a>Locking / Unlocking mutexes</h3><p>Locking (also called acquiring) a Pthreads mutex is accomplished via the pthread_mutex_lock() function,</p><p>The counterpart to locking is unlocking, or releasing, the mutex. </p><figure class="highlight c"><table><tr><td class="gutter"><pre><span class="line">1</span><br><span class="line">2</span><br><span class="line">3</span><br></pre></td><td class="code"><pre><span class="line"><span class="meta">#<span class="keyword">include</span> <span class="string">&lt;pthread.h&gt;</span></span></span><br><span class="line"><span class="type">int</span> <span class="title function_">pthread_mutex_lock</span> <span class="params">(<span class="type">pthread_mutex_t</span> *mutex)</span>;</span><br><span class="line"><span class="type">int</span> <span class="title function_">pthread_mutex_unlock</span> <span class="params">(<span class="type">pthread_mutex_t</span> *mutex)</span>;</span><br></pre></td></tr></table></figure><h3 id="Conditional-variable"><a href="#Conditional-variable" class="headerlink" title="Conditional variable"></a>Conditional variable</h3><p>Synchronization mechanisms need more than just mutual exclusion; also need a way to wait for another thread to do something (e.g., wait for a character to be added to the buffer)</p><blockquote><p>wait(condition, lock): release lock, put thread to sleep until condition is signaled; when thread wakes up again, re-acquire lock before returning.</p><p>signal(condition, lock): if any threads are waiting on condition, wake up one of them. Caller must hold lock, which must be the same as the lock used in the wait call.</p><p>broadcast(condition, lock): same as signal, except wake up all waiting threads.</p><p>Note: after signal, signaling thread keeps lock, waking thread goes on the queue waiting for the lock.</p><p>Warning: when a thread wakes up after cond_wait there is no guarantee that the desired condition still exists: another thread might have snuck in.</p></blockquote><h3 id="Wait"><a href="#Wait" class="headerlink" title="Wait"></a>Wait</h3><p>The <code>pthread_cond_wait()</code> routine always returns with the mutex locked and owned by the calling thread, even when returning an error.</p><p>This function blocks until the condition is signaled. It atomically releases the associated mutex lock before blocking, and atomically acquires it again before returning.</p><hr><p>Some additional discovery about usage of <code>*</code> in terminal if under <code>zsh</code> </p><p>Follow error will be displayed by default when <code>*</code> is used to match files or some others.</p><figure class="highlight bash"><table><tr><td class="gutter"><pre><span class="line">1</span><br></pre></td><td class="code"><pre><span class="line">$ clang-tidy: No match -checks=-*,clang-analyzer-*,-clang-analyzer-cplusplus*</span><br></pre></td></tr></table></figure><p>It’s actually a limitation in <code>zsh</code>, which could save you in case you just typed  <code>rm *</code> . Surely that is dangerous.</p><p>And please, remember that <code>exit</code> works for the whole program, don’t use it in the <code>signal_handler</code> for certain thread. </p><hr><blockquote><p>[Thu Apr 7 2022, 22:54] Some toolchain support</p><p>i clang-format</p><p>i fmenezes/tap/clang-tidy</p></blockquote>]]></content>
    
    
    <summary type="html">&lt;p&gt;A course that is not concerned with MATLAB, great.</summary>


    <category term="Term6" scheme="https://redbowtie.github.io/categories/Term6/"/>
    
    
    <category term="System" scheme="https://redbowtie.github.io/tags/System/"/>
    
    <category term="C" scheme="https://redbowtie.github.io/tags/C/"/>
    
    <category term="Programming" scheme="https://redbowtie.github.io/tags/Programming/"/>
    
  </entry>
  
</feed>